Master class “Knotted batik. Knotted batik: a master class on painting fabric, as well as methods and technologies for dyeing using knotted batik technology
More than 10 centuries, the history of the most ancient type of batik, knotted, has been counted. Indochina is considered the birthplace of this art. And the word “batik” itself is made up of two words: “ba” is a fabric, and “tik” is a dot (the term is taken from the language used on the island of Java). The name arose due to the unique technology of coloring the material, the basis of which was the use of wax. Now batik is a painting on fabric, wax is not actually used, but variations in the structuring of a pattern have been improved every time a new one.

Characteristic
The technology of knotted batik cannot be called complicated. It is similar to other areas of batik: the fabric must be reserved from getting a coloring composition on it. Only in a specific situation, not a reserve composition is applicable, but ropes, threads, harnesses, with which you can create knots.
First, the fabric must be wrapped, tied up, knotted on it, and only then it is dipped into the paint. Or the paint is applied to the fabric with a brush. When the dyeing process is completed, the rewound and bandaged places will remain undyed. The result is an interesting pattern, its complexity and beauty depend on how thoughtful the knotting technique is. Knots, by the way, are knitted both manually and with special devices resembling hooks.
Batik technique is simple. It is often shown to children, as they really like this kind of handicraft: as a rule, children use knotted batik to make rainbow bandanas for themselves.


What fabric is needed?
In order for the pattern on the fabric to turn out beautiful, bright, resistant, you should decide on the fabric itself.
- coarse calico;
- chintz;
- satin;
- thin linen.


Shades of fabric are preferably white or light. It is good if the material is monophonic, with a rare printed pattern like polka dots or stripes. It is no secret that manual creativity always tends to save money, therefore there is nothing reprehensible in the use of used fabrics. Subsequently, works in the technique of nodular batik look great, the fabrics of which were previously burned out in the sun and lost their brightness.
And only when the experience in the technology of dyeing fabric is confident, sufficient to complicate the technique, you can begin to transform natural silk, viscose, pure wool. But synthetic fabric for batik is not used. Even a fabric interspersed with synthetics will not work. These materials require a fundamentally different technique of work, schemes and dyes will be different.
If you do not know these rules, the picture may turn out to be fuzzy, blurry. Aniline dyes do not cope with synthetic fibers, hence the result.

Dyes
Aniline dyes are the main "participant" of batik. They are used for dyeing cotton fabrics. You can find a fairly wide range of these dyes in almost any art supply store. But many batik lovers do not look for easy ways, they make dyes on their own.
It is possible - remember what shade the onion peel or nettle gives. Natural dyes are certainly more environmentally friendly, which is what attracts modern fans of batik.


Examples of vegetable dyes:
- red- St. John's wort, buckthorn and hawthorn;
- yellow- potatoes and hazelnuts;
- green- nettle and cuff;
- Orange - celandine;
- blue- blueberry;
- violet- blueberry;
- blue - Ivan da Marya flowers.
You can start with industrial dyes, and when you have confidence, try to make the dyes yourself: you will get a creative natural product.


Tools and auxiliary composition
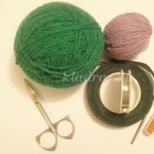
The main tool that helps to make knots is a thin cord or a strong thread of sufficient reliability. They must prepare the fabric for dyeing. Of the auxiliary composition, it should be noted:
- eggshell;
- small pebbles;
- wood chips;
- even small boards;
- clothespins;
- traffic jams;
- covers and more.


All these improvised means help to create a unique pattern on the fabric. You can not be limited to the proposed list, but come up with your own stamps, copyrights. Someone uses children's hairpins, someone uses caps from felt-tip pens and pens, someone uses elastic bands.
And you will also definitely need dishes where the most interesting things in knotted batik will be carried out. This should be a container made of glass or ceramics (paints will be diluted in it), an enamel pan (the coloring itself takes place in it), a container for subsequent rinsing of the fabric, a plastic bottle for storing the dye. You also need a standard wooden spatula with which you will stir the fabric.


Technology
The presence of special skills, art education and even the simple ability to draw is not at all necessary. The principle of knotted batik: each piece of fabric that has not been dyed is tied so that the dye does not get into the knot. For this, clothespins, clips, cords are needed. They do what is called fabric reservation in batik. The fabric can be twisted, folded, sewn, folded.
In this way of reservation and subsequent dyeing, you can make napkins, tablecloths, clothes, scarves, bandanas, pareos.


The next stage - staining can be of two types.
- Brush painting. The workpiece with knots is placed in a not very deep container, after which a small amount of dye is applied to it. If using multiple colors, apply them one at a time. But keep in mind that adjacent colors are often mixed, a new shade is obtained (not always beautiful). Therefore, think over what and how, in what sequence you paint.
- Submersible coloring. Without a brush, you simply dip the fabric into a container of diluted paint. This is how multi-color staining is usually carried out. The process is gradual and slow.
Multi-color staining will be more difficult. On the stretched fabric, the master puts blots, makes stripes and various spots that claim to be artistic. And after drying, knots, small and large, are tied on the fabric, after which the fabric is dipped in a paint of a darker shade than was used before. The procedure is repeated several times.


How to fix the composition?
There is an option to use paints "under the iron". The work is first dried, then freed from knots, ironed on the reverse side. Then it should be thoroughly rinsed in clean water, thus removing the remnants of the dye. If steam-fixed dyes are used, the fabric is also freed from knots, the painting is fixed with steam. The product should also be rinsed, dried, ironed.
If you use aniline dye and the dipping method, it is possible to fix the dye immediately. It is diluted with hot water in a bowl that can be heated. This water should completely cover the fabric even after boiling, so 3-4 liters of water are taken per 100 g of fabric (in a dry state). The workpiece is placed in a bowl and boiled over a not very high heat. Cotton is boiled for 20 minutes, then it is taken out, 50 g of salt is added to the solution, and the fabric is boiled again for half an hour.


If silk is dyed, the process will not be much different, but instead of salt, vinegar is used. The fabric must be left in the solution until its temperature drops to 50 degrees. Then the fabric is washed in warm water, then in cold. Only at this stage, the knots are untied, and the tissue is washed again. The fabric is ironed while still damp, so that the folds from the knots go away without problems. If you do everything in this way, there will be no need to re-fix the color.
Knotted batik is not the most capricious technique, it goes well with others (with cold and hot batik). Often craftsmen use it as the basis for a floral motif, which is then worked out using the cold batik technique. In the technique, it is not necessary to use the entire cut, but only part of it. While you are boiling the material, one of its edges can be left unpainted, in a convenient way by fixing it over the boiling dishes. So, the transition from the colored part to the unpainted part will be natural. And then you can manually paint the unpainted fragment.
Those who “boiled” jeans in the Soviet years understand how a unique clothing design can be achieved with the help of knots and boiling. Try knotted batik, you'll love it!


In the next video you will find a master class on knotted batik (spiral pattern).
Knotted batik is found in the culture of many nations. The pattern is obtained by tying knots from the fabric itself, by tying it with a strong thread, or by tying small objects into it, such as shells, smooth stones, beads, buttons. The paint does not penetrate into those areas that are under a layer of threads or in a knot. This process can be compared to some extent with redundancy, because knots prevent staining where they are.
Knotted batik in Africa
In Africa, cloth woven from palm raw materials is often used for dyeing. Raffia palm fibers are used to tie knots. Indigo or a substance extracted from kola nuts is often used as a dye.
Knotted batik in India
In India knot dyeing is called bandhani. This designation is used not only for the staining method, but also for the name of finished products.
Traditionally, cotton and silk are dyed. The cut is marked on a stencil, and then small knots are tied on it. No knots are removed from the finished product to prove handmade authenticity.

The process of working in the technique of nodular batik
Fabric preparation
The process of painting or dyeing in any of the batik techniques includes a preparatory stage. The material must be degreased and sizing agents removed, for this it is washed with a small amount of detergent. This ensures the shrinkage that will happen anyway when ironing or steam fixing.
So, for example, satin can shrink approximately 5 cm / m, and crepe de chine 3.5-5 cm / m on the warp. For duck, this figure averages 2 cm / m.
knot tying
Then we move on to the main step. The knots are tied in an arbitrary or in a certain order, which depends on the artist's intention. But keep in mind that the result of staining cannot be predicted 100%. The final pattern depends on how tightly the threads are tied and on the saturation of the color.
It is better to use harsh threads made from natural fibers because, unlike synthetic ones, they do not allow paint to pass through and protect the surface of the material from staining. To make the knots very tight, after wetting the thread, you can pull it up again, or tie knots on an already damp fabric.
Patterns and effects in knot technique
This type of batik allows you to get a different pattern, from concentric circles to small circles. A star pattern is created with the help of small objects, and a marble effect is achieved if an arbitrarily crumpled section is tightly wrapped with threads in different directions.
An interesting effect is achieved when using a grid. The fabric placed in the mesh is tightly tightened so that it is pinched from all sides and “squeezed out” through the cells, and then proceed to dyeing.
Fabric dyeing
Nodular technique allows staining in different ways:
- Brush painting. To do this, the workpiece with nodes is placed in a shallow container, and then the required amount of dye is applied. You can use multiple colors by applying them one after the other. It should be borne in mind that adjacent colors can mix and give a new shade.
- Dip coloring. With this method, it is also possible to produce multi-color staining.
Multicolor staining
- Various stripes, spots, blots are drawn on the stretched fabric. After drying, knots are tied on it and immersed in a dye of a darker shade than was used before.
- Knots are tied on the cut and immersed in a container with the lightest color. Then, without untying the knots, the workpiece is dried and new knots are tied in a free place.
- After that, the work is again immersed in a dye solution of a more saturated shade or darker color than the previous one.
The procedure can be repeated several times. Thus, we get the material of the color that we used last, and under the knots we will retain the original colors.
Fixing the dye
When using iron-on paints, the work is first dried, then freed from knots and ironed from the wrong side. After that, it must be rinsed in clean water, removing excess dye.
When using steam-fixed dyes, you also need to free the fabric from knots and fix the painting with steam. After that, the product must be rinsed and ironed.
When using aniline for immersion dyeing, it can be fixed immediately. To do this, the dye is diluted with hot water (40º-50º C) in a container, which can then be heated. The liquid should completely cover the work even after boiling, so its amount is taken at the rate of 3-4 liters per 100 g of dry tissue. The workpiece is placed in a container and boiled over low heat.
Cotton should be boiled for 20 minutes, after which it is removed, salt is added to the solution (about 50 g per 4-5 liters of solution), and then the workpiece is continued to boil for another 30 minutes.
When dyeing silk, the process does not differ significantly, but instead of salt I add vinegar (120-150 g for the same volume).
The fabric is left in the solution until its temperature drops to about 50º C. Then it is successively washed in warm (about 40º C), then cold water, freed from knots and washed again. The fabric is ironed while still damp to remove wrinkles from knots. This method of staining avoids re-fixation.
The combination of knotted batik with other techniques
Knotted batik can be combined with other techniques - with cold or hot batik. Often, the knot technique is the basis for a floral motif, which is further developed using the cold batik technique.
In this technique, you can paint not the entire cut, but only a part. In the process of boiling, you can leave one edge unpainted by fixing it over the container with the dye. As a result, the transition from the colored part to the unpainted part will be soft. Then, on an unpainted area, you can paint using any technique.
Using knotted batik
Knotted batik is a technique that is not difficult to perform, which allows you to quickly create an exclusive print that can be used for clothes or interiors. In addition, this technique can be used when dyeing sewn-on garments. So, for example, you can often see T-shirts dyed using this technique.

Knotted batik
This is one of the first ways to decorate fabric. It has been known in the countries of the East since ancient times. In Indochina, knot technology existed even before the 7th century. In India, it is still widely used today under the name bandhey (bandhana, bandhini), which means "tie-dye". The drawing consists of many white and colored dots. Similar patterns are found on ancient frescoes and sculptures. From such fabrics make wedding and festive clothes.
In Malaysia, Indonesia, the nodular technique is called plangi, which means "space, spot". In Sumatra, fabrics are complemented with beadwork, in India - with beads, in Africa - with embroidery, pearls and shells. This staining method was known in pre-Columbian America, in the Caucasus, in Tibet, in the countries of the Middle East and North Africa.
Creating a pattern by stitching fabric is a more sophisticated technique. In Indonesia, this technique is called tritik.
In Europe, knot dyeing became known at the beginning of the 20th century; it was used in clothing and interiors: for bedspreads and curtains. In the 70s, the revival of interest in the East made the knotting technique fashionable again, it was widely used to decorate clothes in the hippie style.
Dyeing
Dilute the dye in the jar according to package directions and strain before pouring into the dye bowl. Add the required amount of hot water and gradually heat on a gas stove to 40-45 °. Then dip the fabric into the dye. Slowly bring the dye to a boil and continue to simmer over low heat.
If you are dyeing cotton fabric, then after 20 minutes. boiling, it must be removed, put salt (2 tablespoons per 2-5 liters of water) and again lower the cloth into the solution. After that, boil for another 30 minutes. When dyeing woolen or silk fabric, instead of salt, add 1 tablespoon of vinegar essence to 4-5 liters of water. When finished dyeing, leave the fabric in the solution until it cools down to 60-70°, then rinse it first in warm (35-40°) and then in cold water. Finally, remove the windings, untie the knots and rinse the fabric again. In the last rinse, add 1-3 tablespoons of vinegar to 10 liters of water.
For partial dyeing of fabric in different colors, it is suspended above the tank and the desired part is dipped into a boiling solution. In this case, it is better to lower it dry and dry it before the next dyeing.
For multi-color dyeing, you can pre-paint the fabric with colored stripes, circles, spots, or splatters, and then fold, knit, and dye the fabric as usual.
And you can repeatedly lower the fabric into the paint. After the first dyeing, rinse the fabric without untying, straighten the folds, tie new knots and windings and dye in a darker tone. This process can be repeated many times, each time dyeing the fabric a darker color.
MUNICIPAL STATE INSTITUTION "EDUCATION DEPARTMENT" MUNICIPAL DISTRICT YANAUL DISTRICT OF THE REPUBLIC OF BASHKORTOSTAN" MUNICIPAL BUDGET EDUCATIONAL INSTITUTION OF ADDITIONAL EDUCATION HOUSE OF PIONEERS AND SCHOOLCHILDREN YANAUL MUNICIPAL DISTRICT YANAUL DISTRICT REPUBLIC OF BASHKORTOSTAN Methodical development "Knotted batik" (set of classes 4 hours) Yanaul: Tatyana Efimovna Bigildina 2015 |
Topic: "Knotted batik". (4 hours).
Target: Teach children to perform nodular batik.
Tasks:
Tutorials:
To acquaint children with one of the methods for performing batik - “knotted batik”.
Introduce children to the visual arts of the Paleolithic era.
To teach children how to make decorative compositions in the style of cave paintings of a primitive person and use them in combination with nodular batik;
Developing:
Development of artistic taste;
Development of imagination, creative abilities of students;
Educational:
Raise interest in creativity and fine arts;
To cultivate the desire for a reasonable organization of their free time, to help children in their desire to make their work practically meaningful;
Cultivate perseverance, accuracy, instill the ability to organize your workplace.
To enrich the inner world of children through their acquaintance with works of arts and crafts.
Relevance: Despite the fact that a person today lives in a huge metropolis, he, like a primitive person, feels a connection with nature and tries to portray it. If the ancient man did not have to choose visual means for his creativity (stone and natural dyes), today there are a lot of such means. Even in batik, there are many methods and techniques. One of them is "knotted batik". Knotted batik leads to the final result much faster, which cannot but interest children. In addition, he is unpredictable, keeps the mystery until the end of the work.
Novelty: We studied the technique of cold batik - a rather time-consuming technique. Knotted batik is a technique that is not yet familiar to children, which is performed quite simply and quickly. With its help, you can paint large areas, much larger than the area of \u200b\u200bthe working frame for batik, such as scarves, scarves, skirts and blouses.
Lesson 1 (2h)
Topic of the lesson: " Knotted batik "Rosette" in warm colors. Performing a composition in the style of rock paintings of the Paleolithic era"
Lesson type: Educational work with elements of creativity.
Purpose of the lesson: To teach the nodular method of performing batik.
Lesson objectives : expand the horizons of students in the field of ancient art, develop imagination, creativity, aesthetic ideas and artistic taste. Education of curiosity, love for the history of the native land.
Visual range:
1. Presentation:
- Stages of work in the technique of "nodular batik";
- Reproductions of cave paintings: Altamira, Lasko, Kapova Cave, and African rock paintings.
- Works of artists in the technique of "batik" in the style of rock paintings.
2. Reproductions of rock paintings;
3. Patterns of images in the style of rock paintings.
Materials:
1. Nylon fabric, size 30x40 cm;
2. Paints of warm colors, diluted with water 1:2;
3. Squirrel brushes No. 3-4.
4. Jars of water;
5. Silk threads;
6. Hair dryer;
7. Templates for images of ancient people's rock paintings;
8. Simple pencil;
9. Frames for batik, A-3 format;
10. Stationery buttons;
11. Black reserve compound;
12. Glass tubes for applying contour.
Lesson plan:
2. Theoretical part………….………..……………………………….10min.
3. Performing knotted batik………………………………….…….30min.
4. Tension of the fabric on the stretcher, stories about the caves………………..10min.
5. Drawing up a composition, applying a reserve……………………………30min.
6. Completion of the lesson …………………………………………………….5 min.
1. Greeting:
This is a very easy method!
Write what you want to them.
I'll tie a coin in a knot
Not for happiness - for the soul!
Day-to-day on linen and cotton,
I bring craquelure.
I will untie a strong knot
And it will turn out openwork.
What is this poem about? ( about batik) About what?
Today we will study a new method of painting fabric "knotted batik". It is interesting in that it is performed quickly and with its help you can paint large areas.
2. Theoretical part (slides 1-7)
Knotted batik is a kind of artistic painting of fabric, which consists in the fact that the area of the fabric that should remain undyed is tied up with a waxed thread or twine, the fabric is tied with knots, limiting the access of paint. Glass balls, buttons, coins are tied into the fabric.
Folding methods are varied. Each artist invents his own ways and gets new types of drawing. You can also tie in different ways.
Then the fabric is moistened with water and dyed. At the same time, a harmonious combination of colors for coloring is selected in advance.
After drying, the threads are carefully cut, the twist is unfolded
Depending on the method of tying, different types of pattern are obtained.
The more complex the knots, the more interesting the pattern.
Tell me how you can use the nodular painting?
(for painting clothes, draperies and curtains)
And knotted batik can serve as a background for other types of painting. Today we have to do work in the style of cave paintings of primitive man. Look at examples of works on this topic, made in various batik techniques ( slides 8-15) It would take at least four sessions to complete them. We will do this work in one and a half lessons.
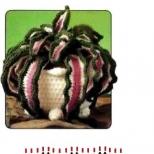
3. Making the background for the picture: (slides 16-18)
- To do this, we will make a “socket” twist. The socket can be made in different ways: you can arrange it symmetrically, you can break the symmetry by moving the center of the twist up or to the side. You can generally make it from the corner of the fabric.
- Usually the twist is moistened with water and squeezed well. We will not do this because we are working with nylon fabric. And it is very quickly impregnated with paints and without additional wetting.
(Children fold and bandage the fabric, the teacher shows how to do this with an example).
Physical education:
Get up quickly and smile
Stretched higher
Come on, straighten your shoulders
Raise, lower.
Sit down, get up. Sat got up.
And they ran on the spot.
- Now let's color our twist in warm colors. I prepared the colors ahead of time. Since this will be the background, it should not turn out too bright. To do this, I diluted them in a ratio of 1: 2. Choose the sequence of colors yourself so that each work is individual. Get the picture "Sun". Don't over-wet your work. Otherwise, it will take too long to dry.
- We put the colored twists on a dish and go for a break.
(During the break, the teacher dries the work with a hairdryer).
4. Stretching the fabric on the stretcher, stories about the caves
We continue to work on the composition. Cut the twists with scissors.
Safety precautions:
Do not take scissors in hand unnecessarily;
Scissors need to work carefully so as not to cut the fabric;
Do not swing the scissors and do not direct the ostium towards your comrades or towards yourself;
Pass the scissors to each other only forward with rings;
After finishing work, you need to put the scissors on the table;
After cutting the threads, we straighten the fabric and pull it onto a stretcher.
In the meantime, we are preparing the fabric for work, the girls will tell us about the places where rock paintings are found:
- speaker - Altamira Cave; ( slides 19-24)
- speaker - Lasko Cave;(slides 25-29)
- speaker - Kapova Cave;(slides 30-33)
- speaker - African rock paintings;(slides 34 -39)
5. Compilation of the composition.
Now that we have become familiar with the visual arts of the Paleolithic era, let's start making drawings with contours directly on the fabric. At the same time, it must be remembered that erasing a failed drawing will not work. Imagine that primitive man also did not have such an opportunity. The natural dye so eats into the stone that it persists for tens of millennia to the present day. For those who find it difficult to draw with a contour, you can make a preliminary drawing with a pencil and use templates only as a last resort.
Reserve application sequence:
- The teacher picks up the reserve composition in the tube;
To prevent leakage of the reserve composition, the tube must be held at an angle, thin end down, hook up;
Directly at the time of operation, the hook of the tube turns over and comes into contact with the tissue at a right angle;
Apply the contour from above, going gradually down;
To prevent the formation of thickenings in the figure and blots, it is necessary to use a rag to remove the droplets of reserve formed at the end of the tube.
The reserve is applied slowly. When applying a reserve, it is necessary to ensure that the contour is not interrupted and is thick enough;
To prevent the hand from trembling, it is necessary to fix the forearm with an emphasis on the frame.
(Children draw on the fabric with a contour, the teacher fills the tubes with a reserve, monitors the progress of work, helps to correct mistakes).
6. Completion of the lesson.
Our lesson ends, and work on the composition has not yet been completed. It will take at least a day to dry the contour. Therefore, we will paint the drawings with dyes next time.
What was the purpose of this lesson?(learn how to perform knotted batik).
Reflection: Before you is a picture and stickers of suns and clouds.
Whoever thinks that he has learned knotted batik sticks the sun on the picture; who believes that he has not learned - a cloud.
If there are clouds in the picture, we identify the causes, discuss the result.
Workplace cleaning.
Lesson 2 (2 hours)
Lesson topic: Completion of the compositionin the style of rock paintings of the Paleolithic era"
Lesson type: Practical creative work.
Purpose of the lesson: To consolidate the skills of painting with textile dyes.
Lesson objectives : development of artistic taste, education of perseverance, attention, conscientious attitude to the work being done.
Visual range: Reproductions of rock paintings of the Paleolithic era.
Materials:
1. Nylon fabric, with an outlined pattern, stretched over a stretcher A-3;
2. Paints: black, brown, red, orange;
3. Squirrel brushes No. 2.
4. Jars of water;
Lesson plan:
1. Greeting. Reporting the topic of the lesson ...…………………………….5min.
2. Painting with dyes of silhouettes of drawings…………...………………..80min.
3. Completion of the lesson. Exhibition of works. Cleaning of workplaces…………5min.
1. Greeting.
Ah, this batik is a stroke on silk,
In the transparency of the fabric - drops of paint ...
Smile, sigh... Adjusting bangs,
I am carried away into the reality of a fairy tale.
Today we are finishing a composition in the style of Paleolithic cave paintings.
2. Painting with dyes of silhouettes of drawings. Although we will paint the figures in the form of a silhouette. But it will not be a pure black silhouette, but a silhouette with the addition of brown, red and ocher-orange paint. This will bring our images closer to the rock paintings and make them more voluminous.
(Children paint the figures with dyes, the teacher monitors and helps to correct mistakes).
Safety precautions:
- Although decola dyes are considered safe for children, they should not be allowed to enter the mouth and mucous membranes;
- You can use paints only from a saucer, having previously typed them from jars;
- The lids on the jars must be twisted each time and put into the box.
Physical education in the middle of the lesson:
1,2,3,4,5
We need to sit down and stand up.
Spread your arms wide
Bend over -3.4
And jump in place:
On the toe, then on the heel.
This is how we recharge!
3. Completion of the lesson.Exhibition of works. Workplace cleaning.
Work examples
Attachment 1
Cave of Altamira.Located in Spain. In the city archaeologist -amateur Marcelino Sanz de Sautuola together with a 9-year-old daughter accidentally discovered a cave with drawings. The 270 m long cave consists of a series of double corridors and halls. Figures represent imagesbison , horses, wild boars, handprints, etc. They are madecoal , ocher , hematite and other natural colors. The drawings are located on the ceiling and walls not only of the main hall, but also in the main corridor and other halls. Ancient artists used the natural contours of a wall to create a three-dimensional effect. Altamira Cave is called the "Sistine Chapel" of the Paleolithic era.
2. Lascaux cave. Located in France. It was discovered in 1940 by 4 boys who, while playing, climbed into a hole that opened under the roots of a tree that had fallen after a storm. The painting of the Lascaux cave - images of bulls, wild horses, reindeer, bison, rams, bears and other animals - is the most perfect work of art from those that were created in the Paleolithic era.
3. Kapova cave. Otherwise, it is called the Shulgan-Tash cave, located in the Burzyansky district of Bashkiria. Known for rock carvings from the Paleolithic era. "Kapova" comes from the word "Temple", that is, in prehistoric times it was used as a temple.
The drawings were discovered in 1959 by the zoologist of the reserve A. V. Ryumin.The drawings are made mainlyocher - natural pigment based on animal fat, their age is about 18 thousand years, depictedmammoths .
- African rock art.
Africa is considered the cradle of mankind, because it was on this mainland that the skeleton of our ancestor was found. The Black Continent is rich in rock art, which was also left by our ancestors. The ancient people of Africa lived, hunted, performed their rituals. They made sure that their knowledge would not disappear in the loose sands of time, so they carefully marked the most important thing in their opinion on the rock. Lots of petroglyphs all over Africa they are talking about one thing, the work of the ancient people was not in vain, the message successfully passed through the millennia. Many shallow grottoes and caves are dotted with petroglyphs that describe the life of ancient Africans. Like rock paintings from other regions of the world, the history of the people of that time can be fully traced in African ones. Hunting scenes quite accurately convey the whole process in great detail.
Tassili-n-Azher in Algeria, which means "Plateau of the Rivers" - one of the most famous in North Africa, mountain ranges with rock art. Drawings found there show a verdant Sahara teeming with life in stark contrast to the arid desert that the region has since become.
Preview:
To use the preview of presentations, create a Google account (account) and sign in: