Crochet leaves for beginners. crochet leaves
Knitted leaves can decorate many products: clothes, a hat, a handbag. They can be used to decorate the interior - in the form of knitted plants in pots or in wall panels. You can crochet or knit the leaves in different ways, this article discusses several typical motifs.
clover leaf
We start with a chain of 4 VPs. Next, knit 1 lifting VP, 1 single crochet, 1 double crochet, in the last st of the chain, knit 10 double crochet stitches. I got a petal. Similarly, tie two more petals. Then, without breaking the thread, knit a chain of 8 VPs. Further, the scheme is as follows: 1 air. lifting item, 7 stlb b / n, in the last. we attach chains. stlb all three parts of the leaflet.
oval leaf
Link the original chain of 13 VP. Scheme of further knitting: 1 VP lift, 7 RLS. The remaining 6 VPs remain untied. From the last RLS we knit a chain of 6 VPs. In 1 p. of the lower river. connect 3 ch lifts plus 2 dc, 2 dc, 3 dc with one vertex, 1 dc2n in the 7th stbn, 3 stlbsn with one apex, 2 stlbsn, 3 stlbsn with one base.
In one p. we knit 3 lifting VPs plus 2 StlbSN, 2 StlbSN, 3 StlbSN with one vertex, 1 concave StlbS2N, 3 StlbSN with one vertex, 2 StlbSN, 3 StlbSN with one base.
We knit with a common top: 3 VP lifts, 1 StlbSN, 1 convex stlb with 2 stitches, 2 StlbSN.
We knit a voluminous leaf: video master class
Technique for making convex and concave relief columns
Convex
We make the required number of yarn overs, then we insert the hook not into the loop, but from right to left into the column of the lower river. so that the column of the lower river. was in front of the hook, pull out 1p. and then we knit like a regular StlbSN.
Concave
Knit similarly, but the column of the lower river. should be behind the hook.
chestnut leaf
We start with the pattern of the middle, then alternately knit the elements of the leaflet. The description considers the pattern of the pattern of the smallest element. Knit the rest in the same way, adjusting the length with the number of stitches in the chain.
The first stage of knitting is a set of VP chains for the tail and middle. Next, the middle is knitted in circular rows.
Description
Middle
We collect a chain of 28 VP. We close a chain of 4 VPs in a ring. Further knitting pattern:
- 1r .: 1 VP, 7 RLS, 1VP. We finish a series of SS;
- 2p .: 1 lifting VP, 13 RLS, 1 VP, SS in the lifting loop;
- 3r.: 1 VP, 20SBN, 1 VP;
- 4r .: 1 VP, 24 RLS, 1 VP;
- 5r.: 1 VP, 32 RLS, 1 VP.
Tail
We knit the remaining VP with two p. stlb b / n, each attaching to the middle of the SS.
The smallest - lower right - leaf element
We make a chain of 13 VPs, knit RLS, attach a conn. stlb in the 3rd p. of the middle from 1r. ponytail. We knit the SS in the following. p. middle instead of 1 lifting VP, then - in a chain of VP - 2 stlb without / n, 2 half-column. s / n, 2 StSN, 2 pillar. with 2n., 2 pillar. with 3n., 2 pillar with 4n., in the extreme VP and RLS we knit 15 StS4N.
The second half of the element is knitted in a mirror. The last column b / n we attach the SS to the middle.
Skip 1 stbn, 3 stbn, * pico, 2 stbn * - between * - * repeat 10 times, 8 sc.
The remaining elements of the chestnut leaf are connected according to the same principle.
Maple Leaf
Link a chain of 10 VP, close in a ring. Further knitting pattern:
- 1p .: in each p. tie a fragment, replacing at the beginning the first stlb with 2n. for 4 VP lifts;
- 2p .: in each of the fragments of the previous. R. tie, replacing at the beginning the first StS3N with 3 lifting VPs. Total - 10 fragments.
- starting from the 3rd p. work is divided. In 9 fragments, knit, at the beginning replacing 1 StSN with 3 VP lifting. We finish r. 1 double crochet. Expanding the work;
- 4p .: 3VP lift, knit in each of the 9 fragments;
- 5r.: 1 air. lifting item, 11 StBN, in each of the remaining 7 fragments, tie, replacing at the beginning the first StSN with 3 lifting VPs;
- 6r .: 3 VP lifting, knit 7 fragments. Finish r. 2 stsn knitted with a common top;
- 7r.: 1 VP lift, StBN in all p. of one fragment before. r., 3 air. p. under., tie 5 fragments Complete p. 2 stsn knitted with a common top;
- 8p .: 5 fragments, replacing at the beginning the first StSN with 3 lifting VPs;
- 9r.: 3 fragments. and 10 stsn;
- 10 rubles: 3 fragments. and 11 StSN each, replacing at the beginning the first StSN with 3 lifting VPs;
- 11th: 2 fragments. and 12 STSN;
- 12r.: 1 fragment, start 3 VP under., 13 StSN plus 3 air. n. plus 13 StSN.
Maple leaf continuous knitting
On the image of the pattern diagram, the beginning of knitting is marked with a black dot.
- 1r .: 1 VP under., 13 RLS, tie in the extreme p., 13 pillar. with a crochet on the other side of the original chain;
- 2p .: 1 VP under., 13 RLS, tie in an arch from the VP, 11 pillars. without / n.
- knitting the next 8r. leaflet - see diagram. We continue:
- 9r.: 1 air. p. under, then - RLS according to the scheme, we complete 4 VPs;
- 10r .: we start knitting the lateral left part: 1 VP, 8 stlb without / n, 1 air. n. above the pillar without / n of the lower river, 1 RLS;
- 11r .: 1 VP under., 10 StBN, 4 VP;
- 12r.: 1 VP under., 14 stlb without / n, 1 air. n. above the pillar without / n of the lower river, 1 StBN in RLS of the 9th river.
Further knitting pattern - see diagram. We attach even rows with columns without / n to the column without / n of the 9th row.
Without breaking the thread, we knit the second left part of the sheet in the same way, we continue knitting RLS until the end of 9p. right, 4 ch.
Next R. we start 1 VP under. and we knit the two right parts of the sheet mirrored to the left.
Crochet oak leaf
- 1p.: in 2p. from the hook 4 stbn, 4 half. from 1n., 5 tbsp. with 1n., 2 StS2N, 8 StS2N to the extreme point. We unfold the work and knit in the opposite direction - 5 tbsp. from 2n., 5 tbsp. from 1n., 4 half. from 1n., 4 tbsp. without / n. semist. without n. to the extreme point;
- 2p .: in the 1st column without n. knit 1 half. from 1n., skip the next. p., * 3 StS1N, 3 VP, 1 half. without n. * - in the next. P. ;
- 1 half without n., 1 RLS, 1 P1N, 1 StS1N, * 3 StS2N, 4 air. p., 1 half. without n. * - in the next. P.;
- 1 half without n., 1 RLS, 1 P1N, 3 StS1N, * 3 StS2N, 4 air. p., 1 half. without n. * - in the next. P.;
- 1 half without n., 1 RLS, 1 P1N, 1 StS1N, * 2 StS2N, 4 air. p., 1 half. without n. * - in the next. P.;
- 1 half without n., * 1 semist. with 1n., 1 StS1N, 1 StS2N * - in the next. P.
The second side is done in the same way:
- 1 st. from 2n., 1 tbsp. with 1n., 1 p / st. from 1n. * - in the next. p., 1 p / st. b / n;
- 1p / st b / n, 4 air. p., 2 StS2N * - in the next. p., 1 st.s 1n., 1 p / s with 1n., 1 st.b / n, 1 p / s b / n;
- 1p / st b / n, 4 air. p., 3 StS2N * - in the next. p., 3 st.s 1n., 1 p / s with 1n., 1 st.b / n, 1 p / s b / n;
- 1p / st b / n, 4 air. p., 3 StS2N * - in the next. p., 1 st.s 1n., 1 p / s with 1n., 1 st.b / n, 1 p / s b / n;
- 1 p / s b / n, 3 air. p., 3 StS1N * - in the next. p., skip 1p., 1 p / s with 1n., 1 p / s b / n in the last. p / s b / n 2nd p.
Stalk: 5 VP, 1 st.b / n in 2p. from the hook, 3 p / s b / n, we complete 1 p / s b / n to the last p / s b / n of the 2nd p.
We fix the end.
Oak leaf knitting
In the description, the leaf is knitted from three colors of yarn - it is autumn. If you wish, you can turn it into a spring one by knitting it completely from green yarn.
We knit with knitting needles for 3 points a lace 2.5 cm long. We carry out further knitting on the same loops:
- Row 1: Cast on 5p. cord set, 7 l., 1i. We have only 8p .;
- 2r. (face side): we collect with knitting needles 5p., 6l., remove 1p. purl, 6l. We have 13p.
In all the following persons. R. the central loop should be removed as a purl. We continue with knitting needles:
- 3r .: persons .;
- 4p.: 6l., remove with knitting needles 1p., 6l.;
- 5p.: as 3p.;
- 6r.: as 4r.;
- 7th: close 2p., 11l. Total in the work 11p.
- Row 8: close 2p., 4l., remove 1p., 4l. Total 9p.
Next 2p. we knit with knitting needles, changing the number of loops. We continue:
- Row 11: Cast on 2p, 9l. Total 11p.;
- 12r .: we collect with knitting needles 2p., 6l., remove 1p., 6l. We have 13p.
Next 2p. we knit with knitting needles without changing the number of stitches. In the second of these rows, we move on to the next color of yarn. We continue with knitting needles:
- 15r .: close 3p., 10l. Only 10p.;
- 16th: close 3p., 3l., remove 1p., 3l. Remaining 7p.
- 19th row: we collect 2p., 9l. Total 9p .;
- 20r .: we collect 2p., 5l., remove 1p., 5l. Total 11p.
Next 2p. we knit with knitting needles, without changing the number of loops. In the second of these rows, we move on to the next color of yarn. We continue with knitting needles:
- 23rd: close 3p., 8l. Total 8p .;
- 24th: closed 3p., 2l., remove 1p., 2l. Total 5p.
- Next 2p. we knit with knitting needles, without changing the number of loops. Then:
- 27r.: x3, remove 1p., 2p. in 1l. Total 3p.
We close the remaining loops.
palm leaf
First leaf
- 1r.: 1 tbsp. b / n in 2p., 1p / s with n., 1 StSN, x3, 1StSN, 1p / s with n., 1stlb b / n, SS, turn;
- 2p .: 1 stlb b / n in each stlb row, x11.
Without breaking the thread, we knit the 2nd sheet and all subsequent ones. The algorithm is the same, we look at the number of loops of the original chain from the diagram image.
Center
- 1 st in the last p. T. o. in it, in total, two stitches are knitted, x4, 16 VP, 1 st.b / n. in the 2nd p. from the hook, x14 times, sl-st in the 1st column of the middle.
diamond-shaped leaf
decorative sheet
Melange yarn was used for knitting. We start with 17 VP. Further:
- 1r .: 1 column without / n. in 3 p. from the hook, 1 stlb without / n. in each p. of the row, - in the extreme p., we turn the work. On the second side of the original chain, we knit 1 stb without nak., Turn the knitting.
Track. p.: 4 VP, 1 RLS behind the back wall in each p. to the arch, into the arch, 1 RLS behind the back wall in each p. to the extreme 2 p., knitting turn.
Repeat the last row 7 times. Then we knit the SS in the center of the fabric to the arch 1p. We finish knitting.
And now we offer you several options for leaf patterns for interior compositions. These beautiful leaves are knitted according to the proposed patterns, the length is determined by the number of VPs in the original chain.


This page contains all the videos on knitting leaves from the paid and free category.
Nature itself tells us ideas for crocheting leaves. All kinds of shapes and a variety of shades and colors give us the opportunity to fully demonstrate our skills, experience and imagination in crocheting leaflets:
- 1. All leaves can be divided into two large groups - these are flat and voluminous leaves. Flat leaves include leaves crocheted in video lessons 1,2,3,4,5,6,7,8,9,10,12,13,15,18,20,21,22,23,24, 25,26,27,30,31,38,54.
In our video tutorials, you will get acquainted with the implementation of voluminous leaves, and learn how to use all the techniques you know in crocheting: twisted and entwined columns, complex columns, bags, learn about interesting strapping and overlays.
Volumetric knitted leaves are presented in lessons 17,28,29,32,33,39,40,47,46,45,48,49,50,51,52,53,55. - 2. Also, when knitting fantasy leaves, you can make simple and beautiful spirals, and such leaves are presented in lessons 52,49,40. Leaves with bindings can be seen in lessons 28,33,45,47,46,48,50,51,53,55.
- 3. A special place in the theme: "Knitted leaves" is occupied by leaves associated with beads and beads.
In these lessons you will learn how to knit various columns with beads and beads and perform non-standard techniques. Leaves with beads and beads are presented in lessons 55,54,35,36,37,34.
All video tutorials on crocheting leaves are understandable for both experienced craftswomen and beginner knitters.
It's no secret that the leaves are different. For each specific case when a flower is created, a special leaf is useful. Crocheting them is easy. The main thing is to know the concept.
classic oval leaf
First, cast on a chain of such a number of loops that it is equal to the total length. A leaf will be knitted on it (crocheted). For example, let the number of loops be 13. An odd number is recommended due to the symmetry of the pattern.
Next, on both sides of this chain, you need to tie a leaf (crochet). The scheme is symmetrical about the middle of the chain. In the second and third loops, make a connecting column. The fourth loop requires a single crochet. In the fifth and sixth will be placed one at a time. The next loop becomes the base. In the eighth loop (middle of the chain), knit two columns with three crochets. Then, in a mirror order, there are columns with a decrease in their length.
At the edge, tie and go to the other side of the chain. Run a drawing symmetrical to the first half of the sheet.
Now it remains to make a vein in the center so that the leaf (crocheted) looks more like a real one. It is made by simple connecting posts with picking up the thread from under the product.
Shamrock
You need to start knitting such a leaf (crochet) with a chain of 12 air loops that need to be closed in a ring. In the first row, perform the following columns: 2 single crochet, 2 double crochet, 4 double crochet, again 2 double crochet and 2 more single crochet. Close the circle.
Second row: at each vertex, make two double crochets. Close the circle and start knitting the second petal in the same way. Then the third.
Pass the hook through the bases of all three petals and pull the thread through them. Dial 15 loops on which to tie the connecting posts.

leaf-foot
The technology of how to crochet a leaf may be somewhat different. Moreover, this is often found in knitted products for decoration.
Start with a chain of 11 loops. Tie connecting posts along its entire length. Perform a rise from 3 loops. Again, make a row of connecting columns, leaving two columns of the previous row untied. Turn work.
Air loop and connecting posts to the end of the row, and the latter must be made into an arch of air loops. Three air loops and one more connecting in the same arch. Run connecting posts on the other side of the leaf, again without tying two at the end of the row. The initial chain should be in the center and be the longest.
Continue the same knitting until the required sheet size is obtained. There must be at least three such roundings. Otherwise, the leaf will be too small.

Shamrock from hearts
Dial a chain of air loops, the length of which will be approximately 3 cm. It is necessary to tie connecting posts on it. This will be the stem of the leaf. Three hearts will be placed on it.
All work will go on the front side. Hearts will make a pattern (crochet), the leaves will be directed from the middle outward from the central circle. It must be done from 9 loops. Then tie with connecting posts.
Dial 8 loops from the circle, knit connecting posts on them. The next row will give the first half of one petal. It consists of: 1 connecting, 1 single crochet, 1 half double crochet, 1 double crochet, 1 double crochet, in the last loop of the chain, tie a fan of three double crochets, 4 air and connecting into the loop from where knitted fan. Then repeat everything in reverse order in order to get the second half of the petal.
Similarly, knit the other two petals. Between themselves, they should be connected by semi-columns.

rowan leaf
It consists of nine identical petals to get a nice and symmetrical leaf (crochet). The scheme of each petal is formed from the following elements: connecting, single crochet, double crochet, double crochet, double crochet again, one more single crochet and connecting.
You need to start knitting with a chain of 12 loops. On the last 8, work a petal, leaving one of the cast-on loops for lifting. Cast on 12 more stitches. Tie another petal on them. Repeat two more times. It turned out four petals on the right side.
For the central petal, you will need to dial only 8 loops. Do the same with the 6th petal of the leaf. After it, on a chain of air loops, tie three connecting posts. Cast on 8 stitches and knit a petal. Repeat two more times.
The second, third, seventh and eighth petals can be made one loop longer and an additional double crochet in the middle. So the leaf will turn out to be closer to what is in nature.

Conclusion
To make the leaves light and airy, the yarn must be thin enough. In this case, it is better to take the hook of the smallest possible size. And then the decoration of flowers with leaves will be elegant and spectacular.
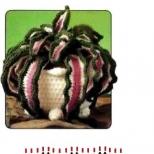
I continue my story about crocheting a needle bed from puffy round flowers with leaves. How to tie flowers for a needle bed, see the previous post. And here I will tell you how I crocheted the leaves for the flowers of the needle bed.

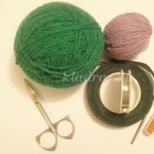
For work, we need yarn, in this master class I have it half-woolen, and for the needle bed I knitted from a woolen roving, and a hook.
Let's get to work. We knit a chain of 10 stitches plus one loop for lifting. We knit the first row with single crochets.


Having knitted the second row, we turn the knitting (do not turn over, but knit in a circle). In the first set of rows, we knit double crochets, collecting them all on the hook. We will increase the length of the crochets, that is: we stretch the crochets in different ways, the first is smaller, the second is a little more, and so on. See the photo, I think it's clear.


Having collected all the loops with a crochet on one hook, we begin to knit them with columns without a crochet, we knit two loops together. Having finished the row, we knit one column with a crochet in the middle of the chain of the first row and again turn the knitting in a circle.


We also knit the next row, like the previous one - we collect double crochets on the hook, pull out the crochets in ascending order. Having collected all the loops, we knit them with single crochets. There is one point here: you can knit two loops together, then the leaf will turn out to be even, and if you knit 3-4 loops together, then it will be rounded. To create a flower arrangement, you can tie leaves of different shapes with varying degrees of rounding, which I did for the needle bed.


We connect the 2nd and 3rd rows with a connecting column, we do not turn the knitting, but we will knit in the opposite direction. We knit deaf loops, that is, we tie the edge of the leaf to go down to the base of the leaf. Going down, you can finish knitting the leaf, or you can continue - tie the other side of the leaf with blind loops (this is how you like it).


The second photo above shows the reverse side of the leaflet. That's the whole master class, I hope that I explained it clearly and the description will come in handy for you) Good luck!