How to glue sliders on nails: a step by step guide
Today, a good manicure is an integral part of the female image. There are many ways to make your nails beautiful and well-groomed. The nail industry presents its fans with more and more new ideas and opportunities for decorating nails and creating a unique manicure. One of them is slider design (to slide translated from English - to slide).
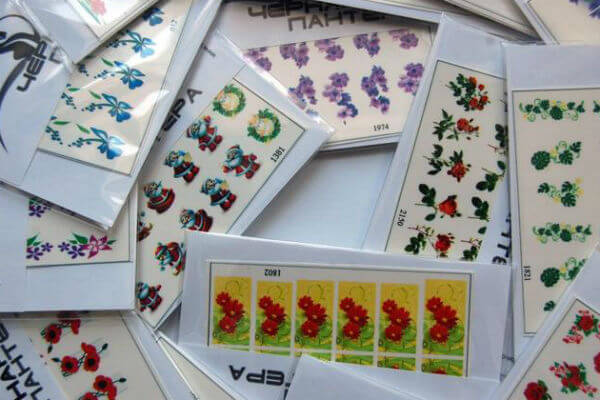
A slider in nail art is a pattern located on a paper base, which is pushed back before being applied to the nail plate itself. Thus, a layer of glue remains on the other side of the pattern, which makes it easy to fix it on the nail.
There are several types of nail sliders:
- Whole-nail. The size of the pattern corresponds to the size of the nail plate, which allows you to completely cover the surface of the nail. Before you glue the sliders on your nails, you need to detach it from the paper base. Next, the pattern is fixed on the nail and fixed with a layer of transparent varnish. You can experiment with choosing a shade of fixing varnish to further decorate the slider, fixing varnish is not necessary, but only serves to keep the slider in a usable condition for a long time.
- Rigid Sliders. They are distinguished by a dense pattern, the application of which requires preliminary preparation of the nail. The surface of the nail must be covered with a layer of varnish, as the slider is fixed on it with a particularly resistant glue. When choosing a varnish for the base, you need to pay special attention to its quality, while you can choose absolutely any color, because it will not be visible under the picture. Rhinestones and sequins are a special decoration that is characteristic of sliders on a dense basis.
- Transparent sliders. They look very harmonious in combination with delicate and light shades of varnish. They are in great demand, as they allow nail art fans to decorate their nails, creating a variety of compositions. Such a manicure will not go unnoticed and will add charm to the whole image.
note
Most often, a set of stickers for nails includes instructions for use, but sometimes it may be missing. That is why it is necessary to know the recommendations for the use and application of nail sliders.
Before starting a manicure, it is important to prepare all the necessary tools in advance so that nothing prevents you from successfully completing the nail decor:
- When applying water-based stickers, it is best to use warm water to speed up the peeling process from the substrate.
- If the sticker cannot be fixed in the desired position, do not try to move it. Try to fix the flaws by adding other decorative elements, otherwise you will have to apply the slider again.
- It is worth remembering that you are not limited in choosing the location of the sticker on the surface of the nail, and this makes it possible to create a truly unique composition.
- After completing the nail slider design, avoid hand contact with water for at least half an hour.
Thanks to the large selection and ease of use of sliders, more and more nail art lovers prefer this way of decorating nails. They do not give the effect of extended nails, so the nails look like they have only one layer of varnish on them. Such stickers are perfect for those who do not want to burden the nail plates with a large number of decorative elements. Sliders do not adversely affect the structure of the nails, which allows them to be used regularly.
The main reasons for peeling nail stickers:
- If the quality of the slider leaves much to be desired or the varnish fixation does not provide adequate protection for the pattern from external influences, the manicure will become unusable in a fairly short time.
- If you make a mistake when applying the sliders, then the nail decoration will also become unusable in a very short time. When applying nail stickers yourself, it is very important to thoroughly dry both the base base and the slider itself. Do not forget about the quality of the varnish fixation, which protects the pattern.
How to stick a slider design on the entire nail
To achieve the perfect slider design, it is necessary to cut the slider exactly under the nail plate. How to stick a slider design on the entire nail? What slider design tools do nail art professionals recommend?
You will find the answers to these questions in the video at the end of the article, with the help of which you will learn the intricacies of the slider design technique and achieve success in performing such a manicure.
Water stickers are very good because they are combined with any nail cover, however, the slider design technique has its own differences. As with any other method of decorating nails, first of all, a hygienic procedure is carried out, which serves to prepare the nails for further operations. Then the nail plate is covered with a layer of varnish or acrylic.
The slider with the pattern you like is cut exactly to the shape of the nail bed.
The sticker is immersed in warm water for a couple of seconds, and then it is detached from the paper base and applied to the nail with the already dried varnish. With the help of small pressures on the slider, drops of water are removed, after which the surface is smoothed with a cotton pad.
As already mentioned, slightly heated water is best suited for water stickers.
Water stickers are in no way inferior to sliders with an adhesive layer. They go very well with light shades of varnish, and due to the ease of application and the ability to stay on the nails for a long time, they are in great demand among nail designers.
How to use nail sliders: application features on different bases
Applying stickers to natural nails should not be a problem, but you should be careful when it comes to extended nails. Before using sliders for nails, it is necessary to apply a base, it can be varnish, shellac or acrylic.
Using regular varnish as a base. Choose your favorite shade and apply two coats of nail polish. After the drawing moves away from the protective layer, carefully move it with the adhesive side down to the surface of the nail, you can use tweezers for this procedure. Then the pattern is smoothed with a cotton swab, and excess air is removed with it. To complete the manicure, apply a lacquer fixation by covering the nails with a clear varnish.
Using gel polish as a base. The only difference when choosing such a basic base is that you need to contact an experienced master in advance who will apply gel polish to your nails.


