Video: draw a snowflake on the nails at home
There are many ways to draw a snowflake on your nails yourself: draw with varnish and a regular needle, use a gel pen, or simply print a pattern. You can choose a plain background or a gradient background.
Women's hands are always in sight. Men consider them for the presence of a wedding ring, girls pay attention to manicure. Both those and others subconsciously appreciate their grace and grooming.
Therefore, we will not upset the fans and please the rivals - we will process the nails and decorate them with a neat pattern. During the winter holidays, you can draw a beautiful snowflake on your nails, which, as in the movie "The Irony of Fate", will "constantly flash before your eyes" and give a festive mood.
Nail art. Let's draw a snowflake!
Homemade snowflake nail art can look just as good as a professional one. But the matter must be taken seriously.
How to prepare nails for nail art?
- Before proceeding with the design of nails, you need to carefully process them.
If necessary, shorten. This is easy to do with nail scissors or nail clippers. - File irregularities
In order not to injure the nail plate, use a gentle nail file - glass, plastic or ceramic, and direct all movements from the edge to the center. - polish the surface
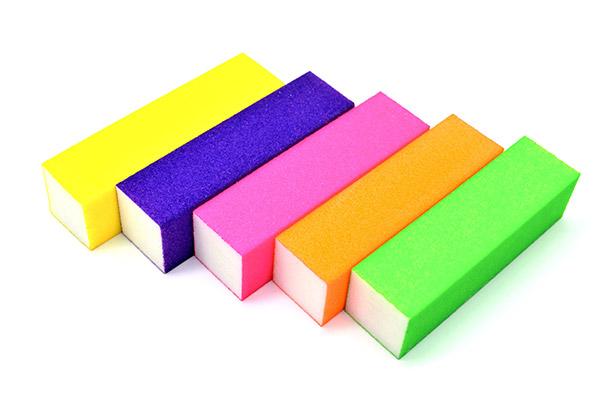
Polishing improves blood circulation in the fingertips and stimulates nail growth, and polish evenly lies on a smooth surface. So the process is well worth the time.For the procedure, you will need a soft nail file, which is called a “buff”. You need to polish your nails very carefully, gradually reducing the abrasive from a coarse grain to a finer one, then even finer, and so on until a smooth rubber surface. The result should be a perfectly smooth surface.
- Remove cut pieces.
It is better to do this with a napkin or brush. Do not rush to wash your hands right away, otherwise you risk getting a sloppy manicure, because if particles of water soak the nail plate, then the varnish will not fix on it. - Degrease nails.
This will help the usual medical alcohol or acetone. Wet a cotton pad and wipe the nail surface.
Preparation for nail art is over. It remains to choose which pattern to draw on the nails: a snowman, a Christmas tree, gifts, lollipops or a snowflake, and you can do this at home with both regular and gel polish.
Snowflakes as a universal winter pattern
Snowflake is the most popular and easy to make winter pattern.
The choice on this topic is very large: snow crystals can be of different colors and sizes, decorate one or all fingers, be shiny and matte, intricate or traditional.
Types of snowflakes on nails
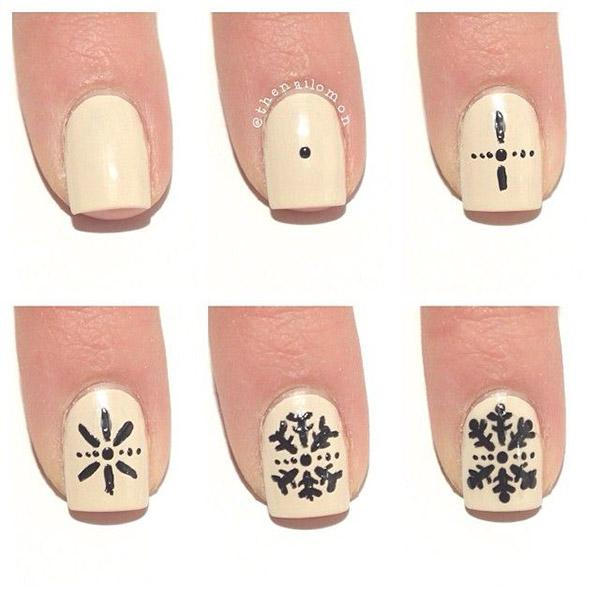
It is easy to draw an ordinary snowflake on nails at home, even beginners can do such a drawing:
- We choose the place where the pattern will be located.
- We draw a cross.
- We break it with two diagonal lines.
- At the edge of each line we put a “tick”.
big snowflakes on nails
Large snowflakes in a manicure have two advantages over time. Firstly, even one large crystal on each finger looks impressive and wintery. But if you decide to decorate only one nail, for example, on the ring finger, the pattern will still not be “lost” and will attract attention.
small snowflakes
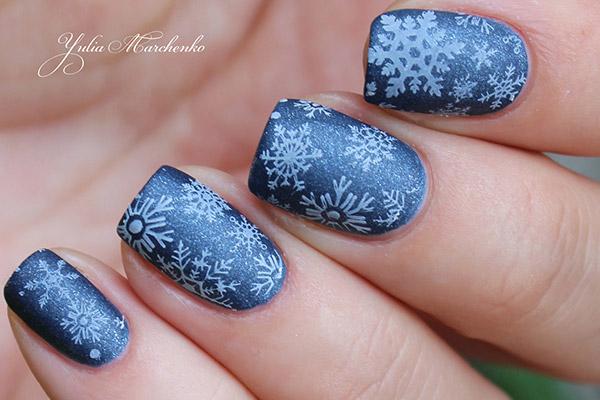
This option takes more time. But with the help of small snowflakes and dots of different sizes, you can create an original gradient pattern with the effect of a real snowfall.
Half a snowflake on a nail
This is a flirtatious manicure. Cold fluffs seem to stick to the edge of the nail and peep: “Does everyone here have a New Year's mood?”. With a half of a snowflake, you can decorate the side of the nail, its free edge or the regrown part.
Draw a snowflake by hand
You can draw on nails using stencils and stamps, but it is more customary to do it manually. Moreover, this method gives unlimited possibilities in choosing a pattern.
Drawing with a needle
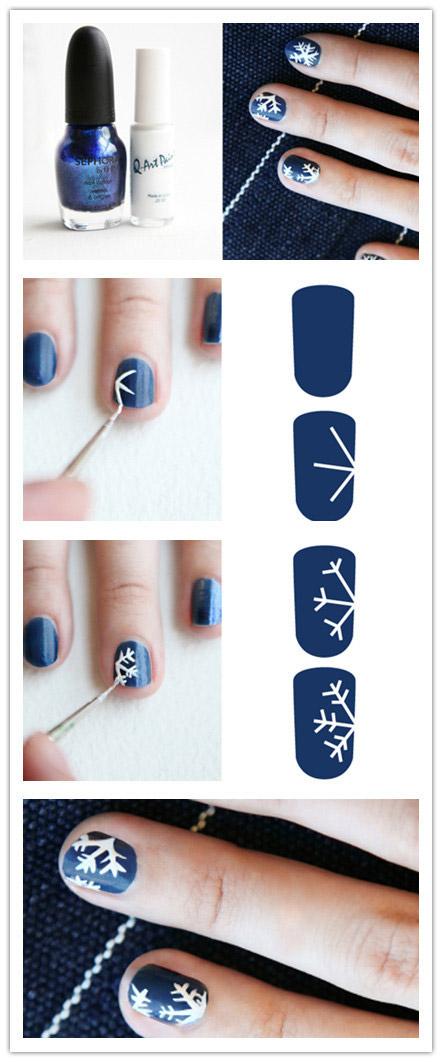
To draw a snowflake on your nails with varnish, you can use an ordinary needle, but here is a mini-instruction on how to do it step by step:
- Degrease your nails with nail polish remover.
- Apply base coat.
- Wait for it to dry.
- Paint your nail.
- Dry again.
- Choose a place where the snowflake will be and drip a little varnish in its intended center.
- Spread rays from it in different directions.
- Place checkmarks at the edges of the lines.
- Dry again.
- Apply a protective layer of varnish.
Snowflake gel pens
If drawing neat lines with a needle and then waiting for the varnish to dry seems painful to you, use a gel pen. 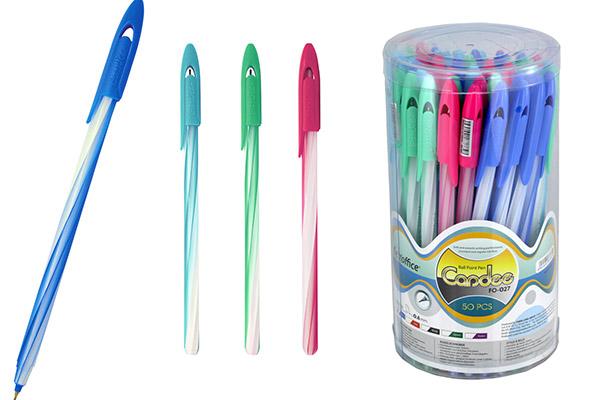
This option is simple to genius, and here is why it becomes a real boon for beginners:
- Unsuccessful drawing is easily erased with a damp cloth.
- A gel pen can be bought at any stationery store or supermarket, and in a house where there are schoolgirls or students, it is likely to be found anyway.
- There is a gel with sparkles, and there is a silver color, which is ideal for depicting a snowflake.
- Thanks to the thin tip of the paste, you can create a complex pattern of jewelry work.
How to draw a snowflake on nails with gel? In fact, such nail art has no features in execution:
- First, the nails are covered with a base for varnish and dried thoroughly.
- Then, if desired, varnish is applied.
- After it is completely dry, draw a pattern.
- After a few seconds, the pattern is fixed with a fixative or colorless varnish.
How to draw a snowflake with a brush
You can draw a snowflake with a thin brush, which is easy to find in the cosmetic department of the nearest supermarket. For a high-quality drawing in this technique, clear, confident movements and accuracy are needed. 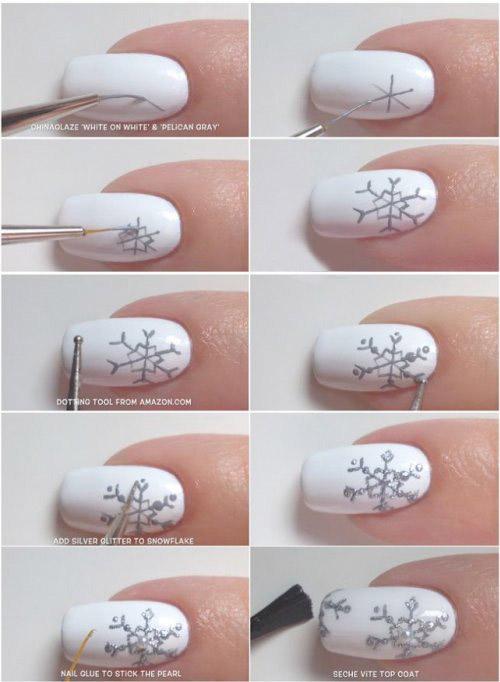
You will have to try a little more than with a regular manicure, but, by and large, the procedure is familiar:
- Apply base on prepared nails.
- Let her dry.
- If you like, use colored polish and let it dry.
- Gently dip the end of the brush into a contrasting color polish and draw a snowflake.
- Wait for the drawing to dry.
- Fix the pattern with a fixative.
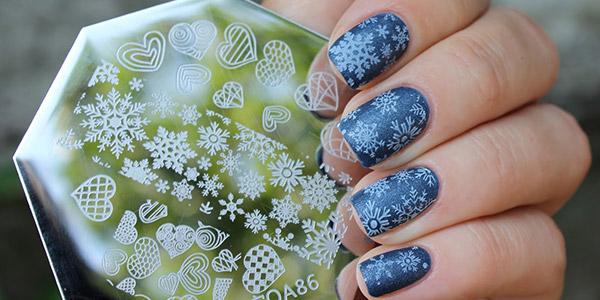
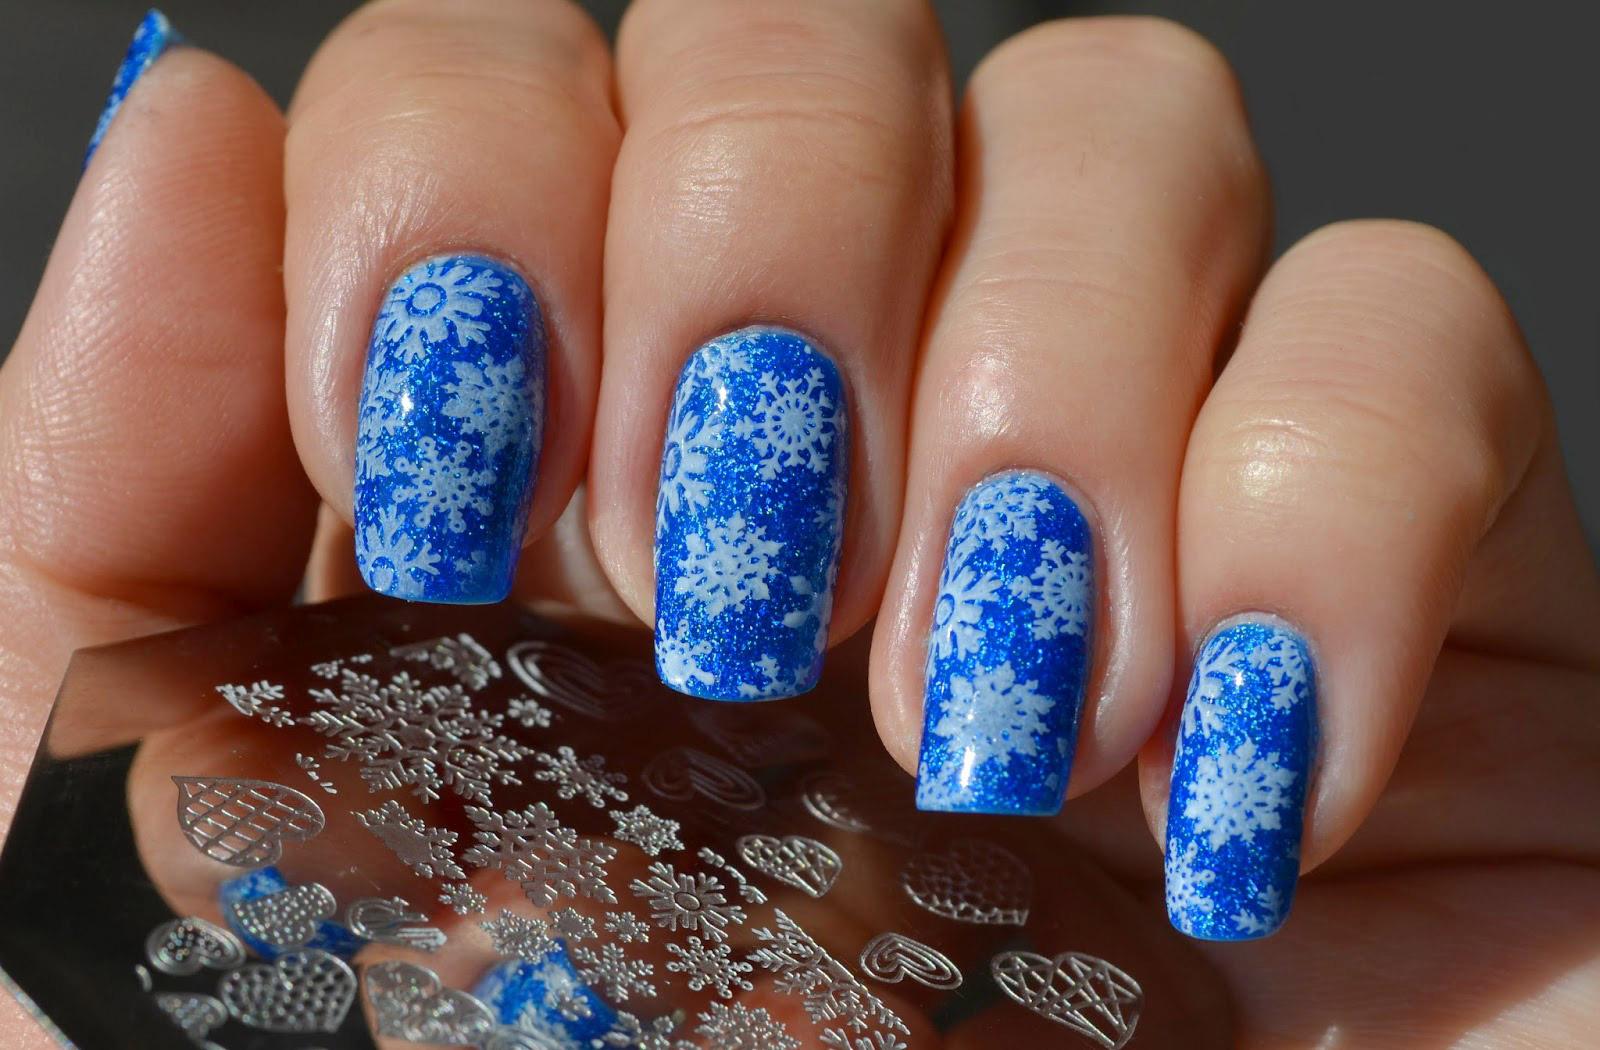
Snowflakes with stamping
In order to save time on nail art, and the patterns turned out to be the same size, you can use the technique "Stamping" - drawing a picture with a stamp.
What is required for stamping?
Stamping kit includes:
- Rubber stamp.
- Metal discs with patterns.
- Scraper.
Step-by-step instructions for drawing snowflakes using stamping
Beautifully draw a snowflake on the nails in this technique is very simple, here's how to do it in stages:
- We take a disk with a pattern.
- We put varnish on it.
- We remove excess varnish with a scraper.
- We press the rubber part of the stamp to the disk so that the pattern is reprinted on its surface.
- "Stamp" nails.
To make the manicure neat and look professional, the procedure must be done quickly so that the varnish does not have time to dry.
Suitable background for a snowflake
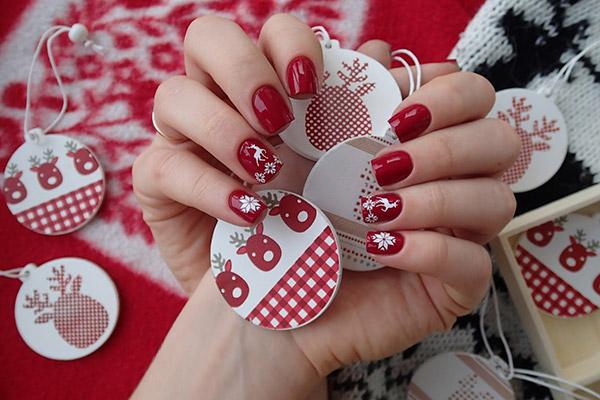
For a winter manicure, it is not necessary to choose a traditional blue or red background. Depending on the color of the pattern, both bright and pastel colors can look beautiful. An interesting option is the transition from one color to another - a gradient, a stretch, or, as it is also called, an ombre.
blue gradient
The popularity of gradient manicure is explained by the fact that it looks original not only as an independent nail art, but also in combination with painting, stamping, and rhinestones. This design visually lengthens the nails and is easily done at home. 
To create a harmonious blue gradient, depending on your preferences, you will need from two to four shades.
Usually white, pale blue, light blue, blue, dark blue, beige and black are used for this range. Paint your nails with the lightest of them and let them dry. After that, you can start creating the gradient.
You can apply stretch varnishes:
- On a sponge
The selected varnishes must be applied one to the other closely, wait a couple of seconds, blot the sponge on plain paper and reprint the pattern on the nail several times so that the colors smooth out and a harmonious transition is obtained. After complete drying, fix the design with a colorless varnish. - On foil
Varnishes are applied not on a sponge, but on a foil. Then we take a sponge, dip it into the gradient and reprint it on the nails. When the drawing is dry, fix it with varnish. - On nails
Lacquers are applied directly to the nail and shaded with a patting touch of a sponge.
Sometimes such difficulties can arise: the skin around the nails gets dirty, the varnishes bubble, and the transition does not work.
Solving these problems is easy. So that the skin does not get dirty, apply a greasy cream on it or stick adhesive tape around the nails.
And so that the varnish does not leave bubbles:
- Use a fine-grained sponge.
- Make the first few prints with freshly applied varnish on paper.
- Apply more coats of varnish.
The main disadvantage of gradient manicure is the high consumption of varnishes, especially if you use a coarse-grained sponge.
But there is a gradient method that does not require such expenses, but looks even more spectacular - this is an ombre with sparkles. To perform it, you just need to paint your nails with a plain varnish, and sprinkle it with small glosses on top with a gradual decrease in density from the edge to the center.
The gradient can be done vertically, horizontally or with a smoothly transitioning color between all nails.
Clear nail polish
Transparent varnish as a background can be called universal. Usually it is chosen by those who like naturalness and minimalism. On the other hand, it does not draw attention to itself and can serve as a good basis for obtaining nail art of a completely different nature.
For example, white snowflakes on a colorless varnish look very elegant and gentle. And the blue scattering creates a completely different mood - dynamic and with a slight element of magic.
The use of rhinestones
You can talk about rhinestones for a long time. This is one of the brightest and most beautiful elements of nail art. With their help, both gentle and ultra-fashionable images are created, which is why girls so often choose a manicure with such a decor. 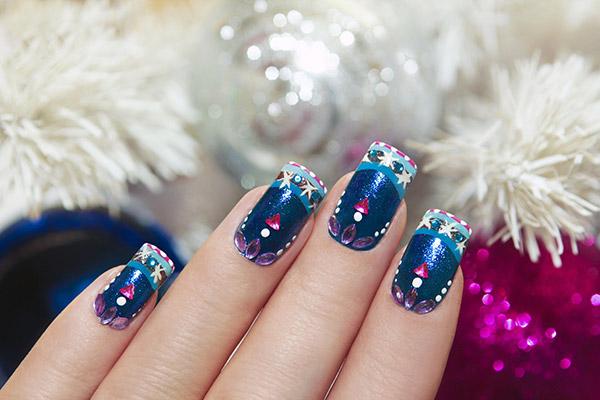
In New Year's and just winter design, they are especially appropriate. A snowflake can be decorated with rhinestones only in the center, but also at the edges of the rays, or you can completely lay it out of pebbles. In the light, such a pattern shines and shimmers beautifully.
Rhinestones are glued with tweezers, then dried and fixed with one or two layers of clear varnish.
In a word, there are a lot of ways how you can draw patterns on your nails yourself. If you give free rein to your imagination and experiment a little, there is a chance to get very unusual and beautiful drawings. And the “creative assistants” in the work will be: ordinary varnish, gel pen, rhinestones, sponge and foil.
If you don’t feel like messing around, get a stamping kit. Having quickly “stamped” the patterns, you will get the effect of a professional manicure, and no one will guess that this is the work of your skillful hands.
Video: draw a snowflake on the nails at home
Snowflakes on nails are a popular solution in the winter season. It turns out that not only the master can draw them. In today's video, we'll look at how you can create a beautiful winter manicure at home.


