How to apply slider design on gel polish
Beautiful well-groomed hands are an adornment of any woman. Today, the beauty industry offers a large selection of manicure products. So, for the past few years, gel polish has occupied a confident position.
It retains the strength and brightness of the coating for at least 2-3 weeks, while you can safely do household chores without fear that the varnish will crack, chip or scratch.
The easiest option for gel polish coating is monophonic, that is, in one color. But there are more interesting design options, such as using a nail design slider.
Slide in translation from English means "slide".
The ease of such a manicure can be explained by the fact that the drawings, called sliders, do not need to be applied manually, they are made in the form of stickers that can simply be glued to the nail plate and fixed with varnish.
Outwardly, they look like hand-painted. At the same time, you can create a beautiful manicure without any skills in drawing on nails.
Stickers-drawings are pasted on a paper basis. It is enough to moisten the sliders with water on the reverse side and press them against the nail plate.
Stickers can be applied both to part of the nail and to its entire surface.
Using sliders allows you to save on the services of a manicurist and at the same time get a beautiful interesting design every time.
The following sticker motifs are the most popular today:
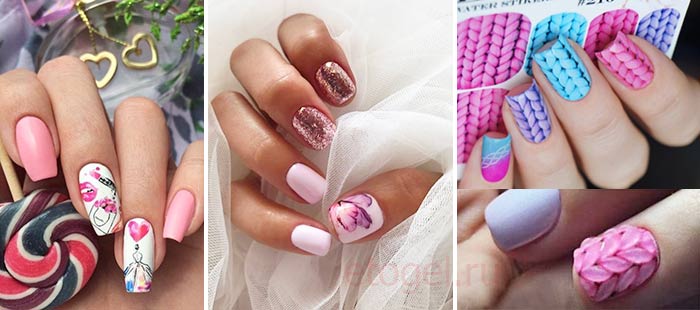
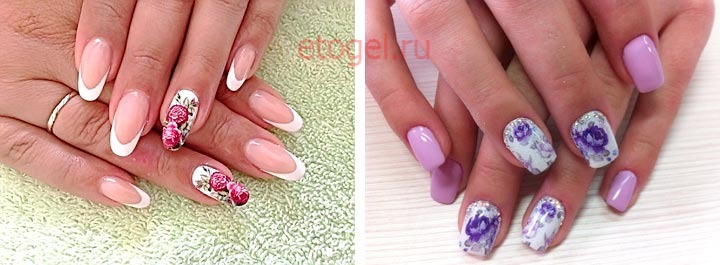
- floral ornaments and flowers,
- portraits, including famous people,
- hearts,
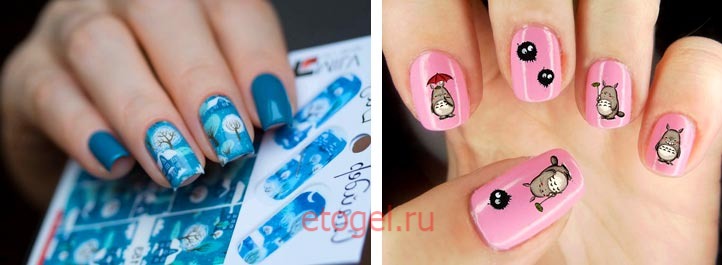
- animals (kittens, puppies, birds),
- cartoon characters,
- abstract patterns, circles, arrows, geometric shapes.
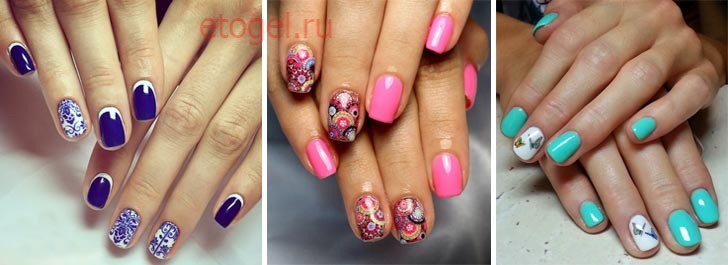
There are a lot of slider options and you can choose a picture for any occasion or for every day.
The technology of applying a design slider on gel polish - varieties
Slider design is represented by several varieties:
- dense image: universal, can be applied to any base - clear varnish, color coating, but most often used to create a French manicure;
- stickers for a transparent coating: used to apply on a light or transparent base, the drawings have clear boundaries, so they are optimal for complementing an already finished manicure;
- stickers for applying to a plate without pre-coating, it is recommended to fix it with a layer of varnish on top (they are considered the most convenient, since there is no need to pre-treat your hands, you just need to cut the sticker in the shape of a nail and stick it on).
- Varnish. They first cover the surface of the nail, then the sticker is lowered into the water, after which it is applied to the nail plate, pressing first in the middle, and then along the edges with a toothpick. It is important to remove all air bubbles that get under the sticker. On top of the slider is covered with a transparent varnish.
- Gel . A transparent base is applied to the nail, dried, a sticker is applied, and the final water slider design on gel polish top coat and dried under a lamp.
- Acrylic . Putting a slider on this material is the most difficult way. Acrylic is applied first, then the drawing is immediately applied. After the nails are completely dry, you need to carefully hold the acrylic ball, but so as not to move the pattern.
RELATED VIDEO
Recommendations for creating a slider design:
- it is worth preparing all the materials and tools in advance so that they are at hand,
- for water design it is better to use warm water, so the pattern will quickly move away from the substrate,
- if the drawing did not fit the way you wanted, do not try to move it, try to correct the situation with other decorative elements or do the work again,
- after completion of work, it is recommended to withstand the slider for at least 30 minutes without contact with water.
Applying a design slider on gel polish - stages of work
This procedure takes about an hour to complete. Experienced masters cope faster, but if you are doing such a manicure for the first time, do not rush.
- Stage 1
It is necessary to prepare the nail plate. It is processed with a file of 240 grit, given the desired shape, the cuticle is removed, buffed and degreased.
- Stage 2
The nails are covered with a primer, a base coat is applied and dried under a lamp. The sticky layer does not need to be touched.
- Stage 3
Now you can apply a color coating in two layers, drying each of them under a UV lamp.
- Stage 4
The sticker is cut to the size of the nail, dipped in warm water, blotted with a napkin to remove moisture, the backing is removed and glued to the nail plate.
- Stage 5
It remains to apply a top coat, dry it under a UV lamp, remove the sticky layer.
Now you know, how to stick slider design on gel polish and get an interesting manicure at home.
The slider design does not hold on gel polish - what to do
Problems may arise when working with stickers. Let's try to figure it out.
1. The pattern falls off along with the top coat. The reason is that the layer of varnish or top coat was not dried well.
2. The slider is wrinkled. Most likely, he was poorly dried before he was put on the nail plate. The second reason is that the sticker is too thick or of poor quality.
3. The top coat is chipping off. There may be several reasons.
- The most common - the top was applied to a wet sticker.
- It is also important to leave at least a small section of the nail for the top to grip, so leave a small gap on the sides of the sticker.
- The edges were not sealed. This must be done without fail, creating a kind of pocket to hold the slider.
- Poor quality top coat. There is an opinion that the best option for a top coat is a remedy for CND, but this is not entirely true. Other manufacturers also produce decent products, but not all of them are suitable for sticker designs. What is best for you, you will understand by experience.
The answer to the question of how to fix the slider on gel polish is that you need to take into account all the little things and adhere to the above algorithm of actions.
Then the stickers will not affect the life of the manicure and will last a long time.
RELATED VIDEO
Almost all ultra-thin stretch designs are printed on a transparent base, so when applied to a dark varnish, the design becomes almost invisible.
Sliders printed on white film can be applied to any color varnish, including black.
True, such stickers are thicker, and therefore less elastic. In order for the sticker to lie flat, make several cuts in the places where the nail is bent, then the drawing will not bulge and completely cover the nail.
VIDEO
In many ways, the life of such a design will depend on the quality of each of the stages of manicure, as well as the quality of the materials themselves.
It is impossible not to note the accuracy of a woman when wearing such a manicure, as well as the features of her work, because when interacting, for example, with chemicals, the coating will be damaged faster.
If the procedure was performed in compliance with the technology, the design should last about three weeks, like the gel polish itself.
Thus, summing up the article, we can draw the following conclusions:
- Slider design is an easy and affordable option for decorating nails at home. You can learn it yourself with the help of master classes. In this case, it is not necessary to be able to draw, the main thing is accuracy.
- Stickers are safe, do not damage the nail plate, are easily removed along with the gel polish. You can use them with any frequency without fear for the health of the nails.
- Sliders look like a real drawing on the nails, while they are not voluminous. This is a great option for those who do not like catchy and large decor.
- Affordable price is another plus in the treasury of stickers. They are sold in specialized stores of manicure masters, as well as in online stores. They are inexpensive, so every girl can afford it.
- Big choice. In addition to simple drawings, voluminous pictures are popular, which look favorably on a long manicure. You can also order custom stickers if you wish.


