How to cover nails with gel polish at home (detailed description)
Gel polish is gaining more and more popularity these days. Gel polish is a hybrid of gel and polish - it applies like a polish and lasts almost like a gel (approximately 2 weeks). My first acquaintance with gel polish happened two years ago, two days before the New Year and, unfortunately, having fallen into the hands of an inexperienced master, this acquaintance was unsuccessful. I just took off my extended nails and in order to somehow restore the damaged nail plate and let it grow a little, I applied gel polish in the salon. But this was not destined to come true - a day later my gel polish began to literally fall off my nails. Two hours before the New Year, I, swearing like a shoemaker, sat and tore off a peeling manicure. As a result, I met that New Year with the most terrible manicure in my life. This case for a long time discouraged me from getting involved with gel polishes, but this year everything has changed.
In winter, my sister completed a manicure-pedicure course, and already in the summer she had crowds of clients. My sister did a manicure, gel nails and covered with gel polish. The latter was the most popular service among clients, so I could not resist and decided to try again. What was my surprise when, with the coating that my sister made for me, I went through twenty days!
Later, having moved to another city, I bought myself all the necessary materials for such a manicure, and my sister shared her secrets with me, which I will gladly reveal to you.

The application of gel polish can be conditionally divided into several stages:
- Purchase of necessary materials (for those who do not have them yet)
- Nail preparation
- Base coat application
- Color Coating
- Fixing with a finish (top coat)
Now about all the stages in more detail.
Stage 1. Purchase of necessary materials
To apply gel polishes at home, you will need:

Prices for gel polishes depend on the manufacturer and vary from 200 to 1500 rubles per bottle. Which one to choose for you - decide for yourself, I have gel polishes from several companies, because everything is known in comparison. It is desirable to use the base, finish and color gel polish of the same company, but practice shows that different companies can still be combined well with each other. It is not necessary to immediately buy gel polishes of several colors, stop at a couple of your favorites, practice. Suddenly, this is not yours at all, but you will have to pay a tidy sum.
Stage 2. Nail preparation
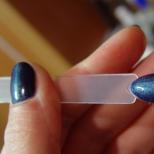
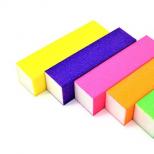
Give your nails the desired shape, gently push back the cuticles with an orange stick. Before applying gel polish, in no case do nail baths and do not steam your nails. Nails must be dry! It was because of this mistake of the master that my gel polish peeled off on the second day two years ago. Gently, without damaging the nail plate, lightly sand the surface of the nail with a soft nail file. It should become matte, and slightly (!!!) rough (not the same as with nail extensions). Brush off sanding dust. Then degrease your nails with a special tool. After that, cover each nail with a primer. Only the surface of the nail should be covered, without affecting the periungual skin. Nails should become matte. If they are shiny and look wet, then you have applied too much primer. This can be fixed by dabbing each nail with a lint-free tissue. The preparation of the nails is over, from now on it is impossible to touch the nails with your fingers. Let's move on to the next step.

Stage 3. Application of the base coat.
Apply a thin layer of the base on the prepared nail plate. Applying the base is a very important step, the durability of your manicure will depend on it. Try to paint over the nail plate evenly, without affecting the skin, pay special attention to the edge of the nail. If the base has flowed onto the skin around the nail, carefully remove it with a corrector or a wooden stick, otherwise the gel that gets on the skin will subsequently peel off the artificial coating from the natural nail. For the same reason, the tip of the nail covers well, but with a thin, thin layer. Seems very difficult? Yes, the first time you may not be able to perfectly apply the base, but do not be discouraged, over time you will “fill” your hand. After applying the base, place the nails in a UV lamp for 2 minutes to cure. Nails will look shiny and sticky. In no case do not touch them with your fingers and do not remove the sticky layer!
Stage 4. Application of a color coating.
Now you can start coloring. Cover your nails with two thin coats of colored gel polish, curing each layer in a UV lamp for 2 minutes. You can get by with one layer, but, as I said, gel polishes are different, so for an even, spectacular manicure, you need at least two layers. And by the way, gel polishes are dense or translucent (like regular polishes). Keep this in mind and do not try to achieve a dense coating with ten layers of translucent gel polish.
Stage 5. Application of the top coat.
After the last layer of colored gel polish polymerized in a lamp, all our work must be fixed. Here we need a finish coat. And it must be applied in the same way as the base: a thin layer without affecting the skin. Then again put the hand in the UV lamp for 2 minutes, and then using a lint-free cloth moistened with the same special nail degreaser, remove the sticky layer from each nail. Everything, a beautiful, glossy manicure is ready! By the way, when choosing a finish, pay attention to the fact that there are those that do not require polymerization in a UV lamp and removal of the sticky layer. Read the label on the bottle carefully!
After removing the sticky layer, put a drop of cuticle oil on the cuticle of each nail and rub it into the skin. Lubricate your hands with cream.

With proper application, gel polish will stay on the nails for up to 20 days. During this time, your nails will significantly strengthen and grow back. If the overgrown part is very conspicuous, then you can cover it with ordinary glitter varnish.
Many complain that in two weeks they get tired of walking with one color. So what's the problem? You can always cover your nails with gel polish applied to it with regular nail polish, and if you wish, remove it with regular acetone-free nail polish remover. It will not cause any damage to the gel polish.
I will tell you how to remove gel polish in my next article.


