Manicure with gel polish at home
Post by request. :) Gel polish at home. I use gel polish with a lamp, although I heard that there was something without drying in the lamps. For example, from Deborah Lippmann, but I have not studied the details, so I do not undertake to tell.
I have been using gel polishes for a long time, practically since their appearance on our (Russian) market. Most of the people around also use gel polishes (hereinafter referred to as ch) and I will say this about the nails: if you use ch all the time, then the nails can really deteriorate. But for this you need to use hl year and not give "rest" to the nails. If you alternate hl and ordinary varnishes, then everything will be fine. We do this all the time in the family and there are no problems. Usually I do ch for 3 months, and then I give them a rest for a month or two. I do baths, I use oils. There is nothing wrong with nails. It is especially important that I DO NOT file off the nail before applying. I cut the nail before acrylic, gels, etc. In the case of ch, I take a grinder (the most common and easiest) and go through the nail no more than 2 times! I'm just taking the shine off a bit! There are no violent events. The nail does not become thin.
GL is very convenient for me at home, since sometimes time is released very unexpectedly and they can’t accept you in the salon ... But a set for home use came to the rescue, now I’m creating at home!
I will say right away, I will describe in detail, but this does not mean that I do a manicure for two hours! Everything takes 30 minutes maximum. This is not bad, because then we can do whatever we want, and not dry our nails for hours, as sometimes happens.
The varnish is removed for 20 minutes on each hand. A little longer than with regular varnish, but these are trifles.
At first I was very afraid to do GL at home, but anyone can handle it! Even the one who considers himself a krivoruchka :), like me! It turns out everything the first time.
I can wear GL for almost 3 weeks (I checked it!), which I don’t do, because I don’t like overgrown nails. I wear a little less than 2 weeks or 2 weeks exactly.
Now let's get down to business. First step- manicure. Edged or not is a personal matter for everyone. I prefer both. I alternate. Here I did the trimming.
For manicure GL we need:
List of what you need:
A convenient place, I usually cover everything with a towel, it’s more convenient and comfortable for me to work.
Everything you need for trimmed or unedged manicure. I don't show it here.
Orange stick to correct flaws. Everything needs to be fixed at once! Until dry.
UV lamp 36W.
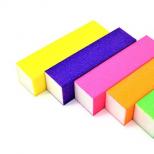
Nail grinder.
Degreaser (disinfector).
Cotton pads are lint-free.
Base coverage.
Top cover.
UV lamp 36W.
Color coating.
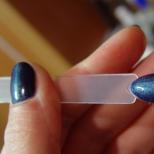
2 step. Slightly file the nail plate with a grinder. I know that there are special ones, but I use the most common polisher from INM and I don’t see the difference. The main thing is that the nail no longer shines. This is necessary for better adhesion of the nail plate to the base. You need to grind quite a bit, literally one or two movements, do not file it down, as before acrylic, etc.!


3 step. Treat nails with a degreaser. It is better to take cotton pads that do not leave a lot of lint behind. We carefully process the ends, the free edge of the nail.

4 step. Starting to cover the nails with a base coat! We apply the base in a thin layer, not forgetting the edges of the nails.


5 step. We dry everything in the lamp.

6 step. Apply color in a thin layer. It is important not to overdo it here. The first layer of color coating should be thin and quite translucent. All flaws will be corrected with a second, denser layer.


7 step. We dry everything in a lamp. One or two minutes.
8 step. Apply a second coat of colored gel polish. Here you can put a denser layer, but you don’t need to fill the nail with varnish, as the coating may crack or bubble slightly (which I have never had :), this is according to the masters). But there will definitely not be problems with the amount of varnish, since everything overlaps perfectly on the second layer.


9 step. We dry everything in the lamp again. 2 minutes.
10 step. Now we apply the top with a denser layer than the color coating. At the same stage, we seal the ends. By the way, the ends and the free edge are sealed with the base and top, this is not necessary with a color coating.


11 step. We dry the whole thing for two to three minutes.
12 step. And almost the end of our manicure: degreaser! Again we use a disinfectant to remove the sticky layer. It is advisable to use lint-free discs. In general, you can save money on a degreaser, take a regular nail polish remover with acetone (this is a must!), But some liquids are removed along with the sticky layer and all the shine, which spoils the manicure a little, it seems to me. They also use products with a high alcohol content (but the effect may be the same - the shine will disappear).


13 step. This step is not absolutely necessary, but it is very important for me. We use any means to moisturize the cuticles and hands. There are many options and choose the tool that works for you.
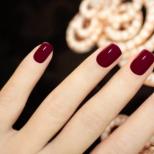
In the photo, I used Color Couture Entity One in Zoom Lens.


