Ombre manicure
Amber-style manicure "captivated" modern fashionistas last year. But to this day, this design remains relevant. To be on top and meet fashion trends, it is not necessary to visit expensive salons, spending a lot of time and money on it. Ombre manicure can be done at home, with your own hands. The main thing is to have a little patience and a little free time. This article will tell you in detail about how to make a gradient effect on your nails, or simply - beautiful color transitions with ordinary varnish. After all, such nails look simply stunning and delight others. Some call this manicure "lunar", which is also very attractive and unusual.
So, read where to start, how to make an ombre on your nails, and also see photos, videos and instructions.
Before you make yourself amber on your nails at home, you need to have an accurate idea of what it is. An ombre manicure is a combination on one nail of several shades that are close in color in such a way that the effect of a very smooth transition is created. The color seems to flow from one to another. In another way, such a design is called a gradient.
This effect is achieved by a special technique of applying varnish. You can make a color gradient both vertically and horizontally. But it is the last version of the amber design that looks better and more beautiful. You can make a gradient on any nails: long, short, oval, square, extended or your own. Ambergris can also be done with gel polish. It can be a light manicure, bright or dark, the main thing is that the colors of the varnishes blend well with each other.
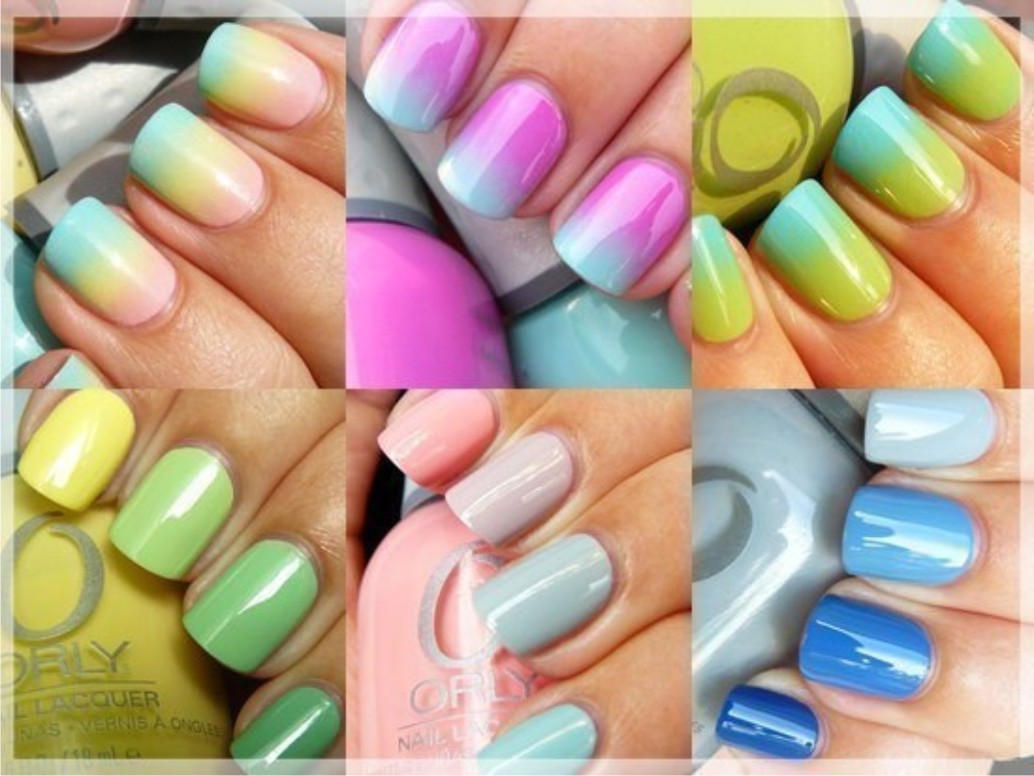
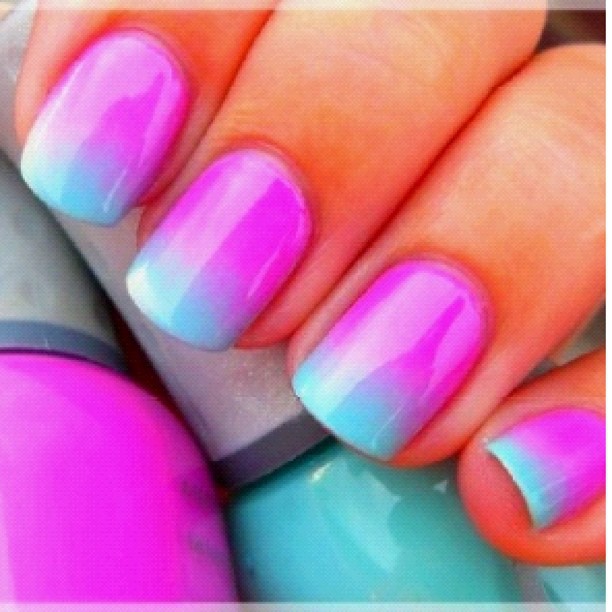
What does an ombre manicure look like, look at the photo:
How to make an ombre manicure at home?
Learning how to make amber design on your nails at home is not difficult at all. But for this you need to prepare all the necessary components.
For this you will need:
- Lacquer 3 or 4 similar colors;
- Foil (you can use an old disk, thick cardboard or a piece of plastic);
- Sponge, sponge or capron (a piece of cloth);
- Acetone or nail polish remover;
- Cuticle oil;
- Cotton buds;
- Toothpick.
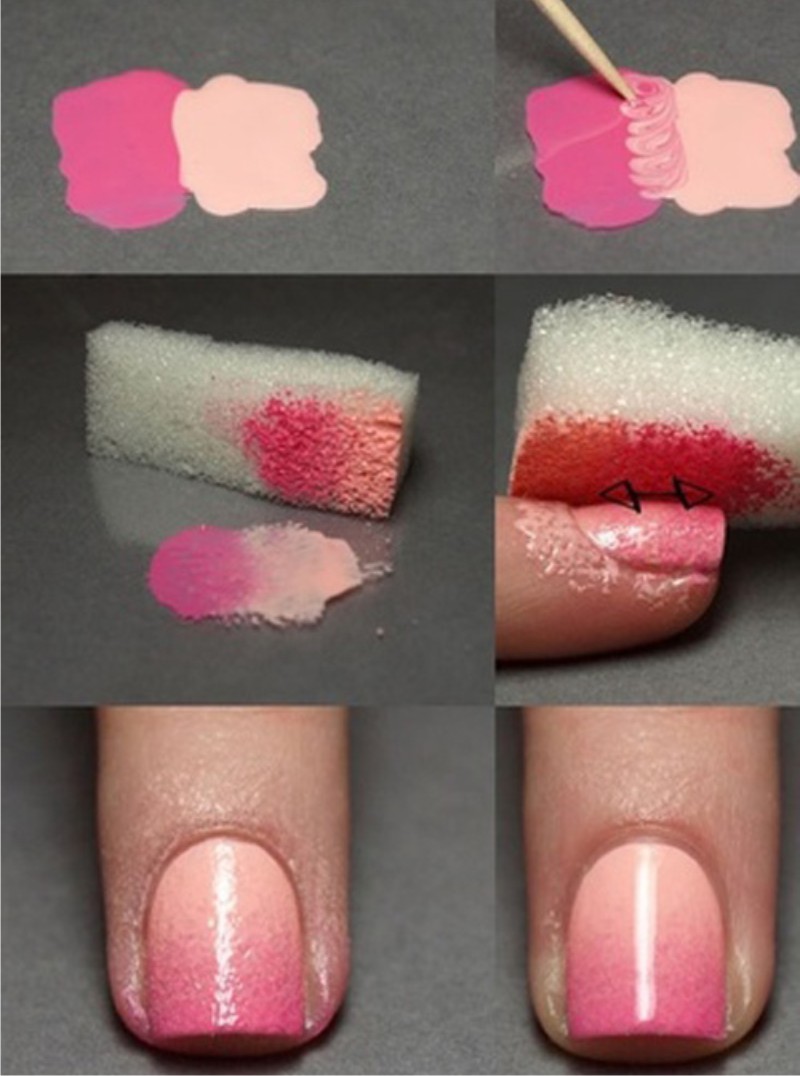
Option 1. Application technique - instructions step by step:
- Make a neat manicure on your nails, trim the length, cover them with a colorless varnish;
- Lubricate the skin around the nails with cuticle oil. This is necessary so that the varnish does not stain your fingers less;
- Further, everything will need to be done quickly: on the foil (or any other dense surface), apply stripes of 2-4 colors of varnish, moving from dark to light or vice versa;
- Lightly mix the colors together with a toothpick (how to do this can be seen in the photo below);
- Immediately dip the sponge into these colors and print on your nails. Sponge or sponge must be made of nylon, or it can be a piece of nylon fabric, otherwise the varnish will be absorbed into the material and will not transfer the color well to the nails.
- When all the nails are covered with a gradient, without waiting for it to dry, cover everything with a colorless varnish;
- If the rim rollers are dirty, remove any excess with a cotton swab dipped in acetone.
How to make an ombre manicure, look at the photo:
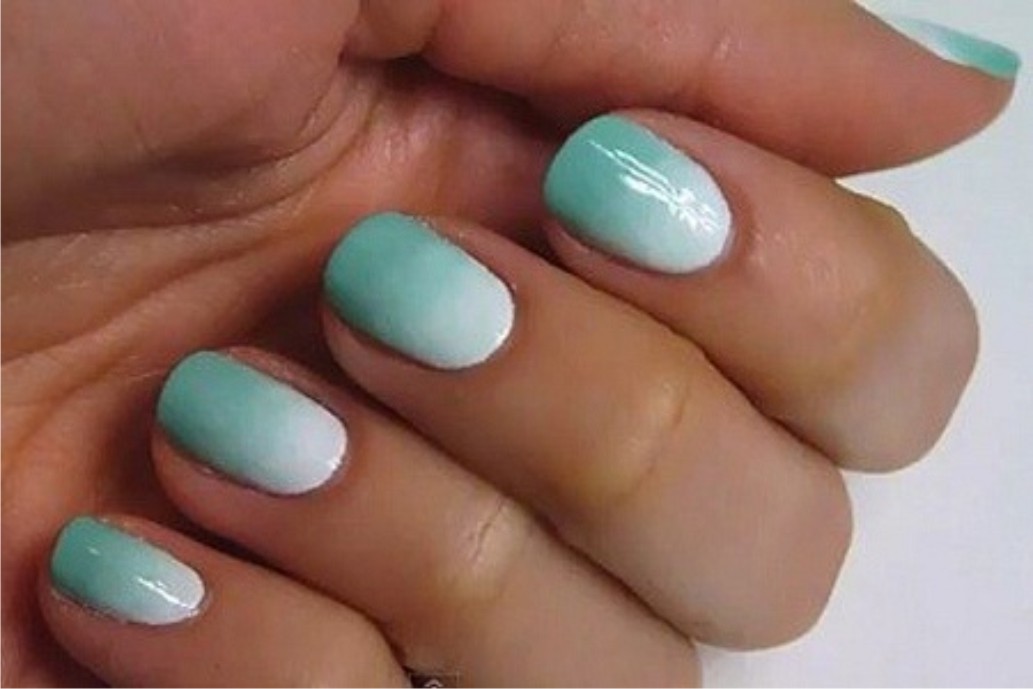
Tip: To achieve the "moon" effect, which is now at its peak, use colors so that there is a light tone at the base of the nail. It is for the color highlighting of the lunula (holes on top of the nail, which absolutely everyone has), that this manicure was called "lunar".
What the lunar design looks like, look at the photo:
Option 2. Application technique - instructions step by step:
- Cover the nail with the base color of the varnish, which will serve as the basis of the gradient, wait until it dries;
- Next, you need to apply 2-3 colored stripes to the foil, using the base color as well;
- Lubricate the skin around the nail with oil, and transfer the color to the nails with a nylon sponge, as in the above instructions;
- If necessary, remove excess with a cotton swab dipped in nail polish remover.
How to do this, look at the photo:
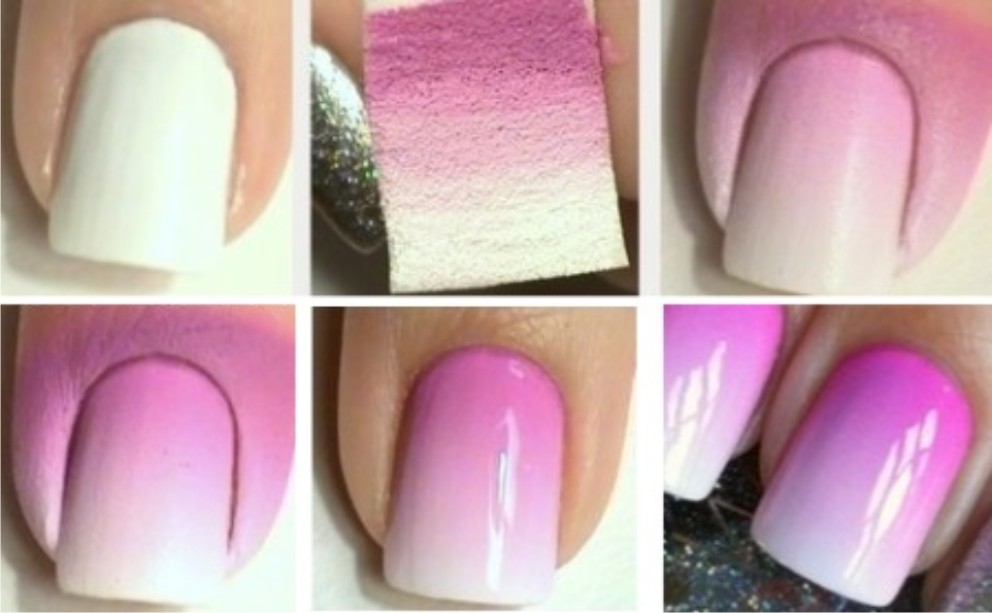
This option has a smoother color transition effect. The borders of tones are more blurred.
See also detailed video tutorials on how to do amber manicure at home:
How to make an Ombre manicure with gel polish at home
In order to easily make ombre gel polishes on your nails, you should first practice on ordinary varnishes, because if something doesn’t work out for you the first time, it will be difficult to remove the gel polish.
To work with the gel you will need:
- Ultraviolet lamp;
- Gel system set (base coat, colored gels, top coat);
- Primer or bondex;
- Polishing buff, soft nail file;
- Cotton swabs, acetone.
Step by step technique how to make ombre gel polish:
- Cover nails with base gel, dry it in a lamp;
- On the foil, make stripes of 2-3 colors of gel polish, lightly mix the borders of tones with a toothpick;
- With a nylon sponge, transfer the gradient to the nails;
- Remove excess gel polish on the skin immediately, otherwise the color will harden in the lamp and it will be difficult to remove it;
- Dry the nails in the lamp and repeat the procedure with color;
- Cover everything with top gel, dry it longer.
Making a design with an ombre effect or a gel moon manicure is more difficult, and skill is needed here, so watch the video carefully and practice on tips first. (video on how to make ombre gel polish)
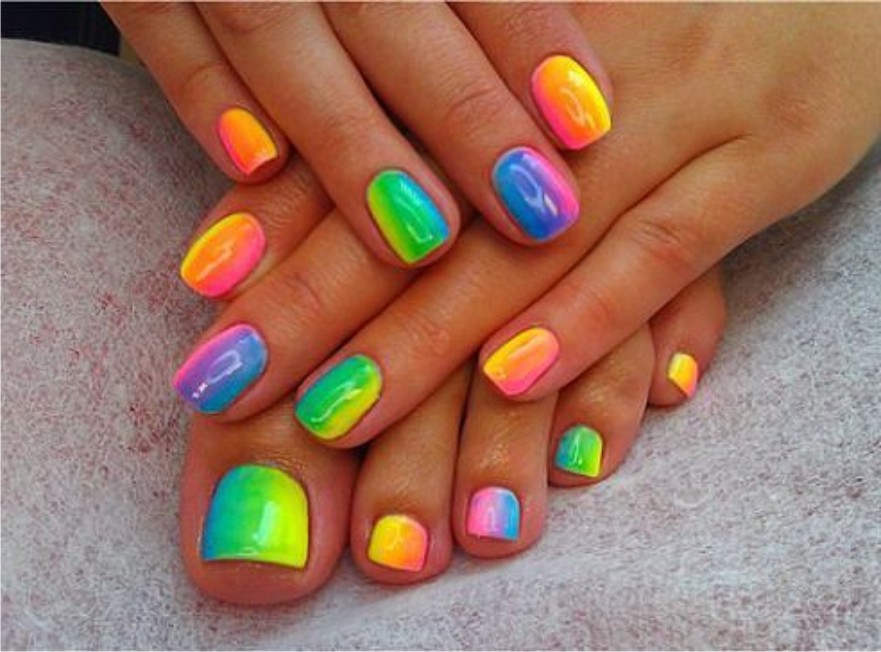
The photo below shows the most successful and spectacular colors for moon manicure and ombre design: