Manicure with ribbons for nail design
Among manicure lovers there are conservatives who prefer the classic style and innovators who are in constant search for something special and new. For those and other ladies, a technology with a ribbon was developed.
Having mastered it, you can independently make a classic French design or an extravagant evening design with adhesive stripes. This will help save money and time without compromising the image.
What is nail tape?
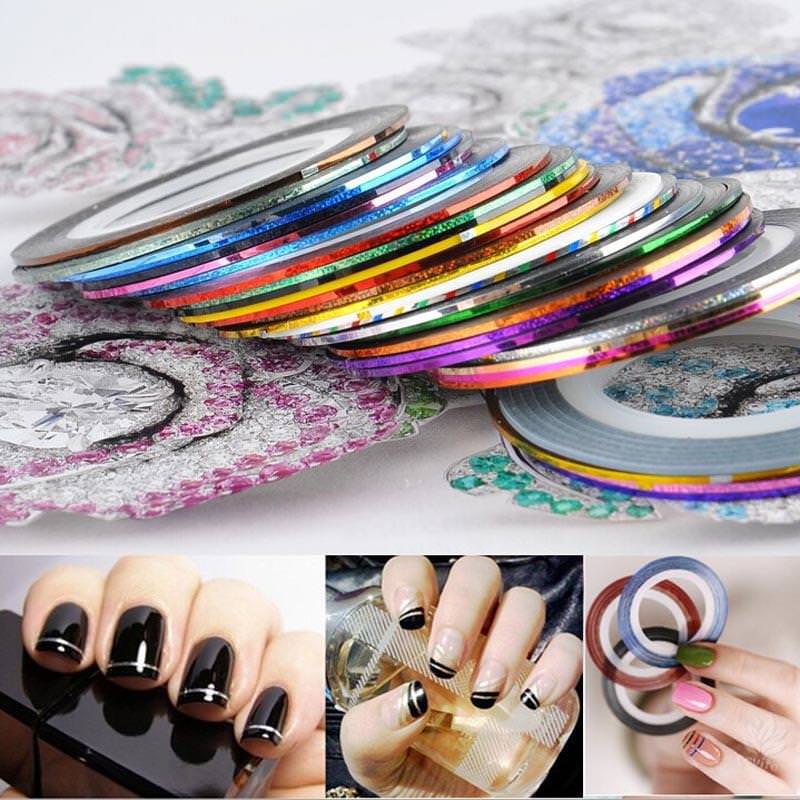
A manicure is a painted plate, on top of which a strip of tape with a self-adhesive base is glued. Color and ribbon design can be the most diverse. Free choice also for decorative coatings, where both gel and varnish can be used.
Decorative jewelry is sold in specialized stores or ordered on the website via the Internet. For frequent use and experimentation with the design, it is more profitable to buy a whole set.
Moreover, it is easy to work with the material, even beginners can handle it. The most popular is a thin strip, only 1.5 mm wide. Delicate lines will give the manicure sophistication and sophistication. The product line impresses with a choice of textures: silver, gold, sequins, stripes, melange, etc.
What is it for?
Ribbon makes the process of decorating complex drawings easier. The usual coating with an unusual finish looks much more interesting and boring. Adhesive base allows you to use the material without much difficulty. If you want to complement the design with clear, even lines, you won’t find a better option.
To make the work look neat, you need to follow some rules for using the decor:
- When pasting the strip should not reach the edges of the cuticle 1-1.5 mm. Tape fixed closely or overlapping will quickly break off.
- When applying the finish coat close the ends carefully.
- It is better to use sharp scissors to cut the material., because the accuracy of the manicure will depend on the quality of the cut.
- The main assistant in fastening the strips is tweezers. The pointed ends of the tool make it easier to pry and fasten the material.
Use cases
Resourceful craftsmen came up with several options for using the tape. It can serve as a decorative design that complements the drawing and be an auxiliary material for creating clear borders.
In the first case, the strips are glued in front of the fixer on the finished composition, and in the second case, on the base coat, but before fixing the surface, the following is removed:
- One option is to delimit color zones. First, markings are made on the plate, then each zone is covered with a different one. For convenience, you can use . After the coating has dried, a tape is glued along the borders. A fixative is used as a fixing agent.
- Material can be applied for the same borders, but it is glued to the base coat, and after applying varnish and drying it is removed. In this case, the borders will have even contours of uncoated plates, which, in combination with color compositions, look quite interesting.
- It is convenient to use a strip with an adhesive base to make clear boundaries between two tones. After applying varnish to one zone, dry the surface and stick the decor along the edge of the pattern. Then paint the next part of the plate. After drying, carefully remove the auxiliary material. As a result, there will be a clear contour between the color zones.
How to make a manicure with ribbons?
Forwith tape technology, you will need:
- manicure set for processing nail plates and cuticles, a set of tapes;
- tweezers with thin tweezers;
- base coat;
- colored varnishes;
- orange stick;
- fixative;
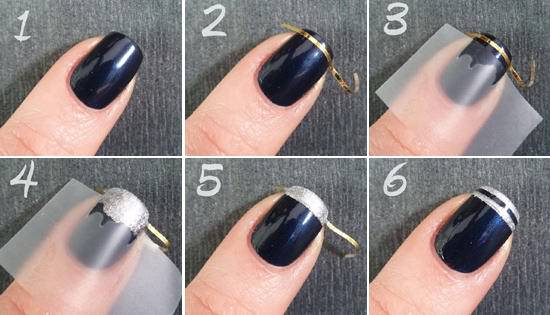
Walkthrough:
- Remove the old coating from the nail plates.
- Make a nail softener and moisturize with a special tool. After 2-3 minutes, remove the residue with a dry cloth.
- Treat cuticles in the usual way.
- Degrease plate surfaces and cover with base coat. Dry.
- First, a colored varnish is applied or an artistic design is created in several tones. After drying, on certain borders of the pattern, they are attached with the adhesive side of the ribbon, cut to the size of the nail plate.
- If color coatings are not provided, then the strips are immediately glued.
- The next step is to fix the accessory with a fixative., which is applied to the plate in two layers with mandatory drying of each.
- When performing a manicure with gel polishes, you must follow the same sequence., but with drying of each layer under an ultraviolet lamp. Tapes are fixed before finishing coating.
Ribbon Manicure Ideas
A variety of modern materials makes it possible to embody the most unexpected solutions in the design of nails.
Tape technology is no exception:
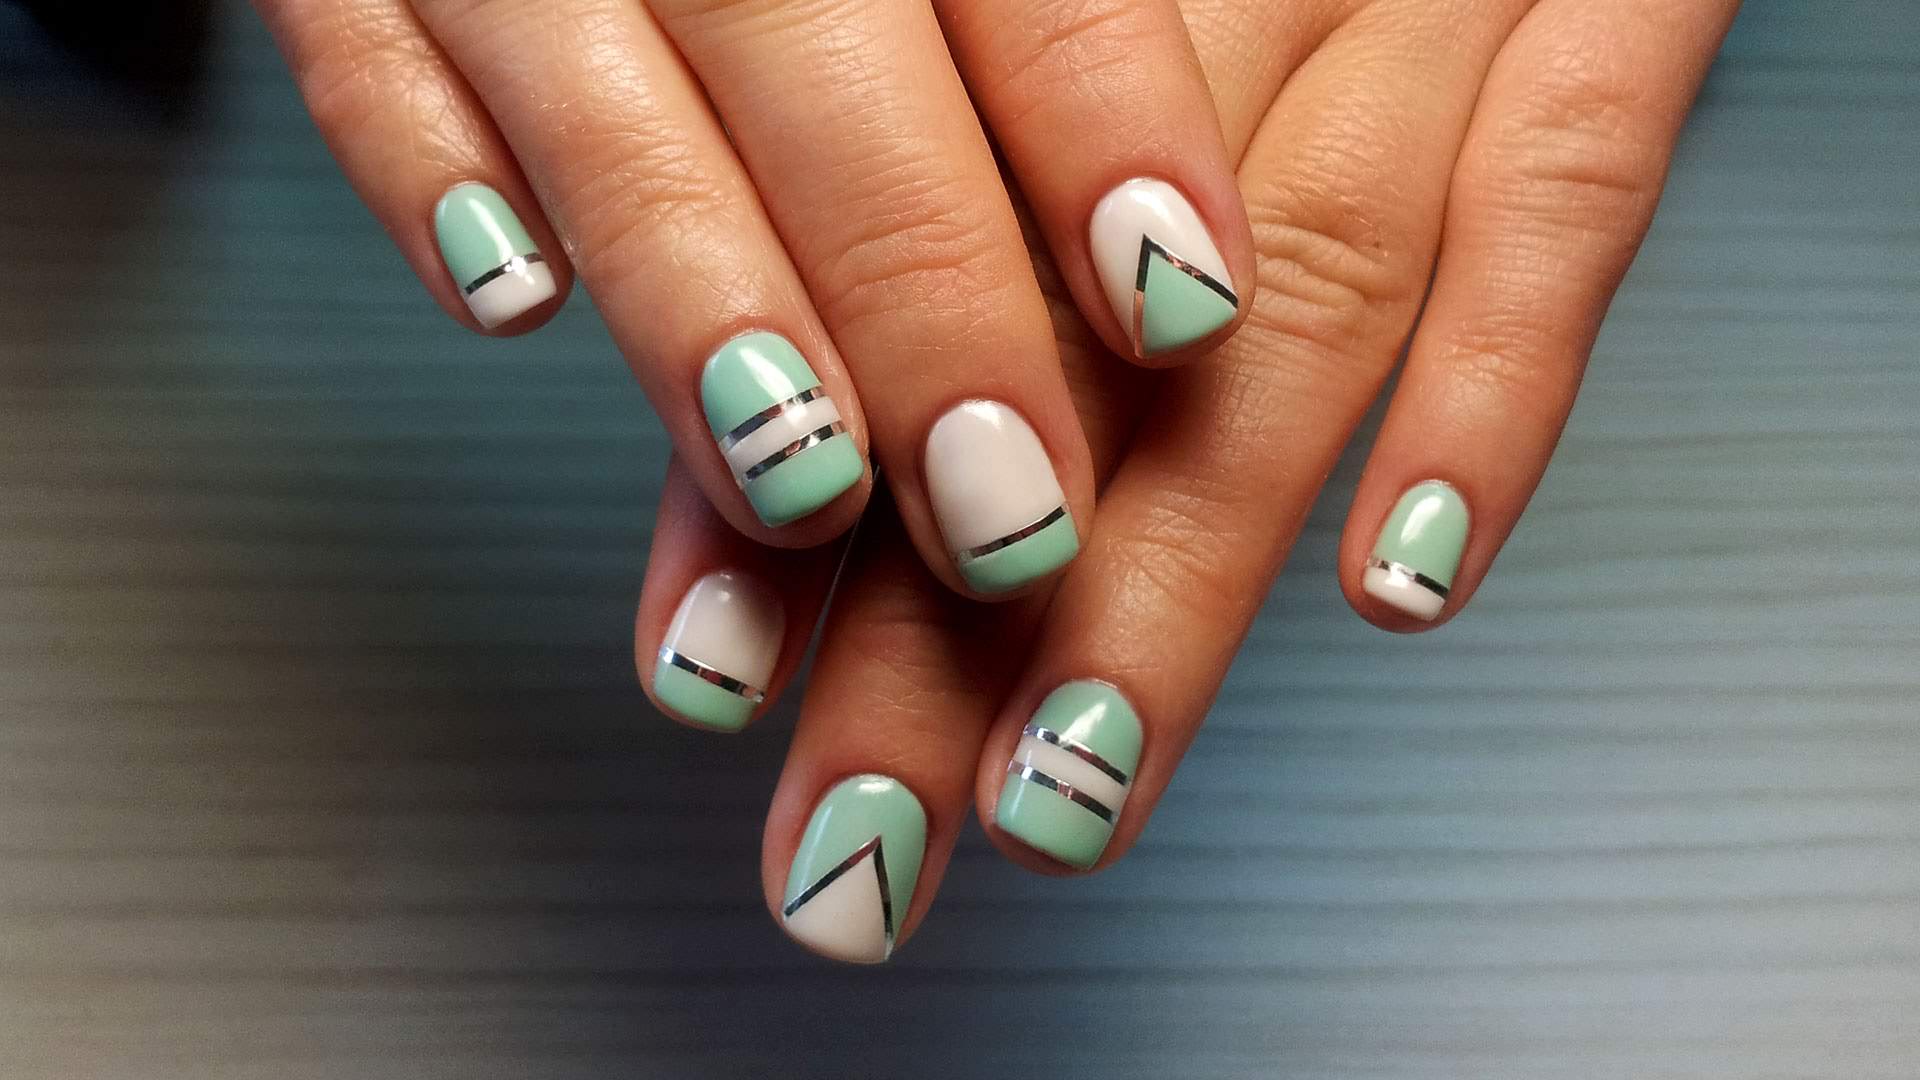
- Classic will play in a new way, if the face is decorated with a shiny thin strip. You can create such an effect on all fingers, or only on one of each hand.
- Looks good with stripes of different widths attached to one finger. Or, according to the same principle, but using the same thin ribbons, place them at the same distance along the surface of the plate to create the effect of a vest.
- Geometric figures on a plate of symmetrical, asymmetric and chaotic shapes, decorated with strips of tape of different thicknesses, will create a complex extravagant composition. In fact, even a beginner can do it. The main thing is to show patience and accuracy.
- Fashionable, complemented by brilliant decor, will look interesting and exclusive. A thin strip will emphasize the contour of the alveolar area.
- Another idea of nail art was a design made against a background of light varnish. Decorative strips are glued over the base, creating regular or chaotic zones. After that, colored varnish is applied to the surface of the zones in one or more tones. Next, the strips are removed, and the surface is fixed with a fixative. It turns out a combination of colored fragments on a light basis.
Liquid tape for manicure
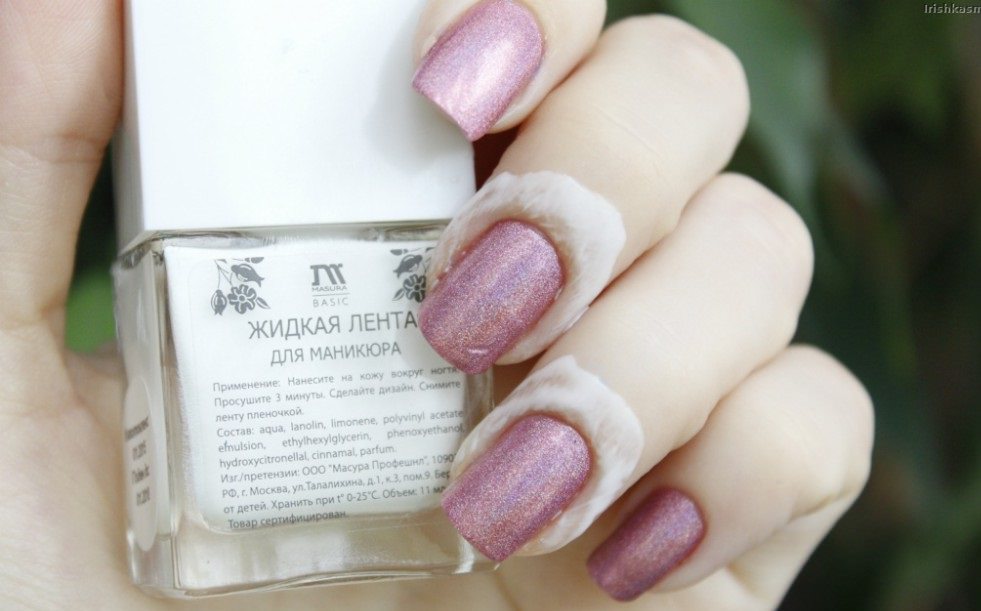
Not so long ago, a liquid tape appeared on the market for manicure products. The product is produced in bottles similar to varnish. The tool greatly facilitates the process of decorating nails and practically eliminates errors in the performance of work, because no matter how hard you try, the coating still protrudes beyond the contour of the nail plate.
This problem is especially known when performing a water manicure, gradient, with a hole, using plates for. Until recently, tape, which had to be cut and pasted around the treated area, helped to avoid such a nuisance. This saved the situation, but it is difficult to call the process convenient. Therefore, with the advent of liquid tape, it has become much easier to perform decoration.
The principle of action is to apply the product to the skin around the plate. This can be done with a brush, which is fixed on the bottle cap. After 3-4 minutes, the liquid composition solidifies, turning into a film.
After performing manicure procedures, the film is carefully removed, and with it the varnish that has gone beyond the area of \u200b\u200bthe nail plate. Thus, the liquid tape serves as an auxiliary material that prevents the lacquer from escaping the nail border. The liquid was previously produced only in pink. Now the assortment has appeared products of different colors.


