Manicure with adhesive tape: video tutorials and photos, step by step guide
How often have you seen perfectly even geometric patterns on the nails of fashionistas? Agree, they claimed that they achieved such a result on their own at home and did not want to reveal their secret. After reading the article, now you will learn how you can make such a manicure yourself. This is a completely simple way, and your assistant will be ... Ordinary scotch tape!
Adhesive tape or special nail design tape: what to choose
Manicure with adhesive tape takes a lot of time because of its cutting. Pieces of glue remain on the scissors, and your patience is only enough to make a design of several nails.

Adhesive tape for manicure. As you can see, it is very thin, with its help you can quickly create neat lines.
Scotch tape for nail design solves the problem of preparing thin strips in no time! One has only to purchase the necessary colors in the store and use them to perform a perfectly even manicure. With the help of ready-made thin strips, you can make a manicure of any complexity. Scotch tape, by the way, can be left on the nails - such a manicure looks incredibly beautiful, and most importantly, your nails will always shimmer in the sun due to the shiny surface of the tape.
What can happen if you do not remove the tape from the nails. Click on the photo for a closer look.
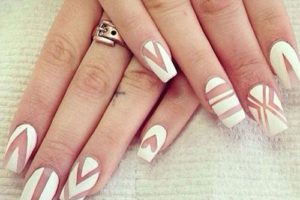
Experiment and make diagonal, vertical, oblique patterns. The tape must be fixed with several layers of clear varnish or Top Coat. So it will not peel off and will last on the nails for several weeks. Despite all the obvious advantages of the tape, adherents of traditional manicure tools will never fail if they remain true to tape. This material is much cheaper and allows you to create strips of any thickness and shape. By the way, curly stencils can be made from adhesive tape, for example, a heart, as shown in the photo:
Watch two videos below showing how to use nail tape.
The first is more sensible, but the second can also be useful if you are serious!
How to do a manicure with tape, step by step guide
The person who invented nail tape should be given an award, as it is good not only for stationery purposes, but also helps to make wonderful designs on nails.
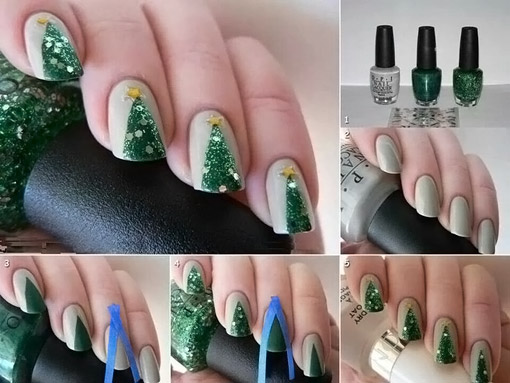
The photo below the algorithm for creating this type of manicure shows how nail tape helps to make it easier to make a beautiful pattern in just a few steps:
- Stage one! Choose a color palette.
In any manicure with patterns, a combination of three varnishes of different textures will look spectacular: glossy, matte and shiny. - Paint all nails. Remember that before this you need to polish your nails, give them the same shape and remove the cuticle.
- Third stage.
Take a transparent or colored tape and cut off the necessary element with scissors. Think over the shape of the pattern in advance so that it is easier for you to determine the length and width of the adhesive tape. Next, you will have to stick the tape on the colored nails. The varnish must dry completely, otherwise it will begin to lag behind along with the adhesive tape. If you have a little time for a manicure, you can do the pattern the next day after applying the coating. - Paint over the area free from adhesive tape with any color and let dry. Remove the tape sharply, remove the adhesive layer that remains on the nail.
- Final step.
At the end, glitter, a sticker or any other decoration can be applied.
And here is the video version of the lesson!
And another video, this time with tape and foil! An unusual idea.
Best Ideas
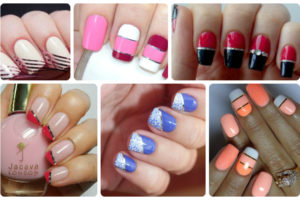
The marine theme reminds of the warm summer days spent at sea, even when there are only a few months left before the holidays.
For a change, you can make blue and white stripes on your nails, reminiscent of a vest, using tape or tape. A strip can help create a beautiful French manicure, as shown on the ring finger.

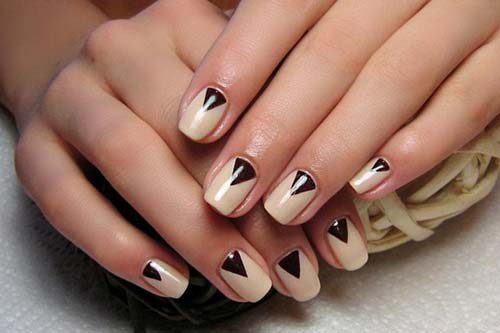
Of the geometric ornaments, triangles are still relevant.
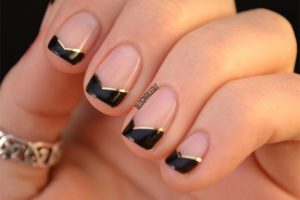
Triangular jacket with tape for nail design.
The triangular jacket is beautiful in itself on both round and square nails and does not require additions. A smile can be colored in one or more colors. The moon jacket, which is based on a triangle, will suit both a teenage girl and a self-confident business woman. To make such a manicure, by the way, one of three tools of your choice will help you:
- Triangular stencil;
- Adhesive tape;
- Scotch.
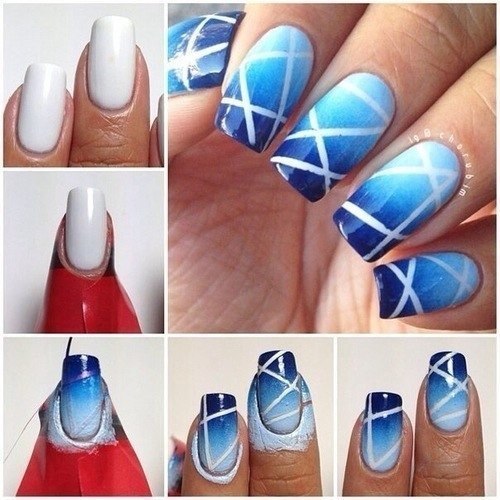
Alternative way using a thin brush is suitable only for the most skilled craftswomen who can independently draw a hole and fill the free edge with varnish. Not everyone will get a thin line! A great idea for a duct tape manicure is to use a gradient as the top layer.
Looking at the photo, which shows the phased progress of work, it will not be difficult for you to do it yourself: a base polish, adhesive tape or adhesive tape is applied, as well as two varnishes mixed on the sponge.
As you can see, tape nail designs can be done on your own by borrowing a few ideas from tutorial videos and fashion magazines. You only need to apply varnish and come up with an application - it all depends on your desire and imagination!
In contact with


