Negative space in graphic design ‹ Virtual School of Graphic Design. Frame space in composition
When working on a photograph, we are always limited to a rectangular frame. We are free to use the space given to us as we please. We can include some objects in the frame, leave others outside the scope of visibility. We can choose the main characters and intensify the accents on them, or, on the contrary, create abstract or graphic compositions where we are interested in pattern, texture or rhythm. Nevertheless, no matter what frame we build, we always work with space. At the same time, it is very important to understand that space is not just a place where we can place our objects. Space itself is often an object.
There is such a concept - negative space. Usually this is the name of the space surrounding the main object of a photograph or drawing. negative space, despite its not a positive name, can be very good means of expression. With it, we can achieve a variety of things.
1. Make the photo breathe, fill it with air.
2. Select one, unlike everything else, object, favorably emphasizing the necessary contrast.

3. Create a uniform background for a clear and readable separation of plans.

4. Create the illusion of the infinity of the space inside which the main subject lives.

5. Emphasize the contrast between objects, incorporated into the photograph by the author.

But most importantly, the correct use of negative space makes the photo simple, concise and readable. Such photographs are very easy to perceive, they instantly resonate with the viewer, who reads the statement of the photographer without barriers.
In addition to negative space, there is dead space. It also surrounds the main subjects, but it works in a completely opposite way. Dead space is filled with many distracting and hard to see details. It interferes and obscures the statement of the photographer, and the first thing you want to do when viewing photos with dead space is to immediately get rid of it.
In this example, bushes with red leaves are in the foreground, merging into one solid and unreadable spot, behind which is a zone of brown grass. Such a foreground is not justified in any way, it does not work compositionally, it is not aesthetically attractive, it is sloppy and chaotic. This space only detracts from the beautiful mountains in the background and the atmospheric highland houses in the middle. This is dead space.

The situation is similar in this example. The magnificent mountain range is lost against the background of a shapeless windbreak in the foreground. The gaze now and then returns to these fallen trees, and unsuccessfully tries to find harmony in all this. It is similar to the state of a viewer sitting in a cinema watching an exciting movie, but forced to constantly be distracted by the slurred conversation of a neighbor in mobile phone: at some point, you, willy-nilly, begin to listen to the whisper of the speaker, losing the story on the screen.
From this lesson you will learn the most important thing that can only be in the composition. The concept of positive and negative space allows you to work with any plot of complexity, regardless of the content of the frame, and, best of all, it does not have any rigid framework. I am sure that by the end of the lesson you will have no doubt that the composition is not right or wrong. You can also make sure that any rules do not just have exceptions, but, together with exceptions, fit into a more extensive and flexible system, which has no restrictions on the use.
It is no coincidence that I emphasize that the ability to recognize these spaces in the picture is extremely important for understanding the composition. In fact, only this is already enough to build a harmonious frame. The concept of spaces is the basis on which other subtleties lie, placing accents in the frame. Therefore, this lesson will be the most valuable for you in the course of training.
But before moving on to describing and applying the concept, let's talk again about how a photograph is made, as well as what rules are most common and why they do not always work.
How photography is born or what is linear perspective
Let's follow this simple and obvious process again. This is really necessary for the sake of one small conclusion, which is rarely paid attention to.
Let's start with the very basics. The camera, like human vision, only works because there is light that is reflected (or not reflected) from objects. There is light - we see. There is no light - we do not see. Reflected from any object, the light is collected by the lens, in a person - by the eye, and falls on a light-sensitive surface, in a camera it is a film or matrix, in a person it is the back wall of the eye. Any, even the largest, objects of the real world are displayed as small copies that light draws on a sensitive surface.
If it’s hard for you to imagine how all this happens, then remember the cinema. It demonstrates exactly the reverse process. A powerful light beam passes through a running film with reduced real objects, which forms an image on the screen.
This process of forming images of objects on a plane is called linear perspective. The name is not random. All this - the transformation of real objects into an image on a plane (this is called perspective) is subject to one simple rule: The closer the real object, the larger its image. Conversely, when removed, the image becomes smaller. The image size is in direct (linear) dependence on the distance from which the object is observed. Hence the name - linear perspective.
At least in in general terms you already knew all this, and if you didn’t know, now you can make sure that there is no secret in the process itself. Where the secret lies is in the management of this process. Someone will probably think about different lenses, filters and all sorts of technical tricks, but we are not talking about them at all.
The only conclusion that can and should be drawn is that the photographer does not work with real objects, not with their location in the field of the frame, not with their appearance and not with visible space.
The photographer works with projections of real objects, small images on a plane.
I will once again draw your attention to this. If you have never thought about it before, remember this simple phrase. From now on, for you it is “Our Father”. You will mentally repeat this every time you look through the viewfinder. If you have seriously thought about this question before, be honest with yourself and think carefully about whether you are starting from this principle when you design a picture?
A process that is absolutely identical in its essence occurs when we work with the application. Any volumetric real world the figures appear as carved flat silhouettes. These silhouettes are then placed on a flat surface, filling it, forming an integral image. Please note that when filling in the provided surface, we will carefully monitor that the objects do not overlap each other in an unfortunate way, so that important details are not covered, silhouettes are not lost. A natural limitation is that in one application it will not be possible to fit an infinite number of objects, because at some point it will all turn into a mess, the drawing will be spoiled.  Photography works according to the same principles: you must not allow some objects to interfere with the perception of others, you need to carefully monitor that the frame does not “overflow”, does not turn into a heap. Leave only what is really important.
So, when we talk about the filling of the frame, about its content, about all these perspectives, volumes and projections, we are talking about only one thing: in the image itself, in the frame, in the picture, in the photograph (call it what you want) there are essentially no objects , no volume, no depth, nothing that we can see there. For the photographer, there is only a set of silhouettes, shapes, lines, transitions of light and color. Even if you understand this very well, it is not enough. Throughout the course, we will not only learn to see this, we will learn to think so. Only in this direction.
Landscape, portrait, still life - there is no difference. Emotional saturation, semantic load, image creation - all these are secondary components that are not capable of creating a successful image on their own. It all starts with working on organizing the image plane. This small two-dimensional space must be filled with the same two-dimensional projections. Imagine that the whole world around you is solid cardboard posters, flat pictures different shapes that are placed around you. All you need to do is choose the one that interests you the most and, having removed all unnecessary cardboard from the frame, press the button.
If you think about it, you've done all this before. Somewhere more consciously, somewhere less. We have already managed to get our hands on a little and you can see that the pictures have become better over time. You already have some preparations and techniques, even if there are very few of them, but they work. It’s more or less clear that it’s worth shooting like this - and it will almost always turn out well, but you definitely don’t need to shoot like this, because all these pictures are then sent to the trash. You are already familiar with a number of rules that tell you how to do it and how not to do it. Here we will talk about them again. Or rather about why they do not always work.
This we did not pass or when the rules are wrong
Let us briefly list the rules by which the basics of composition are taught. You are probably familiar with all of them. If not all, no need to remember anything, they will no longer be useful to you.
Layout rules:
● do not place the main object in the geometric center of the frame*
● do not place the main subject on the edge, close to the edge of the frame or in a corner
● do not divide the frame by the horizon line in half
● do not divide the frame with a vertical line
● take into account the direction of forms, movement, gaze
- a reservation is always made to this point that in some plots this rule can and should be neglected
Hand in hand with these simple guidelines is the ubiquitous rule of thirds, or “golden ratio.” Whatever you call it, the essence is more or less familiar to everyone, this is our favorite “grid”, which seems to be the basis of everything and everything (#).
 Strict adherence to the rule of thirds is not always necessary. But it looks great in this photo.
When does it all work? in simple situations.
We take a cup, put it on an empty table, point the camera, place the cup in the “lower right” crosshairs, press the button, we get a simple and concise result.
Another example.
We go outside, point the camera at a car driving past us (driving to the right), place it somewhere on the left side of the frame, not at the edge, just below the middle, press the button - we get an ordinary, but “correct” picture. Please note that already in this example we cannot clearly speak about the crosshairs of the grid, because it is completely unclear which part of the car to catch in this crosshairs.
There are a lot of such simple scenes that can be filmed. And if you have decent material, you are almost guaranteed to get good pictures that you are not ashamed to show. But what to do when the plot is not simple?
There is one incredibly simple and common situation that confuses all of these rules. In all formulations, we are talking about a certain main object. And that's not lucky - the main object is not always the same.
Two people, three cups, five cars and one bicycle... Under these rules, nothing can be done with them. Imagine this picture: close-up two cyclists ride from point A from the center of the frame in different directions, one looks up, the other at the clock. The brain will boil, but according to these rules, it will not be able to come up with anything rational.
But the situation is worse: there is no main object at all. A “smooth” landscape without prominent parts and without a horizon (!), a chaotic pattern of clouds, a crowd of people (everything is in focus) ... Or such a problem: how to remove the mess according to these rules?
 The photographer conveys to the viewer not so much a specific landscape as an image of winter, using a set of equivalent elements for this.
There is a question that all these rules do not affect at all - this is the size of the plan. That is, how big should the main subject(s) be in the frame. After all, you can take more than one frame, based on these tips, but with a different scale of the depicted plot. In what direction should we move here? Is more or less better? How much space to leave around?
And the last question arising from the previous one - and it is also not regulated by these rules. What to do with the background? Not only is it not clear how much it should be, but you also need to decide what will be there and how it will be located in the frame.
Thus, we can come to a logical conclusion: the considered rules clearly work only in some special cases, they can be called general with a big stretch.
Moreover, one can go further and say that all more or less clear rules in photography are not generally applicable and have many exceptions. This does not mean that they cannot be used. But it is important to understand that in this issue there can be no clear definitions that would fit every plot, every angle. We need a more flexible concept, to which we are moving.
Concept of positive and negative space
 So, how to combine everything we talked about above into a universal system?
The concept of positive and negative space operates with only three components: these are the spaces themselves and the frame (frame). It should be noted here that this concept is applicable to any fine arts, not just for photography. It is also taught to future artists and designers. Let's see what these three elements mean, how they should be perceived.
Let's start with positive space. This is the area of the image that your main subject occupies. Simply put, it's just what you shoot. Everything around the main object is negative space. Both spaces lie within the frame boundaries. At first glance, everything is very simple. But at the same time, it is necessary to understand what is inherent in this approach and how to use it.
The first, and most important, thing that lies in this concept is that there is no emptiness in the frame. If you are photographing a bird against the sky, this does not mean that there is only a bird in the frame. There is also a space around it, the so-called. negative space that is part of the frame.
The same applies to more complex situations. For example, if one person is sharply selected from a crowd of people, then he will form a positive space, and all the rest will form a negative one. Interestingly, in this concept there is no division into plans (front, middle, back). Because, as we found out at the beginning of the lesson, the work is carried out exclusively in the plane. If objects on the front and middle planes, for example, have something in common in the plot, then they will form one positive space. Everything else will go into negative space.
Spaces can be divided into parts. If there is a donut in the frame, then the hole in the donut will refer to negative space. Thus, the negative space will consist of a large part around the donut and a small circle inside the donut.
Positive space can also be composed of parts. For example, when shooting several objects separated from each other. Hence the lack of a problem with applying to multiple objects in the frame. At the same time, if objects are in contact, overlap each other, then they are combined into one space.
Interestingly, the greatest difficulties arise when composing portraits and landscapes. Let's focus on portraits (of people). As a rule, the greatest attention is paid to the face, eyes. Their position in the frame is determined in the first place, and the rest is often forgotten. But a person never consists of separate parts, he exists only as a whole, all parts of the body appear in the frame at once. There is no head without a neck, shoulders without arms, etc. Each time we work not only with a separate part of the body, but also with a general silhouette, shape, and pose. This does not depend on the size of the plan. The concept of positive and negative space teaches us to move from the general to the specific: first determine the overall structure of the frame, and then work on the details. With this approach, you will never get a frame in which a person, visible from the waist up, will be at the bottom of the frame so that his head fits somewhere in the lower left crosshairs of the grid (and the rest of the image space will be filled with some kind of garbage).
With positive space, everything is clear, this is what we shoot. It's pretty clear how to work with it. The second part of the question remains: how does negative space work?
How does negative space work?
A little higher, we said that the negative space is determined on the one hand by the boundaries of the positive, on the other - by the boundaries of the frame. It is absolutely fair to say the opposite: positive space is defined by the boundaries of the negative and the frame of the frame. In a word, the negative space defines the positive. To avoid confusion, let's look at some examples.
The first picture is a normal photo. On the second, the positive space is highlighted in black, i.e. the position occupied by the subject. The third image shows negative space (shaded in black). Look at the outlines of the negative, you can easily build an idea of the positive.

On the basis of this phenomenon, it is possible to obtain an image where the formative space is not positive, but negative space.

Negative space can become an independent object. This approach is very often used in logo design.

Thus, we come to the conclusion that negative space does not just exist inside the frame in the background, but takes a direct part in the formation of the image. That is, inside the frame of the frame, we always work not only with the subject, but also with its environment. And this environment itself not only fills the space between the main object and the frame of the frame, but also participates in the formation of the final image that arises in the viewer.
Without forgetting that everything happens within the specific boundaries of the image, we can say that: any image is formed from two parts, two spaces that interact with each other, complement each other.
Recall the composition rule, which prohibits the subject from being aligned with the edge of the frame. Now you can look at it from a completely different angle. The problem is not that the object is strongly displaced in one direction or another, not that some small edge is cut off. The integrity of the negative space is lost, it ceases to define the boundaries of the positive, the balance is disturbed. The same applies to the division of the frame by a vertical line: there is a break in spaces, the connection is lost, the image ceases to be solid.
As you can see, there is one important word- balance. It means that positive and negative space must be in a certain balance. One cannot be infinitely larger than the other, and together they must form a single image. We will talk more about balance in the next lesson. And now your task is to learn how to isolate these spaces in specific subjects, in photographs.
No, friends, do not think that old Bob suddenly decided to delve into the psychological theories of emotions. Although, on the other hand, why not a topic for an article? After all, graphic design and human psychology are directly related to each other.
But today I want to turn to an equally important topic - the use around elements in design.
Any artist and designer in their work pays a lot of attention to detail, but sometimes they forget about a very important component - the negative, or, as it is also called, negative space. But the use of negative space is a key element of artistic composition!
So, get acquainted negative space- This is the area around the depicted object. Simply put, this is an area that is not occupied by content.
One of the first to use negative space in his work was American graphic designer Charlie Goslin. Many designers still draw inspiration and cite his work as an example.
The main feature of Charlie Grosin's work was his ability to create interesting graphic elements with additional meaning using negative space.
A good designer understands that the space surrounding an item is just as important as the item itself. In order to control the viewer's gaze, it is necessary to make the "negative space" active.
"Negative space" can become self-sufficient in composition, compete with "positive space" or support it. However, in a competent design, it should not distract attention from the main subject of the composition.
 With the help of negative space, many designers manage to create amazing logos. Here is one of the most interesting examples- logo of the American Architectural Center.
There are no absolute rules that define good design. However, there are fundamental principles of visual perception that must be followed to create. One of them is certainly the perception of the physical space occupied by a single graphic element in relation to other elements on the page.
However, negative space doesn't have to be white, or tinted with any one solid color. It can contain smooth, color transitions and even background objects.
Learn to see negative space!
In order to learn how to use negative space effectively, you must see not only the content of the page, but also its hidden meaning.
One of the tools that is used by teachers in art schools, became known thanks to the book of Professor Betty Edwards "Drawing with the Right Side of the Brain". In the exercise, students transferred an image from a photograph or drawing placed upside down.
Because the image was upside down, the students could not recognize the object in the drawing. So they automatically paid equal attention to both positive and negative space. As a result of this exercise, a much more detailed drawing came out.
Here is the most famous example with a glass and facial contours. Rubin's vase is an optical illusion, which, due to the negative space around the vase, seems to be either a glass or two faces.

Wide possibilities of "negative space".
Using the possibilities of "negative space" you can achieve:
- Feelings of airiness and elegance of the composition.
- Concentration of attention on the most important element of the composition.
- Ease of reading text.
- Spectator eye control. For example, from the title to the illustration, from the illustration to the text.
- Transferring the additional meaning of the work.
An Israeli illustrator uses negative space very interestingly in his pictures Noma Bar(Noma Bar). His drawings are concise, simple and at the same time witty. He published a book of illustrations "Negative Space" ("Negative Space"). This selection was published in The Guardian and New York Times Magazine.


Who will benefit from this article? Firstly, to all novice designers, as well as to all those who have already started their journey as a UI / UX designer, in a studio or freelance, but in one way or another experience uncertainty when working with content.
Article idea
She came exactly a year ago, when I started teaching design at an IT school. It was then that I realized that many students (like me when I started my design career) have problems with the correct placement of content. Usually it all came down to the fact that either I sculpted too much text, or vice versa, the amount of space around the text could be compared to the desert in Chile.
Recently, I came across a book by the guys from UXPin about negative space, which I translated, added a little of my experience and outlined all my thoughts in this article. I hope you find it interesting and useful!
So, let's begin!
negative space
The slides are taken from my report, with which I spoke in the Dnieper and Kharkov. Slides in English, because. An English version of the report is planned.
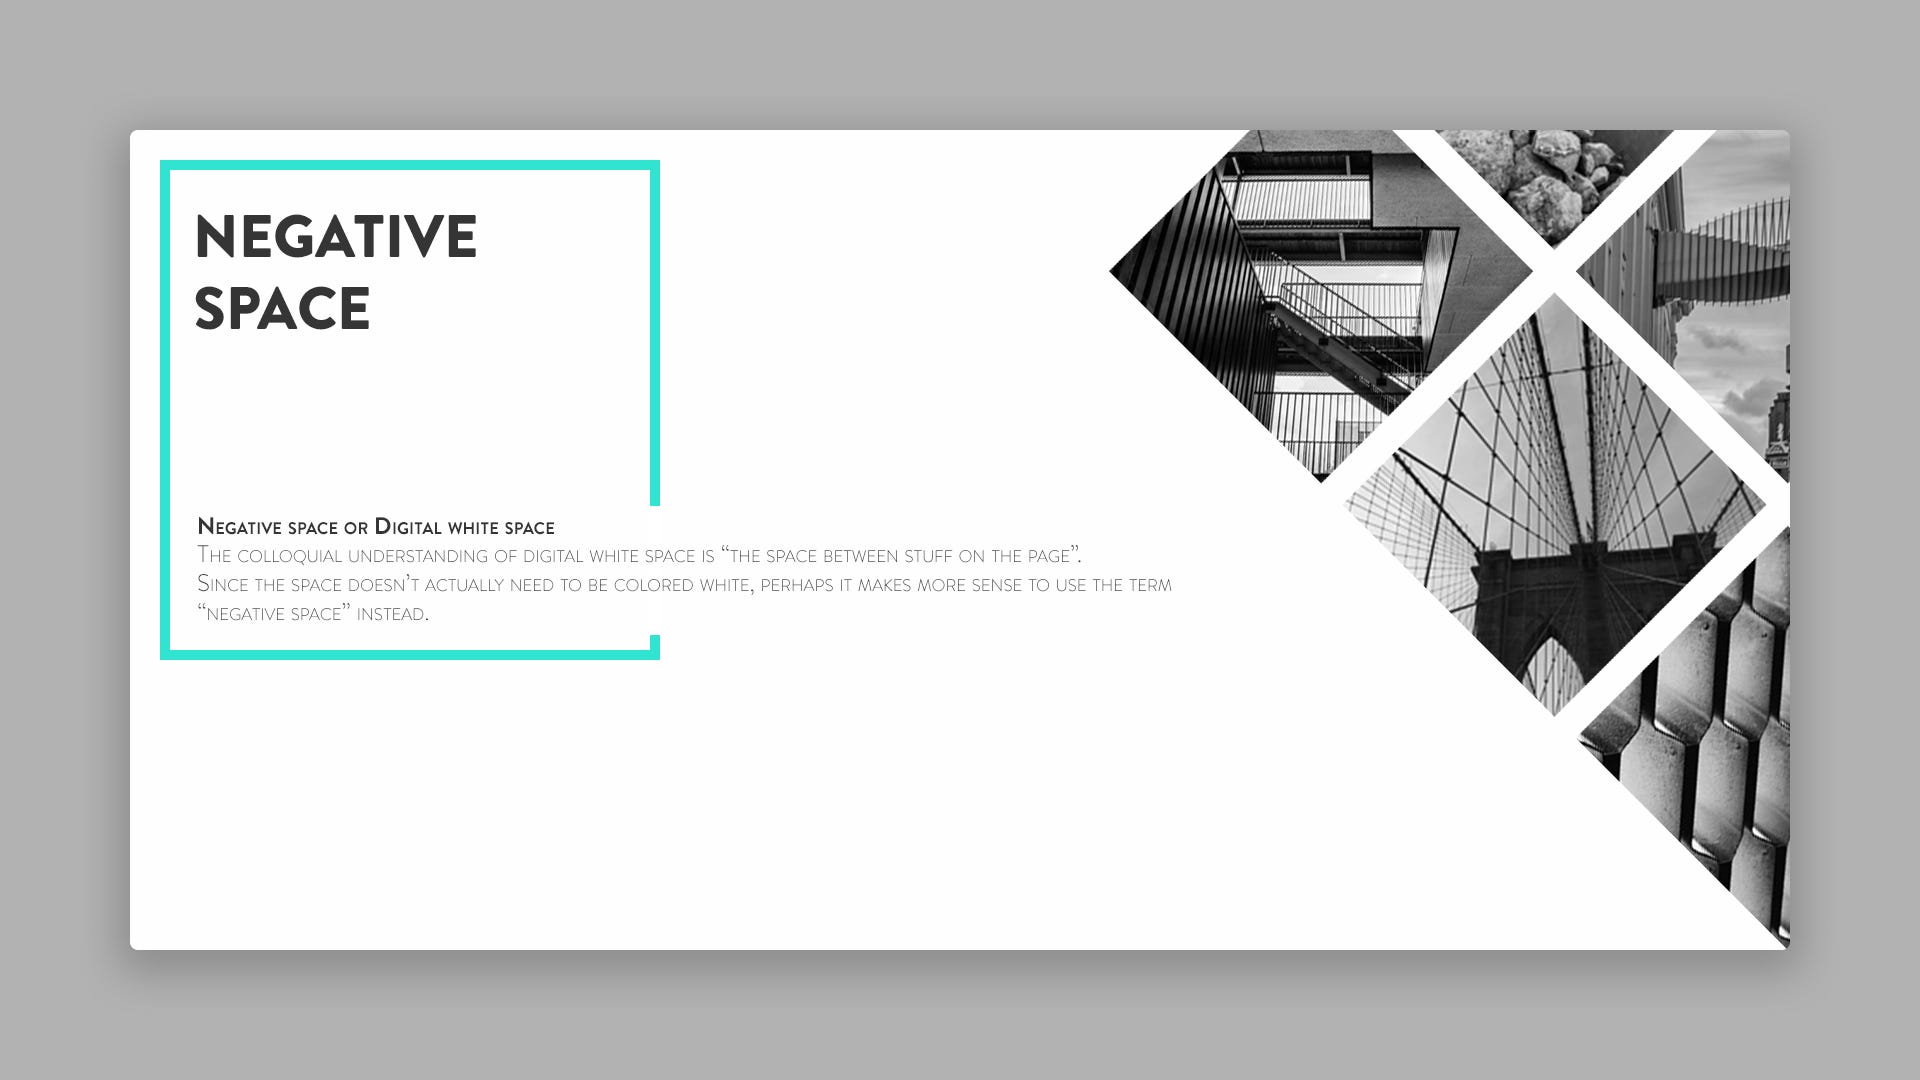
“Negative space”- This is the space between elements on the page.
Every website - is a digital display of the interface. Buttons, links, text, and other media need air. You can see a similar effect, for example, when looking at a good picture, where space improves the overall composition, for this they often use the concept “ big picture”.
Also negative space can also be used between smaller objects such as text or small images. Space often says more about individual elements than the page as a whole. It's like one big microcosm in the macrocosm: little things always affect the big picture.
Separation of negative space

There are a few various kinds negative space used in website layouts:
- Composite negative space- space for margins, padding and overall composition.
- Visual negative space- Space for graphs, icons, buttons or elements.
- - space between headings/paragraphs and lines of text.
Let's take the previous slide as an example. This is an example of an admin panel ( or Dashboard-a). Pay attention to how well each element, each button and block reads and looks harmonious, both in the overall picture and in relation to other elements.
compositional space here it is clearly visible in the indents between the blocks. We can clearly see the navigation block and the sub-navigation block, as well as the main content.
visual space here it is well reflected in the spacing between the small images and the main blocks, creating a visual distance. Visual elements are the middle ground between macro composition design and micro style content. pay attention to correct location icons and the space between them, blocks with the numbers 15, 14 and 28 look harmonious, and the content does not look lost in these cards.
Digging deeper, we'll see text negative space between text headings and, for example, in message blocks. In addition, note how text negative space used between thumbnail images and their titles.
macro and

The guys at UXPin often refer to “negative space” as “digital white space” in their book.
All styles of negative space can be broken down into 2 main categories: and . Larger sites include both categories in their layout designs.
is found when looking at the overall design, at the macroscopic level. As I mentioned, it can be called “big picture”, where compositional negative space captures the main focus. Designers usually start a new web project by creating a warframe or prototype that visually demonstrates macro negative space On the page.
Micro negative space adjusts the space between all the small page elements such as navigation links, image galleries, unordered lists, and page titles. Micro negative space can be used for media like images/icons ( visual negative space) or text such as headings/paragraphs ( text negative space). Like most detailed layouts, the example above demonstrates the presence of both macro- so micro-negative space together. macro negative space exists between each of the larger sections of the page, while micro negative space located between the inner content of the page.
After we have learned about what negative space is and its types, let's try to learn how to use it.
How to use negative space
Every website uses space differently depending on the nature of the content.
For example, you can leave a lot negative space on landing page because you want to focus on the call to action button.
Some online stores, on the contrary, have a lot of content that needs to fit in the layout. In this case, the need for negative space still doesn't disappear, but it's likely that the content won't be as big and carefree as we might see on a regular landing page.
The bottom line is that negative space must be contextual, which means that there are no hard and fast rules that apply to every website. But here are some general tips:

- Get a feel for your website and its organization- Limit to 15 points of interest for a page. Each element you add to the interface is assigned one dot.
- Compare your ideas with other similar designs- Analyze how other designers are using negative space in their layouts.
- Understand that relationships within content are determined by surrounding negative space.- Passive negative space creates "air", while active negative space leads the user's eye to a particular piece of content.
Spatial design features

This slide also shows a good use of negative space.
Composition - is gestalt. It is the whole website that emerges from the sum of its parts. To fully understand what works and why, you must study white space on a compositional and microscopic level.
Let's look at the example on the slide above. On the right, we have another online furniture store, but with a different design. Pay attention to how negative space works here: each product card (chairs) is a separate composition with its own negative space, which creates an emphasis on the content. In turn, these cards harmonize with each other and look good, due to the negative space around them. And the composition of these cards, in turn, fits perfectly into the overall picture of the site and complements the blocks with photos of the interiors.
Gestalt laws say - objects in close proximity will appear as a single “block”, thus negative space acts as a visual cue. But other elements, such as the theme gallery widget, are meant to be well separated. More space between text and images (combined with a contrasting color) forces visitors to turn their attention to the gallery widget, as nothing else is distracting. This is a handy trick for links/buttons or specific content if you want to add more interactivity.
Portfolio sites are another great source of inspiration to use. negative space, because designers pay great attention to the tasteful presentation of their work. The ideal website design includes all the visual information in a "spectacular gift box".
Practical use

Every website design is unique, so you should always link negative space with other design techniques that work well with each other.
Here are some tips for practical application negative space:
- Variety - good. Some designs may need less negative space, others may need a lot more.
- Priority - legibility and readability. Before you start designing, create a list of interface elements to gauge the scope of your content. After you're done, try creating some kind of rough content warframe to estimate how much space it takes for good legibility (how well you can distinguish letters and words) and readability (how well you can parse content).
- Break out of the vacuum. Use contrasting colors, commensurate font sizes, and asymmetrical negative space to add style to layout. Understand that negative space is a design element that encourages reaction and affects the perception of all surrounding elements.
Application negative space is both aesthetic and practical. It affects digital design in the same way it would affect a painting, but a website is not a painting. The site is designed to be interacted, clicked, scrolled and used by as many people as possible.
Practical negative space creates a structure around content that has a vital importance for the success of any design. Consider why when applying negative space it is important to know more about content space design.
Aesthetic properties of negative space

For more design immersion negative space, knowledge of other fundamental UI design principles is required. They are often close to the principles applied in the field of graphic design and they are all combined into a common composition.
negative space plays an important role in the final composition as it exists in every style of layout, whether it's the minimalist style of a design agency or a huge e-commerce company. Of course, you can follow the style of minimalism, but this is not always the only way. the best choice for every web project. Treat negative space as a design element that only you can measure the value of your work and success, as people will not be able to understand and appreciate it.
To sum up, remember:
- Negative space serves both content and design style.
- The space between large pieces of content will delimit it, creating blocks (sections) of the page.
- Extra padding around a particular segment of content draws the attention of visitors to that area because there is nothing else on the screen to grab attention.
Creating a Visual Hierarchy
We are all familiar with the concept of hierarchy in the real world. For example, when mentioning royal families, we clearly imagine who is at what level - princes and princesses, kings and queens.
Designers use hierarchy to show the superiority of one element/section over another. Of course, details like font sizes and font styles play an important role, but negative space can also help establish a connection between headings or paragraphs of text. Hierarchy - is what makes content easy to understand.
More distance attracts attention

When you make large distances between page elements, you are forced to remove "extra elements" that come across on the way. You can always use negative space in your interest because it is not directly visible to visitors. If you insert white space between pieces of content, you can draw attention to that area.
In case you are in doubt about how best to proceed - you should always prefer more negative space, smaller. Many websites unfortunately suffer from being overloaded with too much information, without enough "air". But this is only general rule and should not be taken as an unbreakable law.
Correct spatial proportions are only correct for certain content. What looks good in one layout may look bad in another. A delicate balance of space must be achieved through practice and study of existing site layouts.
Alternating Spatial Elements

When an element uses asymmetrical space, it stands out from other elements that surround it. This will always look bright, which is especially important if you are designing a part of the page where one link or button needs more attention than others.
Asymmetry is not always externally related to margins, padding, or protrusions. It can also be related to internal relationships, such as between small images or text alignment. For example, an image gallery may contain 5 pictures, where the average is slightly larger than the others, which is mainly used to attract attention. Asymmetry is great for focusing on a specific area on a page or on a specific element on a page.
Let's take a closer look at how asymmetry is expressed through contrast, spacing, and other design elements that complement each other.
Observed Contrast
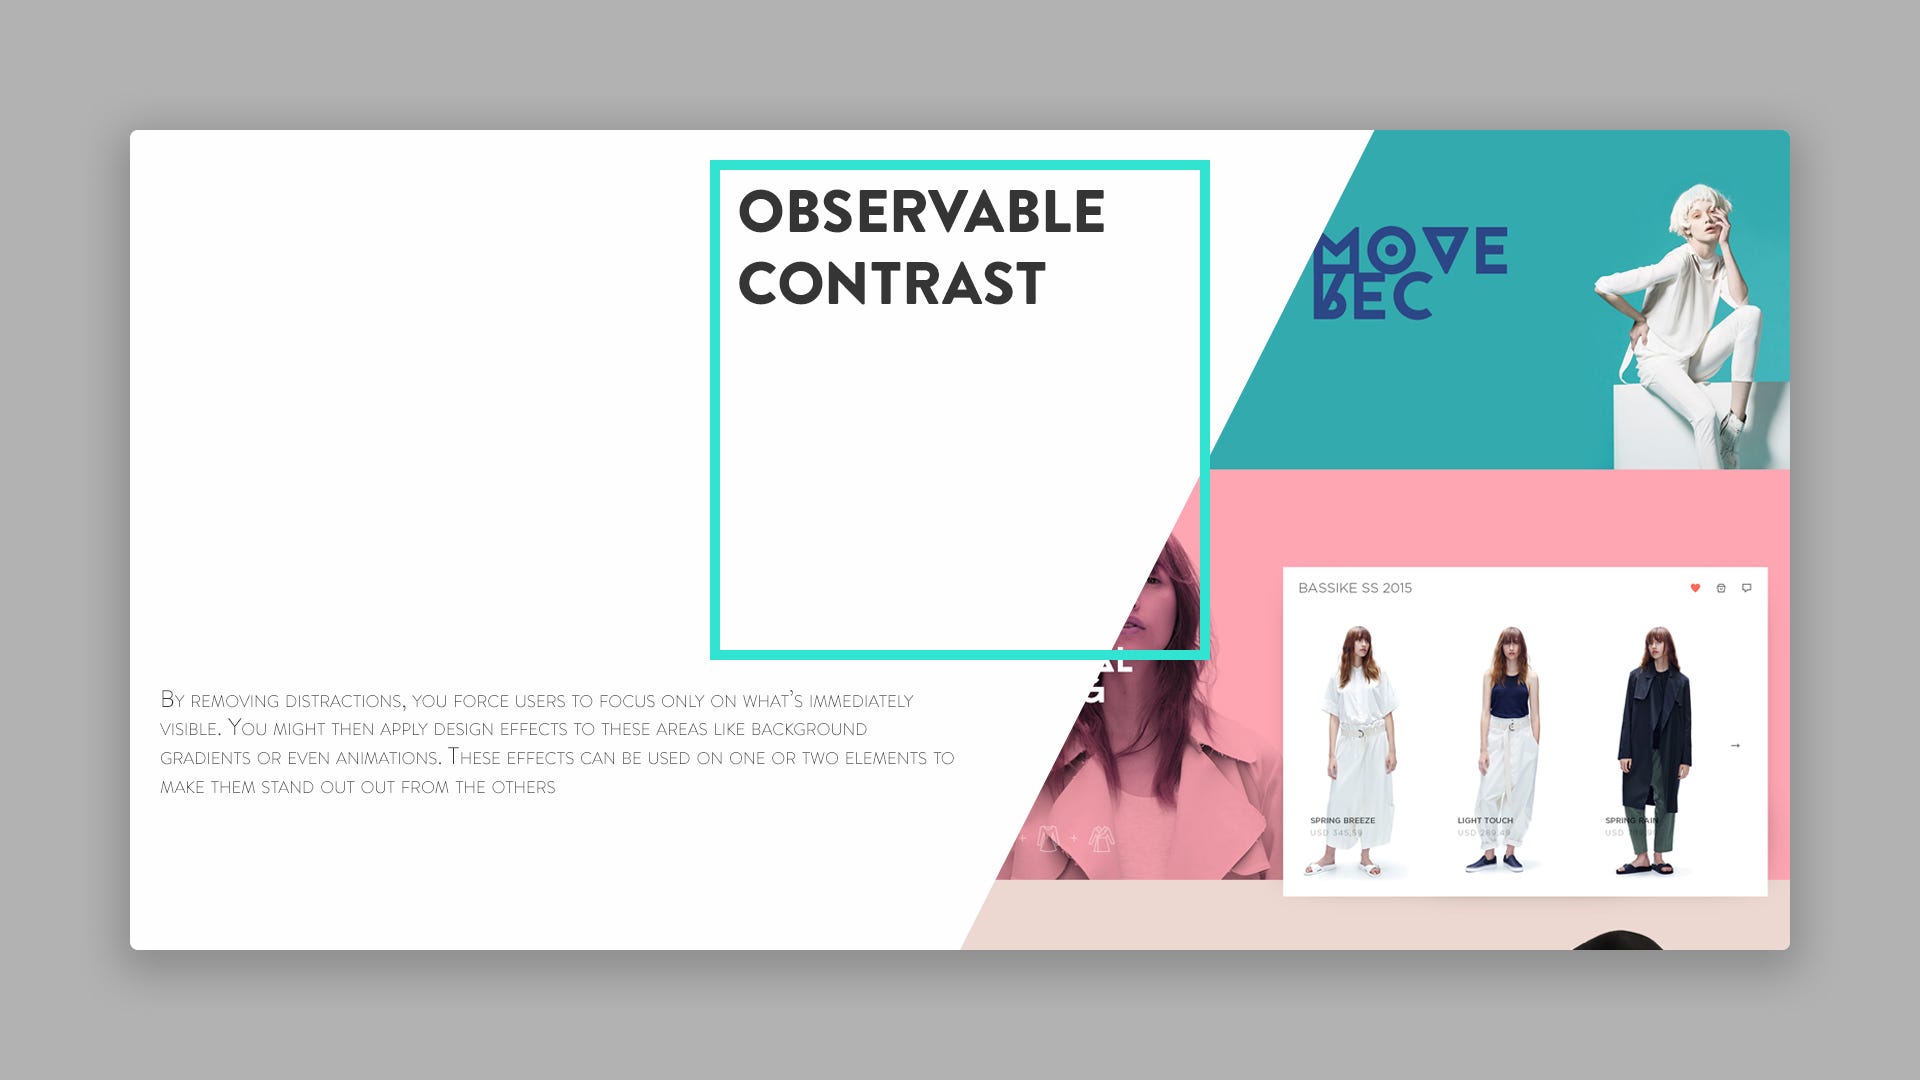
By removing all distractions, you force users to focus only on what immediately catches their eye. You can then apply design effects such as background gradients or even animations to these areas. These effects can be used on one or two elements to make them stand out from the rest. Use negative space it is to your advantage to draw the user's wandering gaze to certain elements of the page.
Space attracts attention

By dividing the page into blocks, you create a natural content hierarchy. With the help of unique styles (full-screen backgrounds, oversized typography, app screenshots), these divisions become even more obvious. Keep in mind that not all websites will benefit from dividing content into large sections like this, but it's still a very popular technique among designers and looks fantastic when applied and done properly.
Creating a luxury effect with space

The example on the slide is taken from the Marie Laurent website (http://marielaurent.fr/)
Although negative space Often seen as a technique for improving UX and usability, it can also be used for aesthetic purposes. Many websites use negative space as part of the design style, as it looks good and neatly emphasizes the brand.
Most layouts that benefit from aesthetic negative space, designed to focus solely on the content, without any distractions. Content can be concise, brief in minimalist layouts, or long and detailed. Original, non-standard use negative space as a design element, it creates a lofty, spacious vibe that resonates throughout the site.
Take a look at the example on the slide above. The homepage uses a minimal design style with flat colors, single group (family) typography, and plenty of white space. Layout is built around sections of content that grab your attention almost immediately.
Please note that most of the home page is occupied by the design of the work. In fact, portfolio samples are the most important component, and therefore get the most attention. In the area of content negative space separates text, buttons, and navigation links.
Aesthetically negative space also plays an important role in single page layouts.
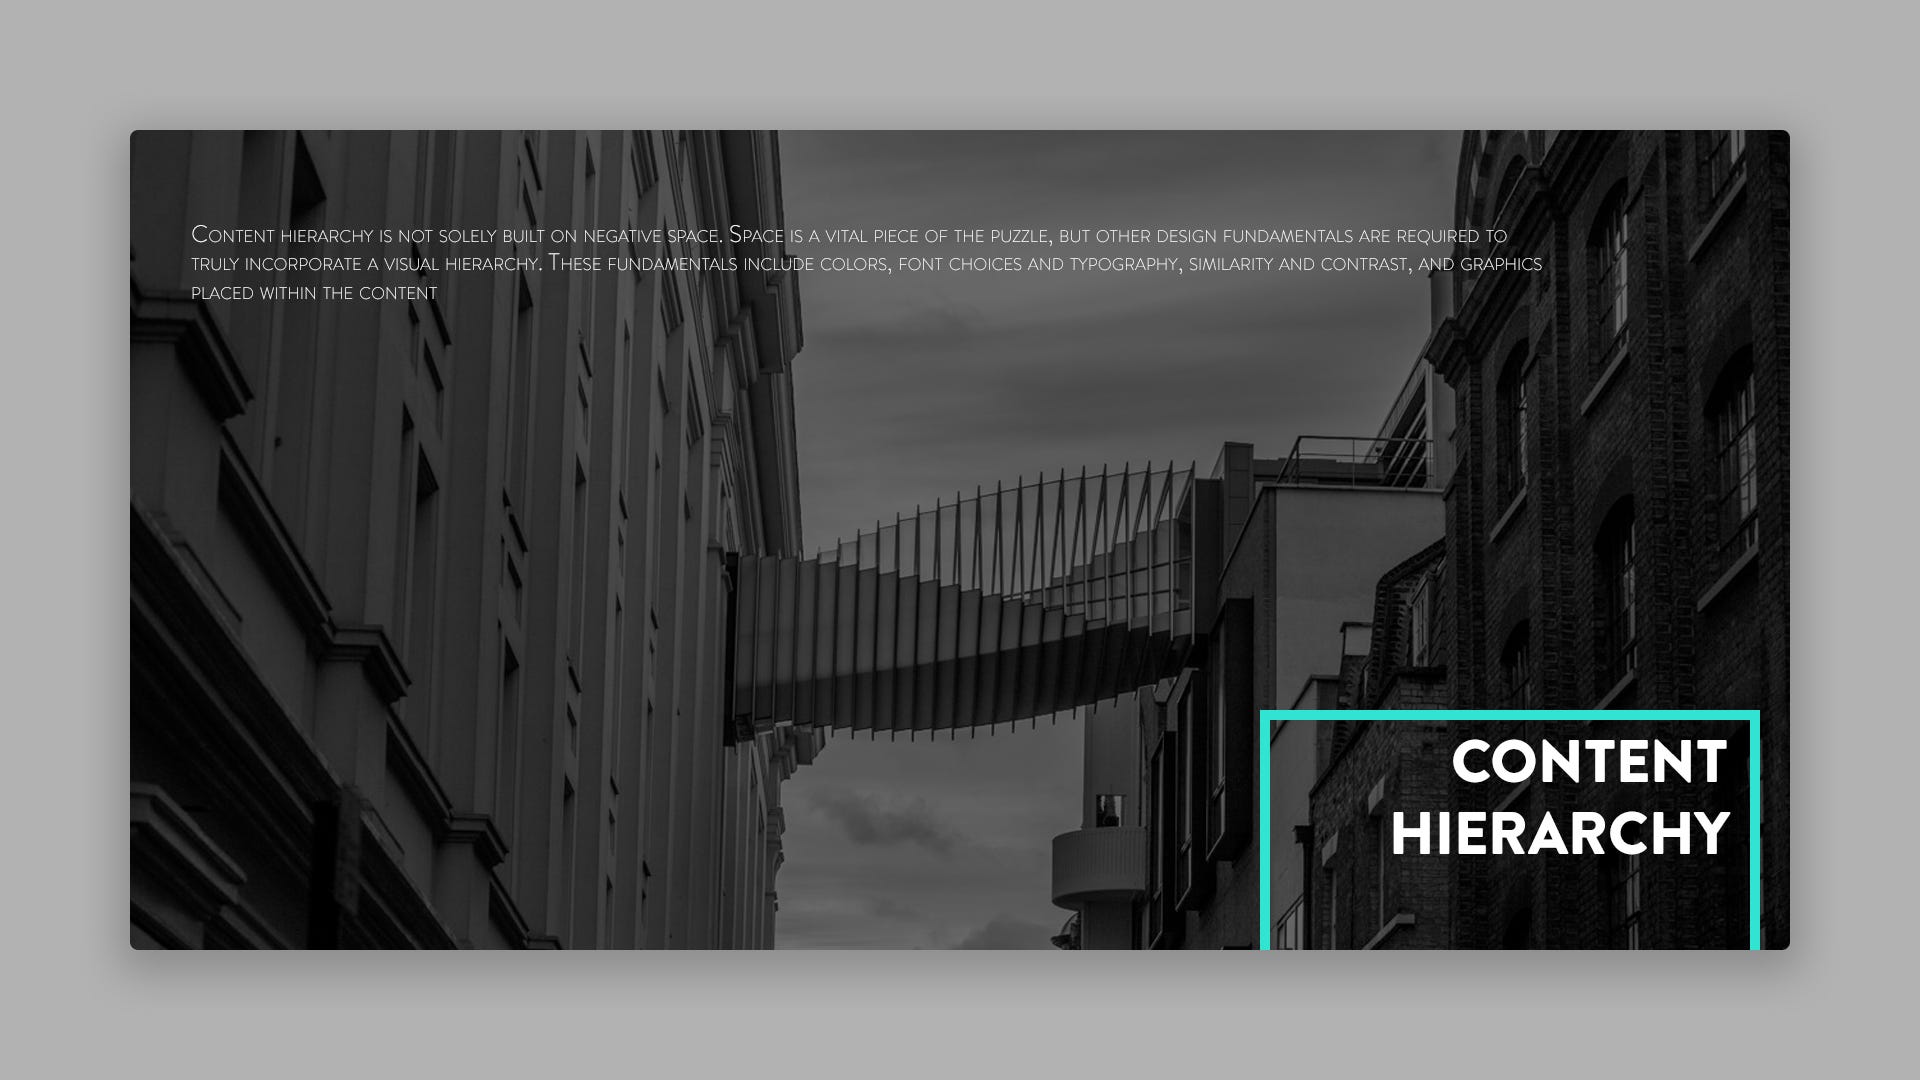
The content hierarchy is built not only on negative space. Space is vital important part puzzles, but other design fundamentals require you to accurately include visual hierarchy. These fundamentals include colors, font and typography choices, similarity and contrast, and graphics placed according to content.
The space located between all the elements dictates their relationship and balance. When creating a new mockup, you will probably be in doubt about space for a while if you are not an experienced designer.
Real understanding of exactly how much negative space should be used to create a visual hierarchy, it takes practice and it also means that there may be mistakes along the way. Confusion - is a big part of the learning process and the more you design, the more you will learn.
Create structured content and typography

Earlier, I talked about building hierarchies in the “big picture” of website composition. But as we dive deeper into typography, you also need to learn how to create hierarchies associated with specific text on the page. Regardless of the number of heading styles, it's your job as a designer to apply them in such a way that the hierarchy is clearly established.
Space between text is important because it helps define the content of the page itself. When users see a new heading, they need to understand if the content is transitioning to a completely new topic or if this heading is still related to the current topic. The right combination of size, color, and style of the title text helps create the right expectations for users.
Negative space between text shows how the content of the page is related. Headings with more space appear to be more dominant, while headings closer to paragraphs are seen as related in context. Bottom indents after paragraphs show the relationship between lines of text and their position in the hierarchy. All this again speaks of the skill of using hierarchy in the content to visually delimit the text on the page.
Header Relationships

Each heading should reflect its own unique style that also complements other text styles on the page. Brilliant use of headings comes with practice, but negative space should generally work the same regardless of the style of the headings.
Consider the example on the slide above. Note that the space between the “Features” heading is larger than between the other headings, indicating that this is the main heading of the entire section. Whereas the heading “Know your business better with free report” reads like a heading of just a block of text, which in turn has subheadings in bold. In all this structure, paragraphs (forming text blocks) also play an important role, which emphasize the dominant role of headings.
Take these ideas into consideration for page titles:

- The visual hierarchy should be obvious, through the use of space, size, color and/or text style. It should be visible even from a distance of 1-2 meters from the monitor.
- Place each subheading close to its first paragraph.
- Position text close to meaningful headings to convey your ideas more quickly and clearly.
contrast effects
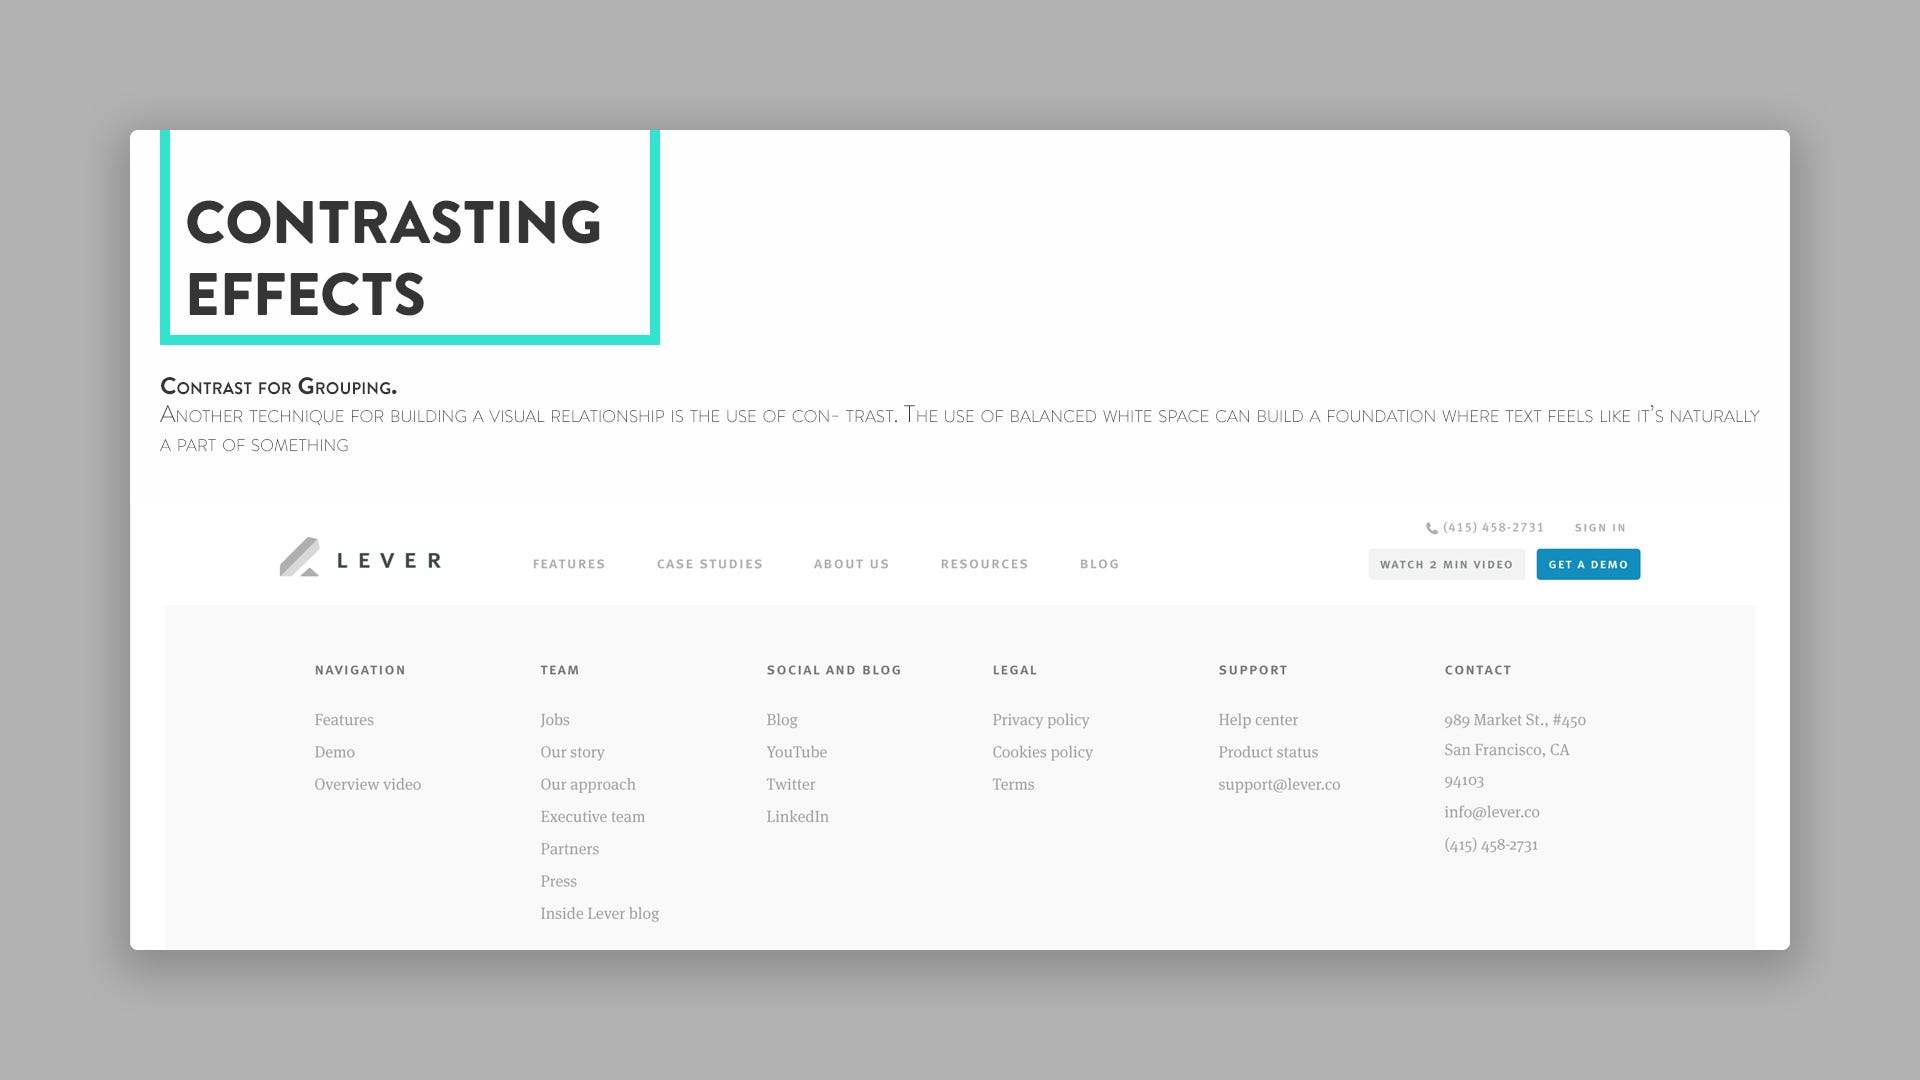
Another method of building a visual relationship is the use of contrast. Using a balanced negative space can build a kind of foundation, where the text is felt as a natural part of something whole (single). In the example above, on the slide, you can see that by combining the content into columns - these blocks are read clearly, and headings with highlighted text look more contrasting.
Navigation menus
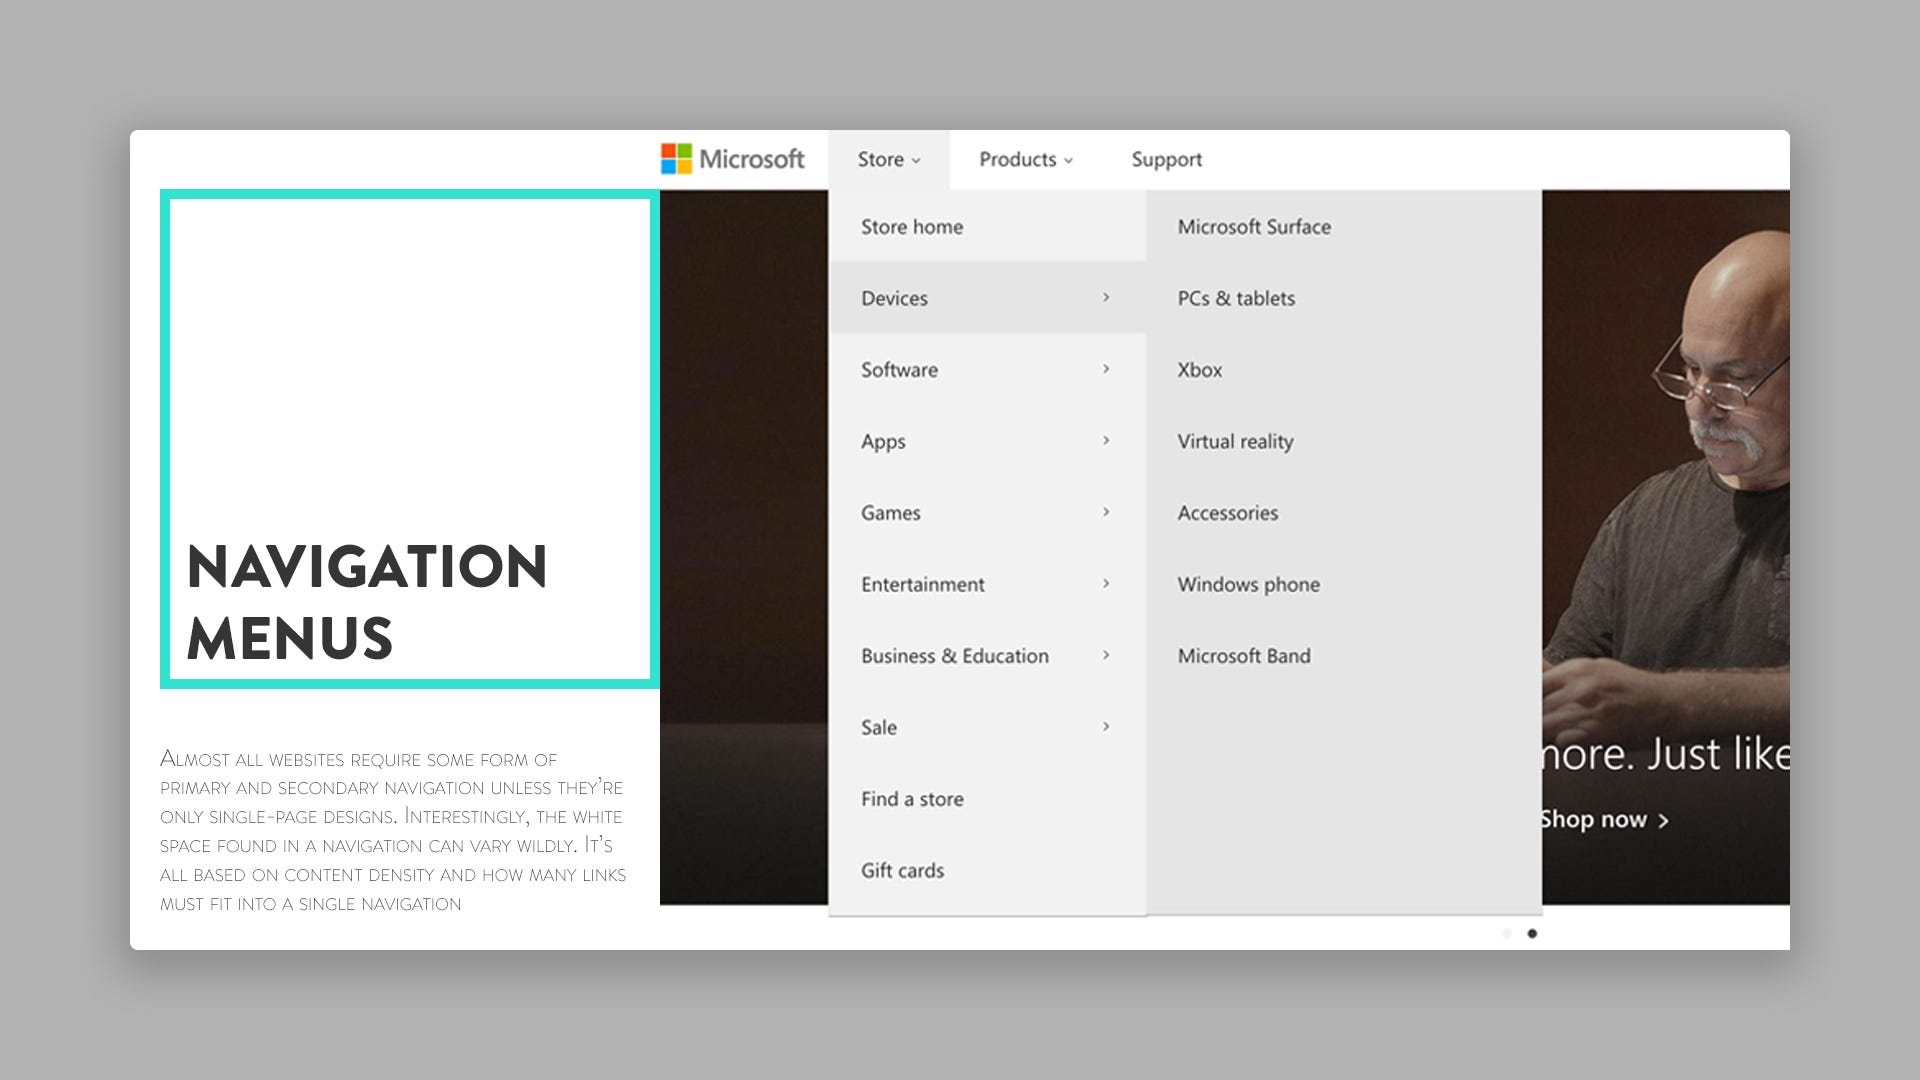
Microsoft's site most aptly illustrates the use of negative space in the navigation menu.
Almost all websites require some form of primary and secondary navigation, unless of course they are single page.
Interestingly, the number negative space, which is in navigation, can be different from each other. It all depends on the density of the content and the number of links that should be placed in one navigation menu. Many of the examples shown above are simple landing pages with a few links. The less content on the landing page, the more creative you can approach the layout of the navigation - for example, make the design of navigation links in the form of large blocks of typography or place them in the corner.
But when structuring a more complex interface, you need a stronger attack plan. Like, for example, Microsoft, which provides support for all its products (slide above). The design of the Microsoft website takes into account their great amount products ranging from tablets to Xbox consoles and games. It's a very delicate balance.
Their navigation menu looks like links with drop down menus. Each dropdown list uses a popup menu with secondary and tertiary product links. Needless to say, the Microsoft website contains a lot of content.
Much of their navigation - is exquisite use negative space. All links in their dropdown menus behave like block-level elements with large indents. Visitors can hover over any point above/around the link and it will become clickable. Following Fitz's law, creating large areas for navigational links is ideal from a UX perspective as it makes site navigation easy and enjoyable..
Readability increases as more space is added between text, so make sure to add plenty of extra space when placing multiple links in the same menu. In this case, a generous amount of negative space helps to eliminate the effect of oversaturation due to too much a large number interface objects, as Hick's law says.

When designing navigation menus, you should always think about content density. How much content should be available on this part of the website? You can find the answer if you think about some of the options in your navigation design and thus understand how many negative space must be applied. Some tips for styling navigation menus:
- Adjust the size, font and space according to the number of links.
- Smaller links can also grab attention with contrast or a scrolling navbar.
- Extra space creates more space for the link and it is thus highlighted. Consider space, both vertically and horizontally, to create a "link block".
- Different sections of the page require different amounts negative space. The top navigation of a website can be very different from the footer navigation.
Long paragraphs

The appearance of the content will change depending on its type. For example, an online news magazine will use paragraph styles that are different from those used by a small gardening blog. The amount of content, the length of the content, and the level of detail - all come into play when it comes to paragraph styling.
Try a design with text large enough to be readable from 2m away from the screen. The relation to text size is very similar to the relation to white space, in the sense that it is generally better to make it larger than smaller. But, nevertheless, exercise moderation and restraint.
If the text is too large, it will simply take up more screen space and require scrolling. But if it's too small, it may simply be unreadable or visitors will have difficulty with "vertical rhythm" (a well-established, clear, strict pattern and this will make their eyes move slowly from line to line.
Two important things to keep in mind - are margins (padding) and line height (the space between each line). Text size in paragraphs enforces both of these values, since white space is size dependent.

Here are some good rules of thumb:
- Don't use a line height greater than a normal, average line of text.
- The EM Unit CSS font is ideal for creating consistent sizes across all browsers.
- The line height should often be slightly larger than the font size.
Paragraph spacing may seem like a tricky topic, but it's an important topic, especially for text-heavy sites. The indent from the bottom paragraph should be significantly larger than from a typical line of text. The indents from the bottom paragraph should be large enough so that you can visually tell when the paragraph has ended.
Once you've determined the size of the website's text, it becomes much easier to play with line heights and determine the amount of space to indent. The goal here is clarity and structure. Each new paragraph should be obvious without any doubt. The key is the proportional space between each block of text.
Conclusion

Negative space in typography directly affects the overall composition and reduces the number of elements on the page at once. In typography design, context is king.
Paragraphs located on the page may require more indentation than paragraphs located on the sidebars. Links in the header may look better with extra padding, but links in the footer, on the contrary, will look nicer with a little bit of padding. There are no hard and fast rules, only best practices and your experience to guide you.
Also remember that typography always comes with its own hierarchy just like page structure. Use negative space to emphasize certain areas or group small blocks of text together. Lots of practice - the best way to improve your perception of quickly recognizing spatial compositions that will be best for each specific web project.
When it comes to usage design negative space, remember that space as an aesthetic quality always comes in the background, and its use as a design tool should always be the main and main one. Space creates relationships, defines hierarchy, and highlights content - Always keep this in mind when considering how to reduce visual noise.

If you were interested - subscribe to my pages in social networks, and also follow my updates. Thank you!
We often think that silence, emptiness or colorlessness is bad for us. We take them for granted without thinking that they are a solid foundation of contrast. Only silence allows us to understand the meaning of sound. Only negative space allows us to feel colors brighter and deeper as they appear on the scene. And only the absence of air allows us to understand how important it is. Today we are talking about air in design. Let's talk about negative space.
Basically, negative space - or blank space as it's often called - is the area of a layout that is left empty. This can be an area not only around the objects that you place in the layout, but also inside them. Negative space - not only defines the boundaries of objects, but also creates the necessary connections between them in accordance with the principles of Gestalt and creates an effective visual composition. Because of this, white space is a legitimate design element that renders big influence on the perception of the user interface.
"Negative space is like a canvas: it's the backdrop that holds elements together in a design, allowing them to stand out," says Mads Sogaard of the Interaction Design Foundation.
Negative space in graphic design is often found in logos, illustrations, posters and lettering, where it becomes an active part of the visual presentation, making key objects even more expressive. For example, in the blog illustration below, we can see how the background element (the moon) plays the role of contrasting negative space, making the astronaut more vibrant and dynamic.

In the design of user interfaces for websites and mobile applications the use of negative space is a significant factor in the high usability and navigational ability of the interface. The negative space around layout elements is also called macro space, while the space inside those elements is micro space.

What is the difference between white space and negative space?
Short answer: no difference. These concepts are completely interchangeable.
Why is this phenomenon reflected in two different terms? It is easy to answer if you trace the origin. The term "white space" comes from print design, since when pages were mostly white, so there was white space all around, between letters and symbols, and around illustrations. Used in design today, the term has nothing to do with white: it's all about white space, not color. The term "negative space" comes from photography: in photographs, positive space is what attracts attention (objects), and by extension the background is negative space.
It's important to remember that negative space in web design doesn't have to be all white - you can use any color, texture, solid pattern, or background image.
Why is negative space important?
Imagine that you have entered a room completely filled with various objects. Shelves, boxes, bags, piles of books and clothes, a table full of various things. Can you concentrate on such conditions? Do you really need all these things right now? Can you find what you need and how long will it take? This is the same experience that users will experience when opening pages without the free air of negative space.
Both clients and some designers may want to put as many elements and features as possible on a single page or screen, thinking that this will be useful for consumers. But this is a mistake: in fact, users do not need everything at once. Moreover, too many elements without enough air greatly increase the level of distraction: overloaded with information and interactive elements, and users have to make an effort to find what they need. As Aarron Walter observed, “If everything is screaming, then nothing is heard.”
Among the benefits of the thoughtful use of negative space in design, we could mention the following:
- it supports page reading;
- it improves the visual hierarchy;
- it maintains a visual connection between elements;
- it provides enough air to the page so it doesn't feel cluttered;
- it focuses the user's attention on the main elements and reduces the level of distraction;
- it adds style and elegance to the page.
For example, let's look at the Big City Guide landing page. Here the designer uses a background photo, and it plays the role of negative space. Moreover, the elements of the photo and the lettering of the main element are interconnected: this makes the negative space an active element of the design and gives the page a coherent harmonious look.

Proper use of negative space can have a significant impact on the following user experience factors.
Readability and readability: If there is not enough space between elements, they become difficult to read and require additional effort to read them. Balancing negative space, especially microspace, solves this problem and makes reading more natural. Thus, negative space directly affects the effectiveness of typography on a page.
Branding: If you review any logo, you will find that designers define the appropriate amount of negative space around it to make it feel right. Violation of these rules spoils the perception of the logo.

Based on this, negative space affects visual perception in such aspects as:
- text content;
- graphic content;
- navigation;
- brand identity.
Let's look at a few examples. Here main page The Big Landscape. Without any visual frames and tables, due to the balanced use of negative space, the designer creates a strong visual hierarchy and allows the user to scan different blocks of content in seconds. Thus, the design looks organized, but also light and airy. White background and layout make it look like a magazine page that harmoniously informs the reader about the purpose and nature of this site.

Another example is the Upper app, where the negative space is black, which creates a great contrast with the main interface elements. Only one straight line is used for the entire screen. However, all the layouts look organized and well-read due to the ample amount of air and no distractions. The space also maintains stylistic elegance to promote aesthetic satisfaction.


