Finished colorful design and 4 congratulations. Coloring pages letters from paper download and print for free
You are in the paper letters coloring page. Coloring page you are looking at is described by our visitors as follows "" Here you will find a lot of coloring pages online. You can download Letters from paper coloring pages and also print them for free. As you know, creative activities play a huge role in the development of the child. They activate mental activity, form an aesthetic taste and instill a love of art. The process of coloring pictures on the topic Letters from paper develops fine motor skills, perseverance and accuracy, helps to learn more about the world around you, introduces you to all the variety of colors and shades. We add new ones to our site every day. free coloring pages for boys and girls that you can color online or download and print. A convenient catalog compiled by categories will make it easier to find the right picture, and big choice coloring pages will allow you to find a new one every day interesting topic for coloring.Today it has become very fashionable to use huge letters to decorate the interior, both everyday and on the occasion of the celebration of any events (Birthday, New Year, wedding anniversary, theme party etc.).
You may have noticed on the pages of fashion magazines about interior design letter-shaped sofa cushions, letter-shaped wall photo compositions, etc.
In this article, the news portal "site" has prepared for you several original ideas how to design home-made large volumetric letters using improvised materials.
Letters for decoration
Beautiful letters for interior design
To make large letters of this option, you will need cardboard (use old boxes), scissors, glue and knitting threads in bright colors.
Cut out neat letters from cardboard (use stencils for this or use a ruler). Then coat the cardboard letter with PVA glue and start winding with threads. Try to wrap evenly, then the letter will turn out beautiful as a result. Finished work can be decorated with artificial flowers, brooches or appliqués.
Large volume letters

To make such original letters, you will need to cut out letters from wood.
Then paint them. In our case, black paint was chosen.
Now grease the letters with glue and stick pre-printed photos on them so that you get a photo collage.
DIY big letters
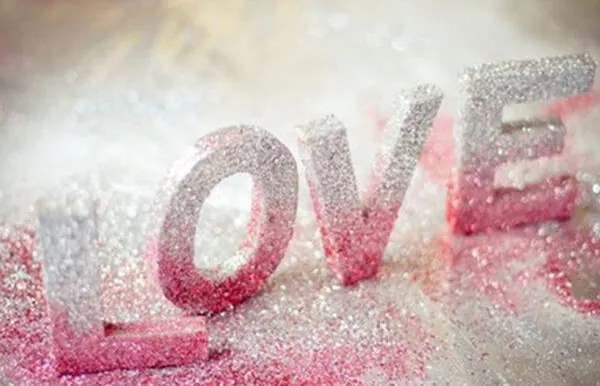
For a glamorous party or an art deco interior, these festive bright letters are perfect.
To make them, you will need a thin sheet of plywood from which you need to cut out the letters. Give the letters the desired shade with paint, and then sprinkle with glue with any sparkles or beads.
You can cover the letter with one color, or you can experiment with two or even three colors.
Letters with light bulbs
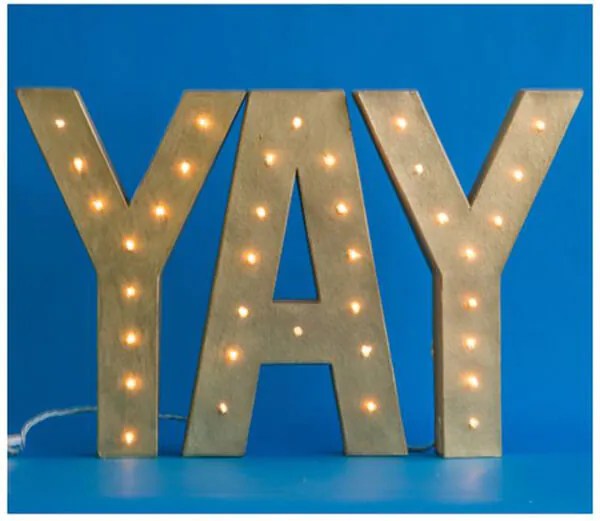
If you have an unnecessary working electric garland lying around at your house, then you can find a new use for it. Make hollow large letters, then make small holes and place a garland light bulb in each of them.
Volumetric letters made of cardboard
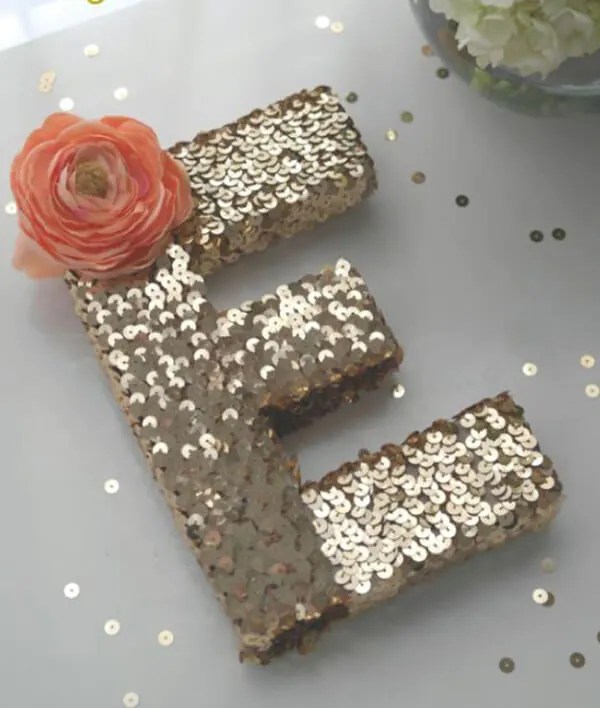
Letters decorated with threads of sequins look very impressive and beautiful. The principle of decorating is the same as in the case of knitting threads. Lubricate the surface with glue, and then proceed to winding the letter.
Do-it-yourself volumetric letters

For lovers of everything natural - this option for decorating a three-dimensional letter will appeal to you. In this master class, the most ordinary dry branches are used, which are glued to front side letters.

Big beautiful letters for holiday decoration

For the design of large letters, you can use the most different materials, for example, it can be wine corks.

If there are large patches of beautiful fabrics in the house, then they may also be suitable.
How beautiful to write letters for the design of a poster, stand.
This article will show you how to make beautiful inscription for the design of a poster, stand, birthday or any other holiday.
Beautiful Russian letters printed in a beautiful font for decoration: letter templates, print and cut
You can organize a holiday without thematic inscriptions, but if you are preparing a stand, a poster, then photographs or pictures alone will not be enough: after all, you need to write a congratulation at least. You can’t do without text when decorating a holiday. Unusual and original letter templates will also be useful in the advertising industry, as decorations that complement the theme of the event.
You can’t do without text when decorating a holiday
- In order not to look for templates every time before the next event or event, you can find suitable stencils and cut them out on thick cardboard. Such blanks are suitable for repeated use.
- It will only be necessary to attach the stencil to the place allocated for the inscription on the poster or wall and carefully apply a thin layer of paint. You need to fill in the letters so that the paint does not leak under the stencil.
- You can have a great time with your child in preparation for the holiday. The very process of writing the text will interest the baby, a joint lesson will contribute to the development of memory, awaken creative activity. Also, thanks to the cutting of letters, the child will form the initial knowledge of the alphabet.

 How to write a beautiful lettering
 - You can cut out the letters along the contour with scissors. But it is more convenient to do this with a clerical knife.
Beautiful letters are painted directly on a concrete or asphalt surface. - Graphic elements can also be applied to a wooden surface, metal, bricks.
Knowing the technology of applying letters to the surface, you can independently make an inscription for any production facility, advertise the service sector. - Letters written according to a pre-prepared template look neat and clear, and fantasize and select various options for writing text you can endlessly.

 Knowing the technology of applying letters to the surface, you can independently make any inscription
 Options for beautiful block letters:


Beautiful Typeface Option #1


Option of beautiful block letters No. 3
 Option of beautiful block letters No. 3

Beautiful block letters option No. 4
Beautiful Russian capital letters for decoration: letter templates, print and cut
If you need to make the inscription in capital letters, then look for the appropriate option in this section.

 Beautiful Russian capital letters for decoration: option number 1
Beautiful Russian capital letters for decoration: option number 2


: letter templates, print and cut
In this section you will find a selection of beautiful Russian letters for decorating a New Year's event.

 Beautiful Russian New Year letters for decoration
Beautiful Russian New Year letters for decoration


Beautiful New Year's inscription for decoration


Beautiful Russian New Year letters for decoration


So that the inscription itself does not mention the winter frosty clear days, it is worth looking for the corresponding letter templates for decorating the holiday. To make your search easier, we have collected them in this section.


Beautiful Russian capital letters for decoration: letter templates, print and cut
- In art schools and other specialized educational institutions for years they have been taught to create inscriptions, to correctly position the texts on the poster. Therefore, all the nuances of writing letters cannot be disclosed within the framework of one article. Yes, we will not try. After all, now there are many ways to bypass the process of writing a text: letters and entire inscriptions can be printed on a printer, redrawn from a finished poster, cover onto tracing paper, and then transferred to a poster or other surface.
- If necessary, you can simply paste the text printed on a black and white or color printer. But if you have time, then you can experiment with colors, texture and apply paint in some unusual way.

 What tools do you need to write beautiful text

Beautiful Russian capital letters for decoration

 Beautiful Russian capital letters for decoration
 Beautiful Russian letters with monograms for decoration: letter templates, print and cut
- Get started by creating a sketch. You will save yourself the time spent on creating a poster or lettering for an event if you write the text in a small format, displaying the maximum amount of detail.
- During the preparation of the sketch, you should have a clear idea of \u200b\u200bwhat your inscription should end up with. It will be possible to proceed to the final execution only after preliminary sketches. The decision on the location of the text also needs to be made at the stage of creating a sketch.
- When starting to write text, you should follow a simple and simple rule: all characters must have the same width. Also, the inscription should consist of the same combination of thin and wide lines. Avoid overlapping graphic elements, characters of different heights, different lengths or widths. Between the letters, in whatever format you create them, the same distance must be maintained.
- If the above requirements seem too complicated for you, then write the letters without complicating them with various additional elements. Take your time, because this activity is only for the patient.
- If you are not sure that you can write a beautiful inscription on a large-format canvas, then use a stencil for work. Now there are many sites where you can find stencils for printing, made in various styles.
- But if you find it difficult to draw with a stencil, then choose the appropriate font, print the letters on the computer. Next, you will need to carefully cut out the letters and place them on the poster, gluing the bottom. such an inscription will also look good.
 Beautiful Russian letters with monograms for decoration

Beautiful Russian letters with monograms
Beautiful Russian letters are fun for decoration: letter templates, print and cut
If you are going to design a poster in a humorous way, with cheerful notes, then look at the letter templates presented in this section.


Beautiful Russian letters fabulous for decoration: letter templates, print and cut
For clearance children's holiday in a fairy-tale theme, special templates are suitable. You will only need to find the appropriate ones from this section and print.


Beautiful Russian letters children's cartoons for decoration: letter templates, print and cut
Children's event can be decorated with cartoon original letters. Where to find them? In this section!


Beautiful Russian letters are large for decoration: letter templates, print and cut
- Whatever font you choose to design a stand, poster, the letters must remain legible. Otherwise, the beauty you create will turn the text into a puzzle. When creating an inscription, of course, you can be guided by your own taste or idea of the design of the future text, but the trinkets will only complicate the text, and not make it more beautiful.

- Using computer program or ready-made templates you should not count on the special "beauty" of the inscription or its uniqueness. This is explained simply: the creators of such templates do not bother looking for information about a well-designed font.
- For example, you can follow one of the template links and see the letters in the provided font in different widths. Letters can be created in violation of all requirements. In one font there may be both rounded wide letters and elongated ones, some may have protruding ends.
If you think this font is beautiful, then use it to design a poster. However, you should not expect that the result will please everyone.


Here is an example of a readable simple font:


Beautiful Russian letters are voluminous for decoration: letter templates, print and cut


Beautiful multi-colored Russian letters for decoration: letter templates, print and cut


Beautiful Russian letters multi-colored for decoration

 Beautiful Russian letters multi-colored for decoration
 Beautiful Russian letters with flowers for decoration: letter templates, print and cut


How beautiful to write letters for the design of a poster, stand, holiday: sample letters for writing
When creating text, follow the following sequence:
What you need to create beautiful letters on a large format poster or paper sheet:
fountain pen for ink and ink
- Fountain pen nib set (tips of different thicknesses)
- wide markers (special, for a glossy surface)
- paint for these markers (specialized stores sell paint with various overflows, for example, metallic)
- in the absence of a fountain pen, felt-tip pens, colored pencils, gouache or watercolor can be used
 In the absence of a fountain pen, you can use felt-tip pens, colored pencils, gouache or watercolor
 A narrow nib can be used to write vertical dashes and lines, a wide nib can be used for the side parts of letters. With this method of writing, letters acquire volume.
- If you decide to use felt-tip pens or colored pencils, then start by outlining the outline of the letters. It's done with a simple pencil. The contour is further outlined with a felt-tip pen, and only then the letter is painted over with paints or pencils.
- So that the inscription does not look boring, you can draw shadows behind the letters. This will create the illusion of a wall behind the three-dimensional letters that cast a shadow. Letters drawn in 3D also take on extra volume. Technical part: recommendations
- determine where the inscription will be located
- without pressing hard on a simple pencil, we make a horizontal line on the sheet (there should be no traces after using the eraser): we apply alternating stripes along the font height and line spacing
- if you decide to make an oblique inscription, then immediately prepare an oblique line according to the type of school copybooks, but place the lines less often
- after drawing the auxiliary lines, we begin to write letters with a simple pencil, observing the maximum accuracy of the configuration and adhering to the width of the letters of the selected font
- errors made when writing letters are corrected immediately with an eraser
- we circle the finished inscription with a pen, felt-tip pen or marker
- do not erase draft and auxiliary lines (they can be removed only after the main inscription is completely dry)
- We print the template you like on the printer
- We put carbon paper on a sheet of paper
- We put the original text on top and circle it with a pen or pencil
- After that, we remove the carbon paper and the template, circle the contours formed again with a pen or felt-tip pen
How to apply text using carbon paper?
Do not be afraid to draw lines with a pen over a pencil. The ink will cover the contours drawn earlier with a pencil and the letters will be drawn evenly and evenly. But if you skip the stage of drawing pencil lines, then the inscription will come out sloppy.
You can choose from the letter outlines suggested in our article and use them as cheat sheets when creating your text.
Question about how to make a stencil in Microsoft program Word is of interest to many users. The problem is that finding a sane answer to it on the Internet is not so easy. If you are also interested in this topic, you have come to the right place, but first, let's figure out what a stencil is.
A stencil is a "perforated plate", at least that is the meaning of this word in an exact translation from Italian. We will briefly talk about how to make such a “plate” in the second half of this article, and directly below we will share with you how to create the basis for a traditional stencil in Word.
If you are ready to seriously get confused by connecting your imagination in parallel, you can use any font provided in the standard set of the program to create a stencil. The main thing, when it is printed on paper, is to make jumpers - places that will not be cut out in letters bounded by an outline.

Actually, if you are ready to sweat over the stencil so much, it is not clear why you need our instructions, since you have all the MS Word fonts at your disposal. Choose the one you like, write a word or type the alphabet and print on the printer, and then cut them out along the contour, not forgetting the jumpers.

If you are not ready to spend so much effort, time and energy and a classic-looking stencil suits you, our task is to find, download and install that same classic stencil font. We are ready to save you from an exhausting search - we found everything on our own.
![]()
The Trafaret Kit Transparent font completely imitates the good old Soviet TSh-1 stencils with one nice bonus- in addition to the Russian language, it also contains English, as well as a number of other characters that are not in the original. You can download it from the author's website.
Installing the font
In order for the font you downloaded to appear in Word, you must first install it on the system. Actually, after that it will automatically appear in the program. You can learn how to do this from our article.

Creating the base for the stencil
Select Trafaret Kit Transparent from the list of fonts available in Word and create the desired inscription in it. If you need an alphabetic stencil, write the alphabet on the document page. Other characters can be added as needed.

The standard portrait orientation of a sheet in Word is not the best solution for creating a stencil. On the landscape page, it will look more familiar. Our instruction will help you change the position of the page.

Now the text needs to be formatted. Set the right size, choose the right position on the page, set sufficient indents and spacing, both between letters and between words. Our guide will help you do it all.

Perhaps the standard A4 sheet size will not be enough for you. If you want to change it to a larger one (A3, for example), our article will help you do this.

Note: When changing the sheet format, do not forget to change the font size and related parameters proportionally. Equally important in this case are the capabilities of the printer on which the stencil will be printed - support for the selected paper size is required.
Screen printing
Having written the alphabet or inscription, having formatted this text, you can safely proceed to printing the document. If you still don't know how to do this, be sure to check out our instructions.

Create a stencil
As you understand, there is practically no sense from a stencil printed on a regular piece of paper. More than once they are unlikely to be used. That is why the printed page with the stencil base needs to be “strengthened”. For this you will need the following:
- Cardboard or plastic film;
- Carbon paper;
- Scissors;
- Shoe or clerical knife;
- Pen or pencil;
- Board;
- Laminator (optional).
The printed text must be transferred to cardboard or plastic. In the case of transferring to cardboard, ordinary carbon paper (carbon paper) will help to do this. You just need to lay the stencil page on cardboard, placing a carbon paper between them, and then trace the outline of the letters with a pencil or pen. If there is no carbon paper, you can push through the outlines of the letters with a pen. The same can be done with transparent plastic.
And yet, it is more convenient with transparent plastic, and it would simply be more correct to do it a little differently. Place a sheet of plastic on top of the stencil page and trace the outlines of the letters with a pen.
After the stencil base created in Word is transferred to cardboard or plastic, all that remains is to cut out the empty spaces with scissors or a knife. The main thing is to do it strictly along the line. It is not difficult to drive the knife along the border of the letter, but the scissors must first be “driven” into the place that will be cut out, but not into the edge itself. Better to cut plastic sharp knife, after placing it on a solid board.
If you have a laminator handy, the printed sheet of paper with the stencil base can be laminated. Having done this, cut out the letters along the contour with a clerical knife or scissors.
When creating a stencil in Word, especially if it is an alphabet, try to make the distance between letters (on all sides) no less than their width and height. If this is not critical for the presentation of the text, the distance can be made a little larger.
If to create a stencil you did not use the Trafaret Kit Transparent font offered by us, but any other (non-stencil) font presented in the standard Word set, we recall once again, do not forget about the jumpers in the letters. For letters whose contour is limited by the internal space (an obvious example is the letters “O” and “B”, the number “8”), there must be at least two such jumpers.
That's all, in fact, now you know not only how to make a basis for a stencil in Word, but also how to make a full-fledged, dense stencil with your own hands.
Our life is full of events, many of which are real holidays. And on such days you want something special, this also applies to the design of the celebration itself. And some designs are directly related to writing beautiful texts that attract the eye. In this regard, today we want to show you how you can make holiday inscriptions in an original way using beautiful letters in in Russian, and also how you can arrange the inscription so that it stands out. This and more is below in the article.
The main thing in the article
Beautiful Russian letters for poster design: templates with photos for cutting and printing
Posters reflect the essence of the event, most of them depict some symbolic things, names, inscriptions. If the poster is made in a bright style, then it will definitely attract the eye and interest. It is important not only to create a poster with colorful pictures and high-quality images, but also to make inscriptions for a specific style. Here are some examples that you can save, print and cut.


Beautiful capital letters of the Russian alphabet for cutting: templates
Capital letters can set the tone for the beginning of a sentence. They must be big and beautiful. With the help of such techniques, the attention of a person is attracted, since the beginning of the text immediately intrigues.


If you want to use for your text lowercase capital letters, you can find the file for downloading them in one archive below.
Beautiful printed letters of the Russian alphabet for decoration: templates
You can print comic posters or those written in an informative style in block letters.
- All printed letters you can do it yourself using large sheets of paper and a pencil.
- If it doesn’t work the first time, you can always correct and erase the excess.
- You can also use stencils that are enough to circle, decorate, and your inscriptions will be ready.
- If you are good at redrawing, you can use our examples below.


Capital letters of the Russian alphabet in a beautiful font: templates for cutting and printing
Capital letters are more gentle and airy. It's easy to write a love letter in cursive, beautiful congratulations or a note for a loved one.


Beautiful Russian letters for nicknames: samples
Most people have a nickname, that is, a pseudonym under which it is recorded in in social networks or other structures. A nickname often reflects what its carrier is like. And the handwriting will give your nickname a character, make it voluminous, characteristic just for you.


Beautiful Russian letters for a tattoo: photo
AT recent times Tattoos are gaining wild popularity, especially text ones. A tattoo is a reflection of a person’s soul, expresses something that cannot be expressed in words, which, in general, is not necessary. Some people write the name of the one they love, others prescribe their values, priorities. And the more beautifully written, the more it attracts attention. For tattoo the best way capital letters are suitable - light, airy letters with “squiggles”.


Beautiful Russian Graffiti Letters: Stencils
Graffiti is another direction of painting, which is typical for the design of streets and buildings. Inscriptions of this kind existed long before the appearance of those that are present on the local streets. Street painting often reflects the artist's view of a particular position. There are a lot of fonts for this style, as each avant-garde artist sees the situation in his own way, and uses his own unique handwriting.


Beautiful letters of the Russian alphabet with curlicues: samples
Letters with all sorts of curls look interesting and unusual, they can be used in writing magical and fabulous texts. Or in any other to which you want to apply them.


Beautiful letters of the Russian alphabet with monograms: pictures
Who doesn't love a monogram? There are probably very few of them. Monograms are used everywhere: in the interior, in decor, in murals, in design, and even in text design.


Beautiful curly letters of the Russian alphabet: pictures
Curly letters, as well as others, can make interesting texts. They come in different types and sizes. And the design of the illustrations will help set the tone for your idea.

Beautiful carved letters of the Russian alphabet: pictures
Carved letters will look best in the "composition" of fabulous, magical texts, especially if you execute them on thick paper and rather large.


Beautiful letters of the Russian alphabet in a4 format: print and cut
Here you can see the letters in large format, as well as download and print.


New Year's letters of the Russian alphabet
New Year - why not create a winter-themed poster? The following letters are suitable for registration.

Calligraphic letters of the Russian alphabet: photo
Some people cannot boast of calligraphic handwriting, so a stencil or printed version of the text comes to their aid. The following are variants of the calligraphic type alphabet.


Beautiful letters of the Russian alphabet for children: pictures


Video: Volumetric beautiful letters of the Russian alphabet
The Russian alphabet is large and rich, it has 33 letters, each of which is beautiful in its own way. Therefore, before using foreign words, pay attention to what beautiful Russian letters. With their help, you can design thousands of posters, and none of those that are written foreign language does not compare with them.